Last updated: July 31, 2026

Quick Answer: Sandwich panel ceiling installation involves mounting lightweight composite panels to a suspended grid system or directly to structural supports. The process typically takes 1-3 days for an average room and costs $8-15 per square foot including materials and labor. Professional installation ensures proper fire ratings, acoustic performance, and structural integrity.
Key Takeaways
- Sandwich panel ceilings combine insulation cores with metal facings for superior thermal and acoustic performance
- Installation requires basic tools but benefits from professional expertise for fire safety compliance
- Total project costs range from $8-15 per square foot depending on panel type and installation complexity
- DIY installation is possible for simple layouts but professional installation ensures warranty coverage
- Proper planning and measurement prevent 90% of common installation problems
- Fire-rated panels require certified installation for commercial applications
- Maintenance involves simple cleaning with no special requirements
- Installation typically completes in 1-3 days for residential applications
What Are Sandwich Panel Ceilings and How Do They Work
Sandwich panel ceilings consist of two metal sheets bonded to an insulating core material, creating a lightweight yet strong ceiling system. The core materials include polyurethane (PU), expanded polystyrene (EPS), or mineral wool, each offering different thermal, acoustic, and fire resistance properties.
These panels work by combining structural strength with insulation in a single component. The metal facings provide durability and finish quality while the core delivers thermal performance and sound dampening. The panels connect through interlocking edges or mechanical fasteners to create a continuous ceiling surface.
Key components include:
- Outer metal facings (typically steel or aluminum)
- Insulating core material (PU, EPS, or mineral wool)
- Interlocking edge profiles for seamless connections
- Mounting hardware and suspension systems
Choose sandwich panels over traditional ceiling systems when you need superior insulation, faster installation, or integrated acoustic performance. Avoid them in applications requiring frequent ceiling access or where budget constraints favor basic drywall systems.
Step-by-Step Sandwich Panel Ceiling Installation Guide
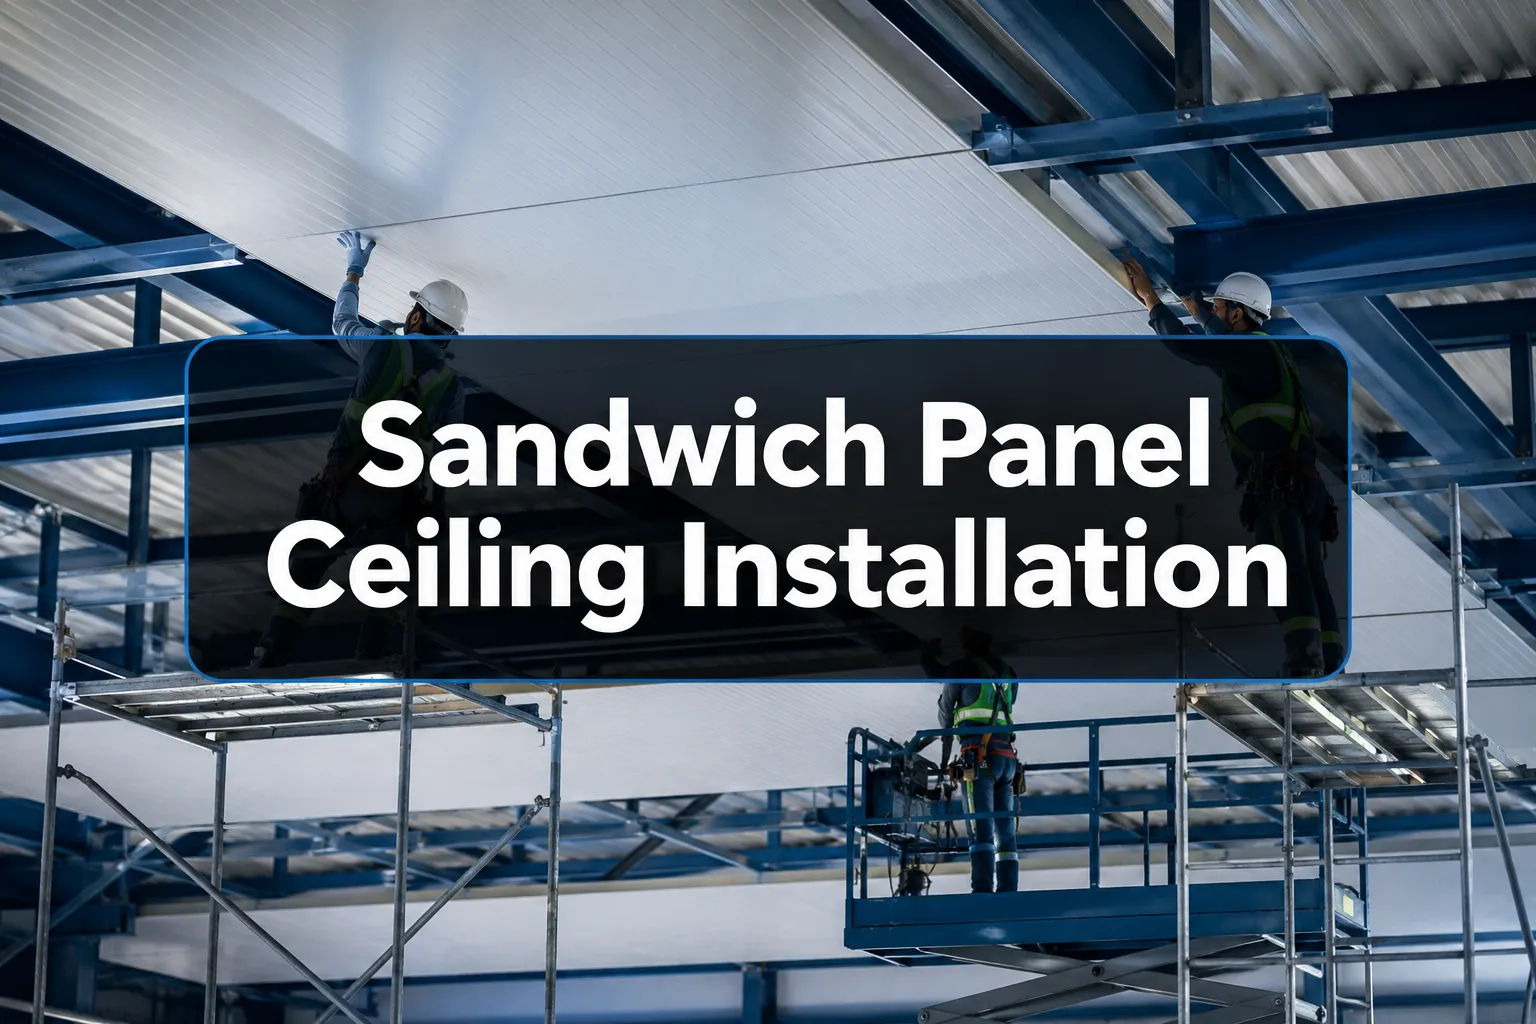
Professional sandwich panel ceiling installation follows a systematic approach to ensure structural integrity and performance. The process begins with accurate measurement and planning, followed by support system installation and panel mounting.
Pre-installation preparation:
- Measure ceiling area and calculate panel quantities with 10% waste allowance
- Identify structural support points and mark layout lines
- Install electrical and mechanical systems before panel installation
- Verify building codes and fire rating requirements
Installation sequence:
- Install suspension system – Mount perimeter angles and main support channels at specified spacing
- Check level and alignment – Use laser level to ensure consistent height across entire ceiling
- Begin panel installation – Start from one corner and work systematically across the space
- Connect interlocking edges – Ensure tight seals between adjacent panels
- Secure to supports – Fasten panels according to manufacturer specifications
- Install trim and accessories – Add perimeter trim, light fixtures, and ventilation components
Common mistake to avoid: Starting installation without verifying the suspension system is perfectly level. Even small variations create visible gaps and alignment issues that are difficult to correct later.
For detailed roof installation techniques, refer to our complete sandwich panel roof installation guide.
Sandwich Panel Ceiling Installation Cost Analysis
Sandwich panel ceiling installation costs range from $8-15 per square foot including materials and labor in 2026. Material costs account for 60-70% of total project expenses, with labor representing the remainder.
Cost breakdown by component:
- Basic EPS panels: $4-6 per square foot
- PU foam panels: $6-9 per square foot
- Fire-rated mineral wool panels: $8-12 per square foot
- Installation labor: $3-5 per square foot
- Suspension hardware: $1-2 per square foot
Factors affecting total cost:
- Panel thickness and core material selection
- Ceiling height and accessibility challenges
- Fire rating and building code requirements
- Project size (larger projects achieve better unit pricing)
- Regional labor rates and material availability
Cost comparison example: A 500 square foot residential ceiling using standard PU panels costs approximately $4,500-6,500 installed, compared to $2,500-3,500 for basic drywall ceiling systems.
Budget an additional 15-20% for unexpected structural modifications or electrical relocations discovered during installation. For current regional pricing, check our sandwich panel installation cost guide for Bangladesh.
Sandwich Panel Ceiling vs Drop Ceiling Comparison
Sandwich panel ceilings outperform traditional drop ceilings in thermal performance, structural strength, and long-term durability. Drop ceilings excel in accessibility and initial cost for basic applications.
| Feature | Sandwich Panel | Drop Ceiling |
|---|---|---|
| Initial Cost | $8-15/sq ft | $3-8/sq ft |
| Insulation Value | Excellent (R-10 to R-20) | None (requires separate insulation) |
| Installation Time | 1-3 days | 2-4 days |
| Ceiling Access | Limited (requires removal) | Excellent (lift tiles) |
| Durability | 25+ years | 10-15 years |
Choose sandwich panels if: You prioritize energy efficiency, structural strength, or minimal maintenance requirements. They work best in residential applications, clean rooms, or spaces requiring integrated insulation.
Choose drop ceilings if: You need frequent access to utilities above the ceiling or have strict budget constraints. They suit commercial offices, retail spaces, or buildings with extensive mechanical systems.
DIY Sandwich Panel Ceiling Installation Feasibility
DIY sandwich panel ceiling installation is achievable for homeowners with moderate construction experience and proper tools. Success depends on accurate planning, appropriate panel selection, and realistic assessment of project complexity.
DIY-friendly scenarios:
- Simple rectangular rooms without complex angles
- Standard ceiling heights (8-10 feet)
- Residential applications without strict fire codes
- Access to proper lifting equipment or helpers
Required skill level: Intermediate DIY experience including ability to read construction drawings, use power tools safely, and work at height on ladders or scaffolding.
Essential tools for DIY installation:
- Laser level or water level for accurate layout
- Circular saw with metal cutting blade
- Drill/driver with various bits and fasteners
- Measuring tape, chalk line, and marking tools
- Safety equipment including eye protection and gloves
When to hire professionals: Complex layouts with multiple angles, commercial applications requiring fire certifications, or projects involving structural modifications. Professional installation also maintains manufacturer warranties and ensures code compliance.
Common DIY mistake: Underestimating the physical demands of handling large panels overhead. Plan for adequate help and take frequent breaks to maintain safety and installation quality.
For professional installation services, explore our sandwich panel installation service options.
Common Installation Problems and Solutions
Sandwich panel ceiling installation problems typically stem from inadequate planning, measurement errors, or improper support system installation. Most issues are preventable through careful preparation and systematic installation procedures.
Top installation challenges:
1. Uneven panel alignment
- Cause: Suspension system not level or improperly spaced supports
- Solution: Use laser level during support installation and verify measurements at multiple points
- Prevention: Double-check all measurements before cutting or mounting panels
2. Visible gaps between panels
- Cause: Panels cut incorrectly or interlocking edges damaged during handling
- Solution: Use appropriate sealants for small gaps or replace damaged panels
- Prevention: Handle panels carefully and cut with sharp, appropriate blades
3. Sagging or deflection
- Cause: Insufficient support spacing or overloading panels beyond specifications
- Solution: Add additional support points or reduce panel span distances
- Prevention: Follow manufacturer's support spacing requirements exactly
4. Difficulty with final panels
- Cause: Accumulated measurement errors or walls not square
- Solution: Measure and cut each panel individually rather than batch cutting
- Prevention: Start installation from the most visible corner and work toward less visible areas
Edge case consideration: In buildings with significant structural movement, install expansion joints every 50-75 feet to prevent panel damage from thermal expansion or settling.
Installation Timeline and Project Duration
Sandwich panel ceiling installation typically requires 1-3 days for residential projects and 3-7 days for commercial applications. Timeline depends on ceiling area, complexity, and crew size.
Typical project phases:
- Day 1: Site preparation, measurement verification, and support system installation
- Day 2: Panel installation for straightforward layouts
- Day 3: Trim work, fixture installation, and final cleanup
Factors extending timeline:
- Complex architectural features requiring custom cutting
- Integration with existing mechanical or electrical systems
- Multiple room installations requiring coordination
- Weather delays for exterior access requirements
Crew size impact: Professional two-person crews complete 300-500 square feet per day under normal conditions. Single-person installation reduces daily output by 60-70% due to handling limitations.
Scheduling considerations: Plan installation after all electrical and mechanical rough-in work completes but before final flooring installation. This sequence prevents damage to finished surfaces while ensuring proper coordination with other trades.
Rush job feasibility: Expedited installation is possible with larger crews but may increase costs by 25-40% due to overtime labor and coordination challenges.
Best Sandwich Panel Ceiling Brands and Options
Leading sandwich panel ceiling manufacturers offer different core materials, thicknesses, and performance characteristics suited to various applications. Brand selection should prioritize local availability, warranty coverage, and specific performance requirements.
Top performance categories:
Fire-rated applications:
- Mineral wool core panels meeting Class A fire ratings
- Steel facings with factory-applied fire-resistant coatings
- Certified systems for commercial and institutional use
Thermal performance priorities:
- PU foam cores providing R-values from R-10 to R-20
- Continuous insulation eliminating thermal bridging
- Vapor barrier facings for moisture control
Acoustic applications:
- Perforated metal facings with sound-absorbing cores
- NRC ratings from 0.65 to 0.95 depending on configuration
- Specialized designs for recording studios or conference rooms
Budget-conscious options:
- EPS core panels offering good performance at lower cost
- Standard thickness options (2-4 inches) for most applications
- Local manufacturers reducing transportation costs
Selection criteria checklist:
- Fire rating requirements for your application
- Required R-value for thermal performance
- Acoustic performance needs (NRC rating)
- Local building code compliance
- Manufacturer warranty terms and local support
For comprehensive brand comparisons, review our sandwich panel buying guide.
Essential Tools and Equipment for Installation
Successful sandwich panel ceiling installation requires specific tools for measuring, cutting, lifting, and fastening panels. Tool quality directly impacts installation speed and final results.
Measurement and layout tools:
- Laser level (self-leveling rotary preferred)
- 25-foot measuring tape with clear markings
- Chalk line for marking installation lines
- Square and angle finder for corner verification
Cutting equipment:
- Circular saw with fine-tooth metal cutting blade
- Jigsaw for curved cuts and fixture openings
- Utility knife for scoring and trimming
- File or sandpaper for edge finishing
Installation hardware:
- Drill/driver with variable speed control
- Impact driver for heavy-duty fastening
- Socket set for structural connections
- Magnetic bit holder and various driver bits
Safety and handling equipment:
- Safety glasses and hearing protection
- Work gloves with good grip
- Sturdy ladder or scaffolding system
- Panel lifting devices or suction cups for large panels
Specialized accessories:
- Panel edge sealant or gaskets
- Trim pieces and corner moldings
- Appropriate fasteners for your support system
- Touch-up paint for cut edges
Tool rental considerations: Laser levels and scaffolding systems are often more cost-effective to rent for single projects. Purchase basic hand tools and cutting equipment for multiple projects or ongoing maintenance needs.
Maintenance and Cleaning Requirements
Sandwich panel ceilings require minimal maintenance compared to traditional ceiling systems. Regular cleaning and periodic inspections maintain appearance and performance over the panel's 25+ year lifespan.
Routine maintenance schedule:
- Monthly: Visual inspection for damage or loose connections
- Quarterly: Gentle cleaning with appropriate methods
- Annually: Detailed inspection of fasteners and seals
- As needed: Touch-up of scratches or minor damage
Cleaning procedures:
- Dust removal: Use soft brush or vacuum with brush attachment
- General cleaning: Mild soap solution applied with soft cloth
- Stubborn stains: Non-abrasive cleaners appropriate for metal surfaces
- Drying: Allow complete air drying before replacing any removed panels
Cleaning products to avoid:
- Abrasive cleaners that scratch metal surfaces
- Strong solvents that may damage panel cores
- High-pressure washing that forces water into joints
- Bleach-based products that may cause discoloration
Inspection checklist:
- Panel alignment and absence of sagging
- Integrity of interlocking joints and seals
- Condition of fasteners and support connections
- Signs of moisture infiltration or condensation
Repair considerations: Minor scratches can be touched up with matching paint. Significant damage typically requires panel replacement rather than repair. Keep spare panels from original installation for future repairs to ensure color and texture matching.
For acoustic panel maintenance, see our acoustic panel installation guide.
Fire Rating and Safety Considerations
Fire-rated sandwich panel ceilings must meet specific building code requirements for flame spread, smoke development, and structural integrity during fire conditions. Proper selection and installation ensure occupant safety and code compliance.
Fire rating classifications:
- Class A: Flame spread 0-25, smoke developed 0-450 (most restrictive)
- Class B: Flame spread 26-75, smoke developed 0-450 (moderate requirements)
- Class C: Flame spread 76-200, smoke developed 0-450 (basic requirements)
Core material fire performance:
- Mineral wool: Excellent fire resistance, non-combustible core material
- Polyurethane: Good fire performance with flame retardant additives
- EPS: Basic fire performance, requires careful specification for commercial use
Installation requirements for fire-rated systems:
- Use only approved fasteners and connection methods
- Maintain specified spacing and support requirements
- Install fire-stopping materials at penetrations and joints
- Document installation with photos for inspection records
Building code compliance:
- Commercial buildings typically require Class A ratings
- Residential applications may allow Class B or C ratings
- Specific requirements vary by occupancy type and building height
- Consult local building officials for jurisdiction-specific requirements
Safety during installation:
- Ensure adequate ventilation when cutting panels
- Use appropriate respiratory protection for dust control
- Follow manufacturer's safety data sheets for all materials
- Maintain clear egress paths during construction
For fire-rated panel options, explore our fire rated sandwich panel guide.
Who Should Use Sandwich Panel Ceilings
Sandwich panel ceilings work best for applications requiring integrated insulation, structural strength, and low maintenance. They suit both residential and commercial projects where performance justifies the higher initial cost.
Ideal applications:
- Energy-efficient homes: Homeowners prioritizing thermal performance and utility cost reduction
- Commercial buildings: Offices, retail spaces, and warehouses needing fast installation
- Industrial facilities: Manufacturing plants requiring easy cleaning and durability
- Specialized environments: Clean rooms, food processing, and healthcare facilities
Property types that benefit most:
- New construction where integrated systems reduce overall project costs
- Renovation projects replacing damaged or inadequate ceiling systems
- Buildings in extreme climates requiring superior insulation performance
- Facilities with high maintenance costs seeking long-term solutions
User profiles:
- Contractors: Appreciate faster installation and reduced labor costs
- Building owners: Value long-term durability and energy savings
- Architects: Specify for projects requiring integrated performance solutions
- Facility managers: Choose for reduced maintenance requirements
Applications to avoid:
- Buildings requiring frequent ceiling access for maintenance
- Projects with extremely tight budgets where basic solutions suffice
- Historic renovations where modern materials are inappropriate
- Temporary or short-term installations
Decision factors checklist:
- Budget allows for 2-3x cost premium over basic ceiling systems
- Energy efficiency and thermal performance are priorities
- Long-term ownership justifies higher initial investment
- Building codes allow or require integrated insulation systems
Soundproofing Benefits and Acoustic Performance
Sandwich panel ceilings provide excellent acoustic performance through sound absorption and transmission reduction. The combination of dense core materials and metal facings creates effective barriers against both airborne and impact noise.
Acoustic performance metrics:
- NRC (Noise Reduction Coefficient): 0.65-0.95 depending on core material and facing perforation
- STC (Sound Transmission Class): 35-55 for typical residential and commercial applications
- Impact resistance: Superior performance compared to traditional ceiling tiles
Core material acoustic properties:
- Mineral wool: Excellent sound absorption, ideal for noisy environments
- Polyurethane foam: Good acoustic dampening with thermal benefits
- EPS: Basic sound reduction, suitable for moderate noise control needs
Design options for enhanced acoustics:
- Perforated metal facings increase sound absorption
- Increased panel thickness improves low-frequency performance
- Specialized acoustic cores optimize speech intelligibility
- Integrated systems combine ceiling and wall treatments
Applications benefiting from acoustic performance:
- Home theaters and entertainment rooms
- Conference rooms and meeting spaces
- Recording studios and music practice rooms
- Open office environments requiring noise control
Acoustic installation considerations:
- Seal all joints and penetrations to prevent sound leaks
- Use acoustic sealants at perimeter connections
- Consider floating installation systems for maximum isolation
- Plan for acoustic testing if performance verification is required
For comprehensive soundproofing solutions, review our sandwich panel soundproofing guide.
FAQ
How long does sandwich panel ceiling installation take?
Installation typically takes 1-3 days for residential projects up to 500 square feet. Commercial installations require 3-7 days depending on complexity and crew size.
Can I install sandwich panel ceilings myself?
Yes, DIY installation is possible for homeowners with moderate construction experience. Simple rectangular layouts are most suitable for DIY projects, while complex designs benefit from professional installation.
What tools do I need for installation?
Essential tools include a laser level, circular saw with metal cutting blade, drill/driver, measuring tape, and safety equipment. Panel lifting devices help with larger installations.
How much do sandwich panel ceilings cost?
Total installed costs range from $8-15 per square foot including materials and labor. EPS panels cost less while fire-rated mineral wool panels cost more.
Do sandwich panel ceilings require special maintenance?
Minimal maintenance is required – quarterly cleaning with mild soap solution and annual inspection of fasteners and seals. No special treatments or frequent repairs are needed.
Are sandwich panel ceilings fire safe?
Fire-rated sandwich panels meet building code requirements when properly specified and installed. Mineral wool cores provide the best fire performance for commercial applications.
How do sandwich panels compare to drop ceilings?
Sandwich panels offer superior insulation and durability but cost more initially. Drop ceilings provide better access to utilities but require separate insulation systems.
What thickness sandwich panel should I choose?
Panel thickness depends on insulation requirements and structural spans. Residential applications typically use 2-4 inch panels while commercial projects may require 4-6 inch panels.
Can sandwich panels be cut to fit around obstacles?
Yes, panels can be cut with standard tools to accommodate light fixtures, vents, and other ceiling penetrations. Use appropriate cutting techniques to maintain clean edges.
Do sandwich panel ceilings improve energy efficiency?
Yes, integrated insulation reduces heat transfer and energy costs. R-values range from R-10 to R-20 depending on core material and thickness.
How do I choose between different core materials?
Select based on priorities: mineral wool for fire resistance, PU foam for thermal performance, or EPS for budget-conscious applications. Consider building codes and performance requirements.
What warranty coverage do sandwich panels include?
Manufacturer warranties typically cover 10-25 years for materials and workmanship. Professional installation maintains warranty coverage while DIY installation may void certain protections.
Conclusion
Sandwich panel ceiling installation offers an efficient solution for projects requiring integrated insulation, structural strength, and low maintenance. The process involves systematic planning, proper tool selection, and careful attention to manufacturer specifications to achieve optimal results.
Success depends on accurate measurement, level support systems, and appropriate panel selection for your specific application. While DIY installation is possible for simple layouts, professional installation ensures code compliance and warranty coverage for complex projects.
Next steps for your project:
- Calculate your ceiling area and determine panel requirements
- Research local building codes and fire rating requirements
- Compare costs between DIY and professional installation
- Select appropriate core materials based on thermal and acoustic needs
- Gather necessary tools and safety equipment before starting
- Consider professional consultation for complex layouts or commercial applications
For expert guidance on your specific project, consult with experienced installers who can ensure proper specification and installation techniques for long-lasting performance.
SEO Meta Title: Sandwich Panel Ceiling Installation Guide 2026: Complete DIY & Pro Tips