Last updated: July 31, 2026

Quick Answer
Cold storage sandwich panel installation involves mounting insulated composite panels with metal facings and foam cores to create temperature-controlled environments. Professional installation typically takes 2-5 days for standard facilities and requires specialized tools, proper sealing techniques, and adherence to thermal bridge prevention methods to maintain consistent internal temperatures.
Key Takeaways
- Cold storage sandwich panels consist of two metal sheets with insulated foam core, providing superior thermal performance
- Professional installation costs range from $15-35 per square meter depending on panel type and project complexity
- Proper vapor barrier installation and thermal bridge elimination are critical for preventing condensation issues
- PU (polyurethane) panels offer the best insulation performance for most cold storage applications
- Installation requires specialized tools including panel lifters, sealing guns, and thermal imaging equipment
- Common installation mistakes include inadequate sealing, improper joint connections, and insufficient vapor barriers
- DIY installation is possible for small projects but professional installation recommended for commercial facilities
- Installation time varies from 1-2 days for small rooms to several weeks for large commercial facilities
What Are Cold Storage Sandwich Panels and How Do They Work
Cold storage sandwich panels are composite building materials consisting of two metal facings bonded to an insulated foam core. These panels create airtight, thermally efficient enclosures that maintain consistent internal temperatures for food storage, pharmaceuticals, and other temperature-sensitive applications.
The panels work through three key mechanisms: the metal facings provide structural strength and vapor barriers, the foam core delivers thermal insulation, and the composite construction eliminates thermal bridging that occurs with traditional framed walls. Polyurethane (PU) foam cores offer R-values of 6-8 per inch, significantly outperforming traditional insulation methods.
Panel thicknesses typically range from 50mm to 200mm, with thicker panels providing better insulation for lower temperature applications. The metal facings, usually galvanized steel or aluminum, protect the foam core from physical damage and provide mounting surfaces for fixtures and equipment.
For detailed information about different panel types available, see our complete guide to cold storage panel types.
Cold Storage Sandwich Panel Installation Steps Guide
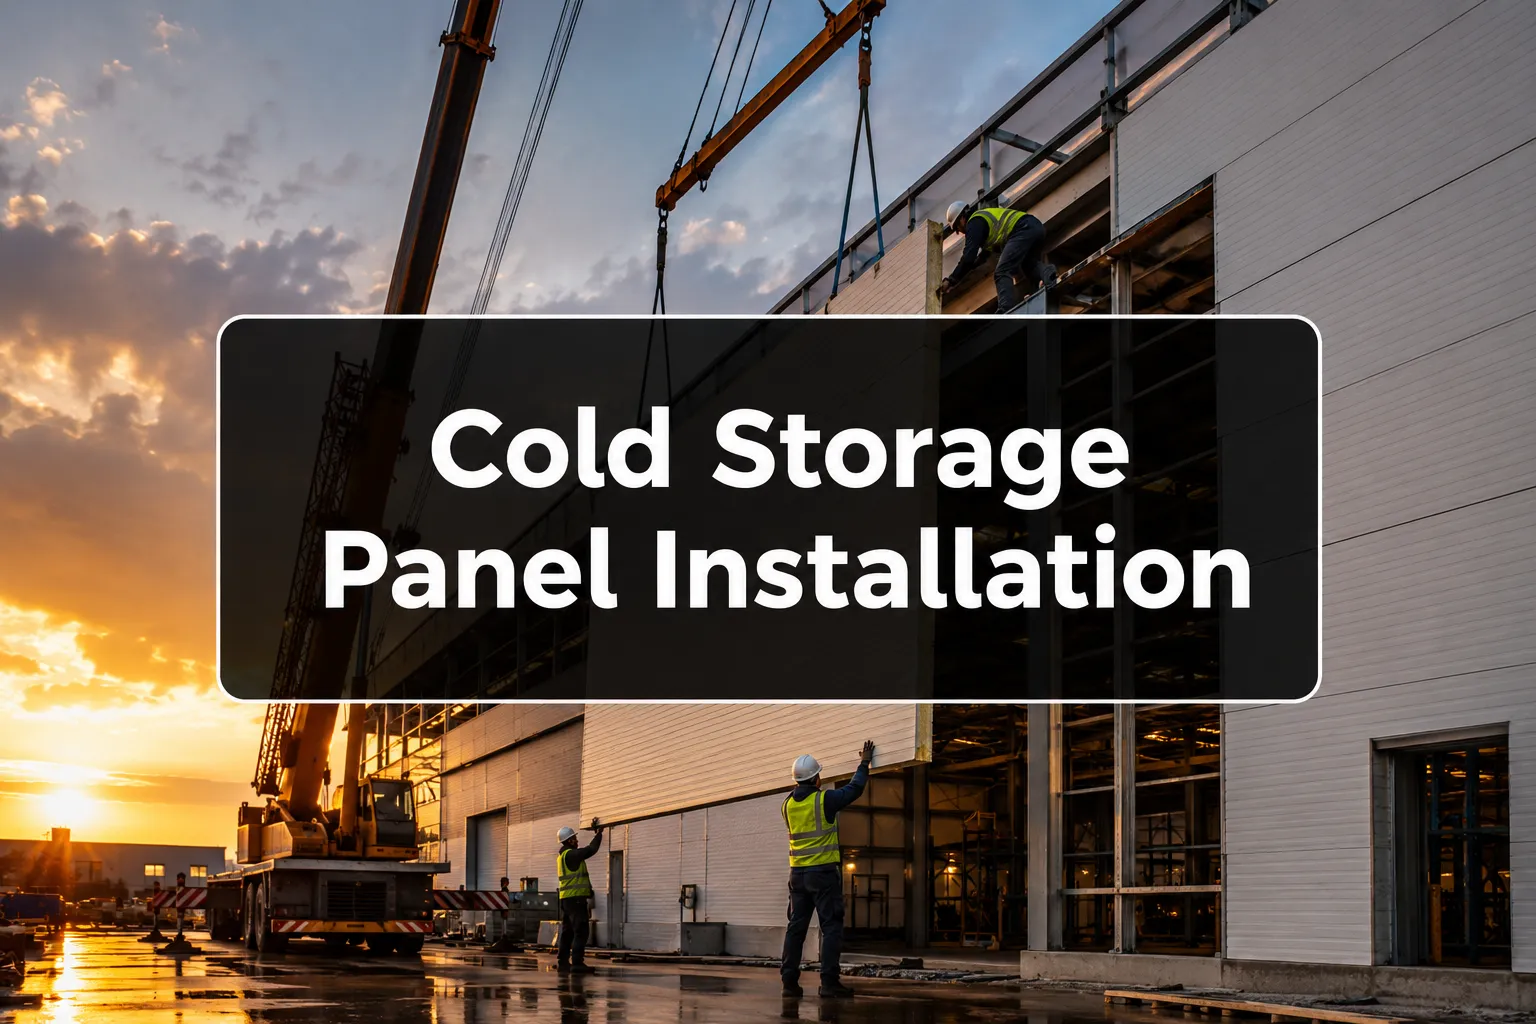
Professional cold storage sandwich panel installation follows a systematic process that ensures proper thermal performance and structural integrity. The installation typically takes 2-5 days for standard commercial facilities, depending on size and complexity.
Pre-Installation Preparation:
- Verify foundation level and square within 6mm tolerance
- Install perimeter vapor barrier extending 150mm beyond panel edges
- Mark panel layout positions using chalk lines and laser levels
- Stage panels in order of installation to minimize handling
Panel Installation Sequence:
- Install corner panels first using temporary bracing and check for plumb within 3mm
- Apply structural sealant to panel edges using continuous beads without gaps
- Position panels using mechanical lifters to prevent foam core damage
- Secure with self-drilling screws at 300mm centers through both metal facings
- Install interlocking joints ensuring full engagement of male/female connections
- Apply weatherproof sealant to all exterior joints within 2 hours of panel installation
Quality Control Checkpoints:
- Thermal imaging scan to identify thermal bridges or gaps
- Pressure testing to verify airtight seal integrity
- Joint inspection for proper sealant coverage and adhesion
The most critical aspect is maintaining continuous thermal barriers – any gap or thermal bridge can cause condensation issues and energy loss. Professional installers use specialized tools like panel lifters and thermal imaging cameras to ensure proper installation.
Cold Storage Sandwich Panel Installation Cost Analysis
Cold storage sandwich panel installation costs vary significantly based on panel specifications, project size, and installation complexity. Professional installation typically ranges from $15-35 per square meter including materials and labor.
Cost Breakdown by Panel Type:
- EPS panels: $12-20 per square meter (basic cold storage applications)
- PU panels: $18-28 per square meter (premium performance, most common)
- PIR panels: $25-35 per square meter (fire-rated applications)
Additional Cost Factors:
- Site preparation: $2-5 per square meter for foundation work and vapor barriers
- Specialized doors and windows: $500-2000 per opening depending on thermal requirements
- Electrical and refrigeration integration: $5-15 per square meter
- Project size premium: Projects under 100 square meters typically cost 20-30% more per unit
Labor vs Material Split:
Installation labor typically represents 40-60% of total project cost, with material costs making up the remainder. Remote locations or complex architectural requirements can increase labor costs by 25-50%.
For detailed pricing information specific to your region, consult our comprehensive guide to sandwich panel installation costs.
Best Practices for Cold Storage Sandwich Panel Installation
Successful cold storage sandwich panel installation requires strict adherence to thermal performance standards and moisture control protocols. These best practices prevent common issues like condensation, thermal bridging, and premature system failure.
Thermal Bridge Prevention:
- Use thermal break strips at all structural connections
- Avoid penetrating both metal facings with single fasteners
- Install continuous insulation at panel joints and connections
- Seal all penetrations with expanding foam or specialized gaskets
Moisture Control Strategies:
- Install vapor barriers on warm side of insulation system
- Maintain positive air pressure inside cold storage areas
- Use desiccant systems during installation to control humidity
- Apply vapor-permeable sealants on cold side, vapor-impermeable on warm side
Quality Assurance Protocols:
- Conduct thermal imaging inspections before final acceptance
- Pressure test completed sections to verify airtightness
- Document all penetrations and sealing methods for future maintenance
- Perform temperature gradient testing across panel thickness
Common Installation Errors to Avoid:
- Installing panels in wet conditions (causes adhesion failure)
- Over-tightening fasteners (compresses foam core and reduces R-value)
- Inadequate edge sealing (allows moisture infiltration)
- Mixing panel types without proper transition details
Professional installers typically achieve air leakage rates below 0.1 CFM per square foot at 0.3 inches water column pressure, ensuring optimal energy efficiency and temperature stability.
Cold Storage Sandwich Panels vs Traditional Insulation Comparison
Cold storage sandwich panels significantly outperform traditional insulation methods in thermal efficiency, installation speed, and long-term reliability. The choice between systems depends on project requirements, budget constraints, and performance expectations.
| Factor | Sandwich Panels | Traditional Insulation |
|---|---|---|
| **Thermal Performance** | R-6 to R-8 per inch, no thermal bridges | R-3 to R-6 per inch, significant thermal bridging |
| **Installation Time** | 2-5 days for typical facility | 1-3 weeks for equivalent performance |
| **Initial Cost** | $18-35 per sq meter | $12-25 per sq meter |
| **Energy Efficiency** | 15-25% better than traditional | Baseline performance |
| **Moisture Control** | Integrated vapor barriers, minimal joints | Separate vapor barrier required, more failure points |
When to Choose Sandwich Panels:
- Projects requiring temperatures below 35°F (2°C)
- Fast construction schedules with minimal downtime
- Applications where energy efficiency is prioritized
- Facilities requiring easy cleaning and sanitation
When Traditional Insulation May Work:
- Budget-constrained projects with moderate temperature requirements
- Retrofit applications with complex geometries
- Projects where local labor costs heavily favor traditional methods
The 15-25% energy savings from sandwich panels typically recover the higher initial cost within 3-5 years through reduced refrigeration expenses.
Essential Tools and Equipment for Cold Storage Sandwich Panel Installation
Professional cold storage sandwich panel installation requires specialized tools and equipment to ensure proper handling, positioning, and sealing of panels. Using appropriate tools prevents damage to foam cores and ensures thermal performance standards.
Panel Handling Equipment:
- Vacuum panel lifters (500-1000kg capacity) for safe positioning without core damage
- Overhead cranes or telehandlers for panels above 8 feet in height
- Panel carts with soft wheels to transport panels without scratching metal facings
- Temporary bracing systems to hold panels during initial positioning
Installation Tools:
- Self-drilling screw guns with torque control to prevent over-tightening
- Pneumatic sealant guns for consistent bead application
- Hot knife cutting tools for field modifications without foam melting
- Laser levels and string lines for accurate panel alignment
Quality Control Equipment:
- Thermal imaging cameras to identify thermal bridges and gaps
- Pressure testing equipment for airtightness verification
- Digital calipers for measuring joint gaps and panel thickness
- Moisture meters to verify dry conditions before installation
Safety Equipment:
- Fall protection systems for elevated work
- Cut-resistant gloves for handling metal edges
- Safety glasses for protection from metal shavings
- Hard hats and steel-toed boots for construction site safety
Common Tool Mistakes:
- Using standard drills instead of self-drilling screws (causes foam compression)
- Manual lifting of large panels (risks worker injury and panel damage)
- Generic sealants instead of structural adhesives (reduces joint strength)
Professional installation crews typically invest $15,000-25,000 in specialized tools and equipment to ensure quality results and worker safety.
Cold Storage Sandwich Panel Installation Timeline and Duration
Cold storage sandwich panel installation timelines depend on project size, panel complexity, weather conditions, and crew experience. Proper planning and sequencing can significantly reduce installation duration and minimize facility downtime.
Typical Installation Durations:
- Small cold rooms (100-500 sq ft): 1-2 days with 2-person crew
- Medium facilities (500-2000 sq ft): 3-5 days with 3-4 person crew
- Large commercial facilities (2000+ sq ft): 1-3 weeks with 4-6 person crew
- Complex multi-room facilities: Add 20-30% to base timeline for coordination
Installation Phase Breakdown:
- Site preparation (Day 1): Foundation verification, vapor barrier installation, material staging
- Panel installation (Days 2-4): Sequential panel mounting, joint sealing, fastener installation
- Quality control (Final day): Thermal imaging, pressure testing, punch list completion
- System integration (Overlapping): Electrical, refrigeration, and door installation
Weather Impact Factors:
- Temperature below 40°F: Sealants require longer cure times, add 10-20% to schedule
- High humidity (>70%): Moisture control measures required, potential 1-day delay
- Rain or snow: Exterior work停止, interior work can continue with proper staging
- Wind above 25 mph: Panel handling becomes unsafe, work suspension required
Crew Productivity Factors:
- Experienced crews achieve 150-200 sq ft per person per day
- First-time installations typically see 30-40% lower productivity
- Complex geometries or multiple penetrations reduce productivity by 20-30%
- Proper tool availability increases productivity by 15-25%
Schedule Optimization Tips:
- Order panels in installation sequence to minimize double handling
- Coordinate electrical and mechanical rough-ins before panel installation
- Plan for weather delays during exterior work phases
- Maintain 10-15% schedule buffer for unexpected conditions
For professional installation services and accurate timeline estimates, see our sandwich panel installation service guide.
DIY vs Professional Cold Storage Sandwich Panel Installation
Cold storage sandwich panel installation can be completed by experienced DIY builders for small projects, but professional installation is recommended for commercial facilities due to thermal performance requirements and building code compliance.
DIY Installation Feasibility:
DIY installation works best for small cold rooms under 200 square feet with simple rectangular layouts. Success requires advanced construction skills, specialized tools, and thorough understanding of thermal bridging and vapor barrier principles.
Skills Required for DIY:
- Experience with metal construction and fastening systems
- Understanding of thermal performance and moisture control
- Ability to read technical drawings and follow manufacturer specifications
- Access to panel lifting equipment and safety systems
- Knowledge of local building codes and permit requirements
When Professional Installation is Essential:
- Commercial facilities requiring health department approval
- Projects with complex geometries or multiple rooms
- Applications requiring specific temperature certifications
- Insurance requirements mandating professional installation
- Facilities where downtime costs exceed installation savings
Cost Comparison Analysis:
- DIY costs: $12-20 per square foot (materials only, excluding tool rental)
- Professional installation: $18-35 per square foot (complete turnkey)
- Tool rental for DIY: $200-500 per day for lifting equipment
- Potential rework costs: $5-15 per square foot if thermal performance fails
Risk Factors for DIY Installation:
- Thermal bridging from improper installation voids energy savings
- Moisture infiltration can cause expensive structural damage
- Building code violations may require complete reinstallation
- Insurance claims may be denied for non-professional installation
- Worker safety risks from handling large panels without proper equipment
DIY Success Strategies:
- Start with manufacturer training or installation videos
- Rent professional-grade tools rather than improvising
- Have thermal imaging inspection performed before system startup
- Focus on small, simple projects to build experience
- Maintain detailed documentation for warranty purposes
Most successful DIY installations involve simple walk-in cooler conversions or small farm storage facilities where thermal performance requirements are less stringent than commercial applications.
Cold Storage Sandwich Panel Installation in Humid Climates
Humid climate conditions create unique challenges for cold storage sandwich panel installation, requiring enhanced moisture control strategies and modified installation techniques to prevent condensation and ensure long-term performance.
Humidity-Related Installation Challenges:
High humidity environments (above 60% RH) increase risks of condensation within panel systems, reduced sealant adhesion, and accelerated corrosion of metal components. Proper moisture management becomes critical for system longevity.
Enhanced Moisture Control Protocols:
- Install continuous vapor barriers on warm side with 6-inch minimum overlaps sealed with vapor-impermeable tape
- Use desiccant systems during installation to maintain relative humidity below 50% in work areas
- Apply primers to metal surfaces in high-salt environments to prevent corrosion
- Implement positive pressure systems immediately after panel installation to prevent humid air infiltration
Sealant Selection for Humid Climates:
- Structural silicone sealants maintain adhesion in high humidity conditions
- Polyurethane sealants provide flexibility for thermal expansion in temperature cycling
- Avoid water-based sealants that may not cure properly in humid conditions
- Use primer systems to ensure proper adhesion to metal surfaces
Installation Timing Strategies:
- Schedule installation during lower humidity periods (typically early morning hours)
- Use dehumidification equipment in enclosed areas during installation
- Complete exterior sealing within 4 hours of panel installation to minimize moisture exposure
- Monitor weather forecasts and avoid installation during high humidity events
Quality Control Adaptations:
- Extended cure times for sealants may require 24-48 hours instead of standard 12 hours
- Multiple thermal imaging inspections to identify moisture-related thermal bridges
- Pressure testing at higher standards to account for humid air infiltration risks
- Documentation of humidity levels during installation for warranty purposes
Long-term Performance Considerations:
Properly installed systems in humid climates achieve similar performance to dry climate installations, but require more rigorous moisture control during construction and enhanced maintenance protocols to prevent long-term issues.
Common Cold Storage Sandwich Panel Installation Problems and Solutions
Cold storage sandwich panel installation problems typically stem from inadequate moisture control, thermal bridging, or improper joint sealing. Understanding these issues and their solutions prevents costly rework and ensures optimal system performance.
Condensation and Moisture Issues:
Problem: Condensation forming on interior panel surfaces or within wall cavities
Root Causes: Inadequate vapor barriers, thermal bridges, or humid air infiltration
Solutions:
- Install continuous vapor barriers with properly sealed joints
- Eliminate thermal bridges using thermal break materials
- Maintain positive air pressure inside cold storage areas
- Use desiccant systems to control humidity during installation
Thermal Bridge Formation:
Problem: Hot spots visible on thermal imaging indicating heat transfer through structure
Root Causes: Metal fasteners penetrating both facings, structural connections without thermal breaks
Solutions:
- Use thermal break strips at all structural connections
- Employ specialized fasteners that don't penetrate both metal facings
- Install continuous insulation at panel joints and penetrations
- Conduct thermal imaging inspections before final acceptance
Joint Sealing Failures:
Problem: Air leakage or moisture infiltration at panel connections
Root Causes: Improper sealant selection, inadequate surface preparation, or installation in poor weather
Solutions:
- Select structural sealants appropriate for temperature range and substrate materials
- Clean and prime all surfaces before sealant application
- Apply sealants in proper weather conditions with adequate cure time
- Use backup sealing systems for critical applications
Panel Damage During Installation:
Problem: Dented facings, compressed foam cores, or damaged edge details
Root Causes: Improper handling equipment, excessive fastener torque, or impact damage
Solutions:
- Use vacuum lifters and soft-wheel carts for panel handling
- Set torque limits on fastening equipment to prevent foam compression
- Provide adequate protection during adjacent construction activities
- Inspect panels immediately upon delivery and document any shipping damage
Dimensional and Alignment Issues:
Problem: Panels not fitting properly or creating gaps at connections
Root Causes: Foundation out of square, incorrect panel ordering, or thermal expansion not accommodated
Solutions:
- Verify foundation dimensions and squareness before panel delivery
- Allow for thermal expansion in panel layout and fastening systems
- Use adjustable connection systems for field dimension variations
- Maintain proper installation tolerances per manufacturer specifications
For complex installation challenges, consult our comprehensive troubleshooting guide or contact professional installation services.
Cold Storage Sandwich Panel Installation for Small Spaces
Small space cold storage installations present unique challenges requiring modified techniques and specialized panel configurations to maximize thermal performance while accommodating space constraints and access limitations.
Small Space Design Considerations:
Cold rooms under 100 square feet require careful attention to door sizing, equipment placement, and thermal bridge minimization since the surface-area-to-volume ratio increases heat transfer per cubic foot of storage space.
Panel Selection for Compact Installations:
- Thicker panels (150-200mm) compensate for higher surface area to volume ratios
- Interlocking edge systems minimize thermal bridges in tight corner conditions
- Custom-sized panels reduce field cutting and maintain factory edge sealing
- Lightweight core materials facilitate manual handling in confined spaces
Installation Sequence Modifications:
- Install ceiling panels first to provide overhead protection during wall installation
- Use smaller panel sections that can be maneuvered through standard doorways
- Pre-assemble corner sections outside the space when possible
- Install mechanical systems before completing final wall panels
Access and Handling Solutions:
- Panel dollies with swivel wheels for maneuvering in tight spaces
- Manual lifting techniques for panels under 50 pounds
- Modular assembly systems that allow installation through standard door openings
- Removable panels for future equipment access or maintenance
Thermal Performance Optimization:
Small spaces lose heat more rapidly due to higher surface area ratios, requiring enhanced insulation strategies:
- Increase panel thickness by 25-50% compared to larger installations
- Use continuous vapor barriers with no penetrations where possible
- Install thermal breaks at all structural connections
- Minimize door opening frequency through proper sizing and placement
Cost Considerations for Small Installations:
Small projects typically cost 20-40% more per square foot due to:
- Higher material waste from cutting standard panel sizes
- Fixed mobilization costs spread over smaller areas
- Custom fabrication requirements for non-standard dimensions
- Reduced installation efficiency in confined working conditions
Common Small Space Mistakes:
- Undersizing insulation thickness to save initial costs
- Inadequate door sealing systems for the application
- Insufficient ventilation for equipment heat removal
- Poor planning for future maintenance access requirements
Small space installations benefit significantly from professional design consultation to optimize layout and thermal performance within space and budget constraints.
Temperature Rating and Performance Specifications
Cold storage sandwich panels provide specific temperature ratings and thermal performance characteristics that must match application requirements for optimal energy efficiency and food safety compliance.
Standard Temperature Classifications:
- Medium temperature (35°F to 50°F): 75-100mm thick panels with R-18 to R-24 performance
- Low temperature (0°F to 35°F): 100-150mm thick panels with R-24 to R-36 performance
- Frozen storage (-10°F to 0°F): 150-200mm thick panels with R-36 to R-48 performance
- Deep freeze (below -10°F): 200mm+ thick panels with R-48+ performance
Thermal Performance Metrics:
Panel thermal performance depends on core material, thickness, and installation quality. Polyurethane cores provide the highest R-values at 6-8 per inch, while EPS cores offer 3.5-4.5 per inch at lower cost.
Performance Verification Methods:
- Thermal imaging inspections identify thermal bridges and installation defects
- Temperature gradient testing measures actual R-value performance across panel thickness
- Energy consumption monitoring validates design performance against actual usage
- Pressure testing ensures airtightness meets design specifications
Factors Affecting Real-World Performance:
- Installation quality can reduce theoretical R-values by 15-30% if thermal bridges occur
- Panel age and condition may decrease performance over time due to foam settling or moisture infiltration
- Ambient conditions including humidity, wind, and solar loading affect actual heat transfer rates
- Usage patterns such as door opening frequency and product loading impact system efficiency
Performance Standards and Certifications:
- ASHRAE 90.1 provides minimum insulation requirements for commercial refrigeration
- FDA food code requires specific temperature maintenance capabilities
- Energy Star certification available for high-performance cold storage systems
- Local building codes may mandate specific R-values or energy performance standards
Selecting Appropriate Panel Ratings:
Choose panel thickness based on:
- Required internal temperature range and tolerance
- Local climate conditions and seasonal variations
- Energy cost considerations and payback period analysis
- Regulatory requirements for specific product types
- Future expansion or temperature change requirements
Performance Monitoring and Maintenance:
Regular thermal performance monitoring ensures continued efficiency:
- Annual thermal imaging inspections to identify developing issues
- Energy consumption tracking compared to baseline performance
- Temperature logging to verify consistent performance
- Preventive maintenance of seals, gaskets, and mechanical systems
Proper panel selection and installation typically achieve 95-98% of theoretical thermal performance, with well-maintained systems retaining performance for 15-20 years.
Frequently Asked Questions
How long do cold storage sandwich panels last?
Properly installed cold storage sandwich panels typically last 15-25 years with regular maintenance. Panel lifespan depends on installation quality, environmental conditions, and usage patterns. The metal facings may require recoating every 10-15 years in harsh environments.
Can I install cold storage panels over existing walls?
Yes, sandwich panels can be installed over existing walls if the structure can support the additional weight and proper vapor barrier systems are installed. However, thermal bridging through existing framing may reduce overall performance by 10-20%.
What happens if a panel gets damaged after installation?
Individual panels can be replaced without removing adjacent panels in most systems. Damaged panels should be replaced promptly to prevent moisture infiltration and maintain thermal performance. Replacement typically takes 2-4 hours per panel.
Do I need special permits for cold storage panel installation?
Most jurisdictions require building permits for cold storage installations, especially commercial facilities. Health department approvals may also be required for food storage applications. Check local requirements before beginning installation.
How do I maintain cold storage sandwich panels?
Regular maintenance includes annual sealant inspection, cleaning metal surfaces, checking fastener tightness, and thermal imaging every 3-5 years. Replace damaged sealants immediately and maintain proper ventilation to prevent moisture buildup.
What's the difference between PU and EPS foam cores?
PU (polyurethane) foam provides higher R-values (6-8 per inch) and better moisture resistance but costs 20-30% more than EPS. EPS foam offers adequate performance for moderate temperature applications at lower cost but requires thicker panels for equivalent performance.
Can panels be cut to fit during installation?
Panels can be field-cut using hot knives or specialized saws, but cut edges must be properly sealed to maintain thermal and moisture performance. Factory-cut panels with sealed edges provide better long-term performance.
How do I prevent condensation problems?
Prevent condensation by installing continuous vapor barriers on the warm side, eliminating thermal bridges, maintaining positive air pressure inside the cold space, and ensuring proper sealant installation at all joints and penetrations.
What tools are essential for DIY installation?
Essential tools include panel lifters or vacuum handles, self-drilling screws with torque control, structural sealant and application gun, laser level, thermal imaging camera for quality control, and proper safety equipment including fall protection.
How much does professional installation cost compared to DIY?
Professional installation typically costs $18-35 per square foot including materials, while DIY costs $12-20 per square foot for materials only. Factor in tool rental ($200-500/day), potential rework costs, and time investment when comparing options.
Are there fire safety considerations with foam core panels?
Foam core panels have specific fire ratings depending on core material. PIR foam cores offer the best fire resistance, while EPS cores require fire-rated barriers in some applications. Consult local fire codes for specific requirements.
Can I install panels in freezing weather?
Panel installation is possible in cold weather, but sealants require longer cure times and may need special cold-weather formulations. Work should stop if temperatures drop below manufacturer specifications, typically around 20°F for most sealants.
For additional technical support and professional installation services, explore our comprehensive panel installation resources.
Conclusion
Cold storage sandwich panel installation requires careful attention to thermal performance, moisture control, and proper installation techniques to achieve optimal results. Whether choosing DIY or professional installation, success depends on understanding panel specifications, using appropriate tools and materials, and following proven installation protocols.
The key factors for successful installation include selecting panels with appropriate temperature ratings for your application, implementing continuous vapor barriers and thermal bridge prevention, using proper sealing techniques and materials, and conducting thorough quality control inspections. Professional installation typically provides better long-term performance and warranty coverage, while DIY installation can work for small, simple projects with proper planning and execution.
Next Steps:
- Assess your specific requirements including temperature range, space size, and budget constraints
- Consult with manufacturers or installers to verify panel specifications and installation requirements
- Obtain necessary permits and ensure compliance with local building and health codes
- Develop a detailed installation plan including timeline, tool requirements, and quality control procedures
- Consider professional installation for commercial applications or complex projects where thermal performance is critical
For expert guidance on your cold storage project, review our complete selection of installation guides and professional services to ensure optimal results and long-term performance.
SEO Meta Title: Cold Storage Sandwich Panel Installation Guide 2026 | Complete Steps