Last updated: July 31, 2026

Quick Answer: EPS sandwich panel wall installation involves mounting lightweight insulated panels with expanded polystyrene cores between metal faces directly to structural frameworks. Professional installation typically takes 2-4 days for standard residential projects, costs $15-25 per square foot including materials, and requires specialized fasteners, sealants, and moisture barriers for optimal thermal performance.
Key Takeaways
- EPS sandwich panels combine structural strength with superior insulation in a single lightweight component
- Professional installation ensures proper sealing, moisture control, and building code compliance
- Installation costs range from $15-25 per square foot including materials and labor
- Proper joint sealing and vapor barriers are critical for preventing moisture infiltration
- DIY installation is possible for experienced builders but professional installation recommended for commercial projects
- Installation time varies from 1-2 days for small residential to 1-2 weeks for large commercial buildings
- EPS panels offer better cost-effectiveness than traditional insulation methods for most applications
- Building codes require specific fire ratings and structural certifications for EPS panel installations
What Are EPS Sandwich Panels and How Do They Work
EPS sandwich panels are composite building materials consisting of an expanded polystyrene (EPS) foam core bonded between two metal face sheets, typically made of galvanized steel or aluminum. The EPS core provides excellent thermal insulation with R-values ranging from R-3.6 to R-4.2 per inch, while the metal faces offer structural integrity and weather protection.
The panels work by creating a continuous insulation barrier that eliminates thermal bridging common in traditional framing systems. The EPS core maintains consistent temperature control while the metal faces transfer structural loads efficiently. This combination delivers superior energy performance compared to conventional wall systems.
Key advantages include:
- Lightweight construction reduces structural load requirements
- Factory-controlled quality ensures consistent performance
- Integrated insulation eliminates separate installation steps
- Vapor-resistant properties reduce moisture infiltration risks
Choose EPS panels when project priorities include energy efficiency, fast installation, and long-term durability. Avoid EPS panels in applications requiring high fire ratings without additional protection systems.
EPS Sandwich Panel Wall Installation Step by Step Guide
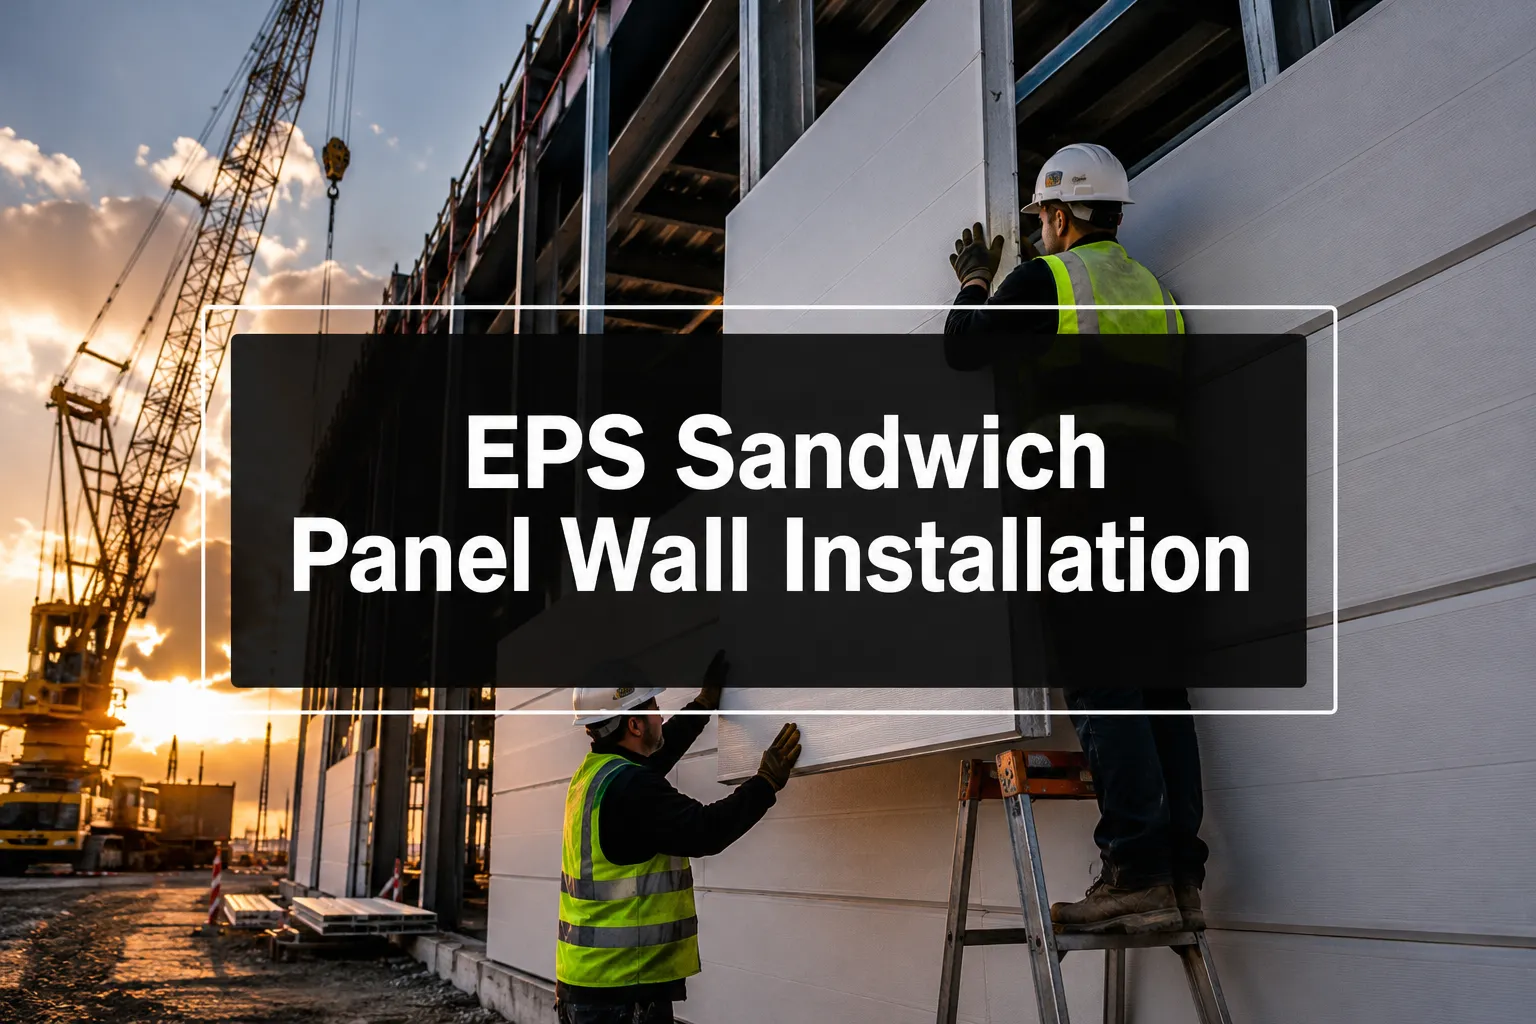
Professional EPS sandwich panel wall installation follows a systematic process that ensures structural integrity and thermal performance. The installation begins with proper foundation preparation and ends with comprehensive sealing and finishing work.
Phase 1: Pre-Installation Preparation
- Verify structural framework meets load requirements for panel weight
- Install vapor barrier on interior side of framework if required by local codes
- Mark panel layout on framework ensuring proper alignment with openings
- Prepare all penetrations for utilities before panel installation begins
Phase 2: Panel Installation Process
- Position first panel at corner using temporary bracing for alignment
- Secure panels to framework using appropriate fasteners spaced per manufacturer specifications
- Install subsequent panels ensuring tight joints and proper overlap sequences
- Apply structural sealant to all panel joints immediately after positioning
Phase 3: Sealing and Finishing
- Install weatherstrip tape over all horizontal and vertical joints
- Apply exterior sealant to all penetrations and panel edges
- Install trim pieces and flashing around openings and corners
- Conduct final inspection for gaps, alignment issues, or incomplete sealing
The most common mistake involves inadequate joint sealing, which can lead to air infiltration and moisture problems. Always follow manufacturer specifications for sealant types and application methods.
How Much Does It Cost to Install EPS Sandwich Panels
EPS sandwich panel installation costs vary significantly based on project size, panel specifications, and regional labor rates. Professional installation typically ranges from $15-25 per square foot including materials and basic labor for standard residential applications.
Cost breakdown for typical installations:
- Materials: $8-12 per square foot for standard 4-inch EPS panels
- Labor: $6-10 per square foot for professional installation
- Additional components: $1-3 per square foot for fasteners, sealants, and trim
Factors affecting total project costs:
- Panel thickness and specifications (thicker panels cost 20-30% more)
- Building height and accessibility (multi-story adds 15-25% labor costs)
- Custom cutting requirements for openings and penetrations
- Local building code requirements for additional fire protection
Commercial projects often achieve lower per-square-foot costs due to economies of scale, with large installations ranging from $12-18 per square foot. However, commercial projects may require specialized fire-rated panels that increase material costs by 30-50%.
Budget for 10-15% contingency costs to cover unexpected site conditions or design modifications during installation.
EPS Sandwich Panel Installation Tools and Equipment Needed
Successful eps sandwich panel wall installation requires specialized tools and equipment designed for handling large panels and ensuring precise installation. Professional contractors typically use a combination of lifting equipment, cutting tools, and fastening systems.
Essential lifting and positioning equipment:
- Panel lifter or suction cup system for safe panel handling
- Telescopic forklift or crane for multi-story installations
- Temporary bracing systems to hold panels during fastening
- Safety harnesses and fall protection equipment for elevated work
Cutting and preparation tools:
- Circular saw with fine-tooth blade for clean panel cuts
- Hot knife for cutting EPS core without compression
- Hole saw kit for utility penetrations
- Measuring and marking tools for precise layout
Fastening and sealing equipment:
- Impact driver with appropriate fastener bits
- Caulk gun for structural sealants and weatherstripping
- Rivet gun for mechanical connections where required
- Torque wrench for ensuring proper fastener tension
The most critical tool consideration involves panel handling equipment. Panels measuring 8×20 feet or larger require mechanical lifting assistance to prevent damage and ensure worker safety. Attempting to install large panels manually often results in damaged edges or improper alignment.
Common Mistakes When Installing EPS Sandwich Panels
Installation errors can compromise both structural performance and energy efficiency of EPS sandwich panel systems. Understanding these common mistakes helps ensure successful project outcomes and long-term building performance.
Critical sealing and moisture control errors:
- Inadequate joint sealing allowing air infiltration and moisture penetration
- Missing vapor barriers in climate zones requiring interior moisture control
- Improper flashing installation around openings leading to water infiltration
- Using incompatible sealants that fail to bond with panel surfaces
Structural and fastening mistakes:
- Insufficient fastener spacing causing panel movement and joint failure
- Over-tightening fasteners that compress EPS core and reduce insulation value
- Inadequate temporary bracing during installation leading to panel distortion
- Ignoring manufacturer specifications for fastener types and penetration depths
Planning and layout errors:
- Poor panel layout resulting in excessive cutting and waste
- Inadequate consideration of thermal expansion requiring expansion joints
- Insufficient coordination with other trades for utility penetrations
The most expensive mistake involves inadequate moisture protection, which can lead to EPS core degradation and require complete panel replacement. Always prioritize proper sealing over installation speed to ensure long-term performance.
EPS Sandwich Panels vs Traditional Insulation: Which Is Better
EPS sandwich panels offer significant advantages over traditional insulation methods in most commercial and many residential applications. The comparison depends on project priorities including cost, installation speed, and long-term performance requirements.
EPS sandwich panel advantages:
- Single-component installation eliminates separate framing, sheathing, and insulation steps
- Superior thermal performance with minimal thermal bridging
- Faster installation reduces overall project timeline by 30-50%
- Integrated weather barrier eliminates additional membrane requirements
Traditional insulation advantages:
- Lower upfront material costs for basic residential applications
- Greater flexibility for irregular building shapes and retrofit applications
- Easier repair and modification after initial installation
- More familiar installation process for general contractors
Performance comparison for typical applications:
| Factor | EPS Sandwich Panels | Traditional Insulation |
|---|---|---|
| Installation Time | 2-4 days typical | 5-8 days typical |
| Thermal Performance | R-15 to R-25 continuous | R-13 to R-21 with bridging |
| Initial Cost | $15-25/sq ft | $12-18/sq ft |
| Long-term Value | Higher energy savings | Standard performance |
Choose EPS sandwich panels for commercial buildings, energy-efficient construction, or projects with tight timelines. Select traditional insulation for budget-conscious residential projects or complex retrofit applications.
How Long Does EPS Sandwich Panel Installation Take
EPS sandwich panel installation timelines depend primarily on project size, building complexity, and crew experience. Professional installation teams can typically complete 1,000-1,500 square feet per day under optimal conditions.
Typical installation timeframes:
- Small residential projects (1,000-2,000 sq ft): 1-2 days
- Medium commercial buildings (5,000-10,000 sq ft): 3-5 days
- Large industrial facilities (20,000+ sq ft): 1-2 weeks
- Multi-story construction: Add 1-2 days per additional floor
Factors that extend installation time:
- Complex building geometry requiring extensive panel cutting
- Multiple window and door openings requiring precise fitting
- Coordination with other trades for utility penetrations
- Weather delays affecting outdoor installation work
- Site access limitations requiring smaller equipment
Factors that accelerate installation:
- Simple rectangular building shapes with minimal openings
- Experienced installation crews familiar with EPS panel systems
- Proper pre-planning and panel layout optimization
- Adequate lifting equipment for efficient panel handling
The fastest installations occur on simple warehouse or agricultural buildings where panels can be installed in large sections with minimal cutting. Complex architectural features can double installation time compared to basic rectangular structures.
For project planning purposes, budget 20% additional time beyond initial estimates to account for weather delays and coordination issues with other construction activities.
Can I Install EPS Sandwich Panels Myself or Do I Need a Professional
DIY EPS sandwich panel installation is technically possible for experienced builders with proper equipment, but professional installation is recommended for most projects. The decision depends on project complexity, building codes, and personal construction experience.
DIY installation considerations:
- Requires specialized lifting equipment for panels over 8 feet in length
- Building permits typically require professional installation for commercial projects
- Warranty coverage may be voided without certified installer involvement
- Liability risks increase significantly for structural building envelope work
When DIY installation may be appropriate:
- Small agricultural or storage buildings under 1,000 square feet
- Experienced contractors adding EPS panels to their skill set
- Projects in areas with minimal building code enforcement
- Renovation work where professional coordination is already established
Professional installation advantages:
- Guaranteed compliance with building codes and manufacturer specifications
- Insurance coverage for installation defects and weather damage
- Access to specialized equipment and bulk material pricing
- Faster completion times due to crew experience and efficiency
Critical skills required for DIY installation:
- Ability to safely handle large panels using mechanical assistance
- Understanding of structural load paths and fastening requirements
- Knowledge of moisture control and vapor barrier installation
- Experience with precision cutting and fitting around openings
Most building codes require professional installation for commercial projects or residential buildings over certain square footage thresholds. Check local requirements before committing to DIY installation approaches.
The most common DIY failures involve inadequate sealing and moisture control, which can lead to expensive remediation work. When in doubt, hire professionals for the installation and focus DIY efforts on site preparation and finishing work.
EPS Sandwich Panel Wall Installation on Concrete vs Wood Framing
EPS sandwich panel installation methods vary significantly between concrete and wood framing systems. Each substrate requires specific fastening techniques, moisture management, and structural considerations for optimal performance.
Installation on concrete substrates:
Concrete installations require mechanical fasteners designed for masonry substrates, typically concrete screws or expansion anchors rated for structural loads. Panel attachment points must align with solid concrete areas, avoiding mortar joints or hollow block cores.
Key concrete installation requirements:
- Pre-drilling pilot holes prevents concrete cracking during fastener installation
- Structural adhesive backing provides additional attachment security
- Continuous moisture barrier prevents concrete moisture transmission
- Thermal break materials reduce thermal bridging through concrete substrate
Installation on wood framing systems:
Wood frame installations allow standard self-drilling screws with structural ratings appropriate for panel loads. Fasteners must penetrate structural framing members rather than sheathing materials alone.
Wood framing installation specifics:
- Fasteners must penetrate minimum 1.5 inches into structural members
- Vapor barriers may be required on interior side depending on climate zone
- Electrical and plumbing rough-in must be completed before panel installation
- Structural sheathing provides backup attachment for panel edges
Comparative installation challenges:
Concrete advantages:
- Superior structural attachment strength
- Minimal thermal bridging concerns
- No concerns about framing shrinkage or movement
Wood framing advantages:
- Easier utility integration and modification
- Standard fasteners and installation techniques
- Lower overall material and labor costs
Choose concrete substrate installation for high-performance buildings requiring maximum structural integrity. Wood framing offers greater flexibility and cost-effectiveness for standard residential and light commercial applications.
EPS Sandwich Panels: Moisture Problems and How to Prevent Them
Moisture infiltration represents the most significant long-term risk for EPS sandwich panel installations. Proper moisture management requires comprehensive vapor control, drainage systems, and regular maintenance protocols.
Common moisture infiltration sources:
- Inadequate joint sealing allowing direct water penetration
- Missing or improperly installed vapor barriers
- Condensation formation within panel cores due to temperature differentials
- Flashing failures around windows, doors, and roof connections
Prevention strategies for moisture control:
Primary moisture barriers:
- Continuous exterior sealant application at all panel joints
- Proper vapor barrier installation on warm side of panels
- Drainage plane behind panels for moisture that penetrates exterior surface
- Flashing systems that direct water away from panel connections
Secondary protection measures:
- Regular inspection and maintenance of sealant systems
- Proper ventilation to prevent interior humidity buildup
- Thermal breaks to minimize condensation potential
- Quality control during installation to ensure complete sealing
Warning signs of moisture problems:
- Visible water stains or discoloration on panel surfaces
- Ice formation on interior surfaces during cold weather
- Musty odors indicating potential mold growth within wall cavities
- Increased heating and cooling costs suggesting compromised insulation
Remediation approaches for existing moisture issues:
Remove affected panels and replace EPS core material if saturation exceeds 5% by volume. Address source of moisture infiltration before reinstalling panels. Consider upgrading vapor barrier systems if original installation was inadequate.
The key to moisture prevention lies in comprehensive sealing during initial installation rather than attempting repairs after problems develop. Invest in quality sealants and professional installation to avoid expensive remediation costs.
Best Practices for Sealing EPS Sandwich Panel Joints
Proper joint sealing is critical for EPS sandwich panel performance and longevity. Professional sealing techniques ensure weather resistance, energy efficiency, and structural integrity throughout the building's service life.
Primary sealing materials and applications:
- Structural sealants for load-bearing joint connections
- Weather sealants for exterior moisture protection
- Vapor-permeable sealants for interior applications where required
- Butyl tape systems for mechanical sealing backup
Joint sealing sequence and technique:
Step 1: Surface preparation
Clean all joint surfaces removing dust, oil, and loose material. Surfaces must be dry and within manufacturer-specified temperature ranges for sealant application.
Step 2: Primary seal installation
Apply structural sealant to interior joint surfaces before panel positioning. This creates immediate weather protection and structural continuity.
Step 3: Secondary weather sealing
Install exterior weather sealant after panels are positioned and fastened. Tool sealant to proper profile ensuring complete adhesion to both panel surfaces.
Step 4: Mechanical backup systems
Install gaskets or tape systems as backup protection for critical joints. Mechanical systems provide redundancy if sealant systems fail over time.
Quality control for sealing operations:
- Verify sealant compatibility with panel materials before application
- Maintain proper ambient temperature and humidity during curing
- Inspect all joints for complete coverage and proper adhesion
- Document sealing work for warranty and maintenance purposes
Common sealing failures to avoid:
- Three-sided adhesion where sealant bonds to bottom of joint causing failure
- Inadequate surface preparation resulting in poor adhesion
- Wrong sealant selection for specific environmental conditions
- Insufficient curing time before exposing joints to weather
Plan for sealant maintenance every 5-7 years depending on environmental exposure. Early maintenance prevents minor sealant degradation from becoming major moisture infiltration problems.
EPS Sandwich Panels Fire Rating and Building Code Requirements
EPS sandwich panels must meet specific fire safety requirements depending on building occupancy, height, and local building codes. Understanding these requirements is essential for code compliance and occupant safety.
Standard fire rating classifications:
- Class A: Flame spread index 0-25, suitable for most commercial applications
- Class B: Flame spread index 26-75, acceptable for many industrial uses
- Class C: Flame spread index 76-200, limited to specific low-risk applications
Building code considerations by application:
Commercial buildings: Most commercial applications require Class A fire ratings with additional requirements for high-rise construction. Some jurisdictions require fire-resistant barriers between EPS panels and occupied spaces.
Industrial facilities: Industrial buildings may accept Class B ratings depending on occupancy classification and sprinkler system coverage. Storage and manufacturing facilities often have specific requirements for EPS panel applications.
Residential construction: Residential applications typically require Class B minimum ratings with specific requirements for attached garage walls and property line setbacks.
Fire protection enhancement options:
- Intumescent coatings that expand when exposed to heat
- Gypsum board backing for interior fire resistance
- Mineral wool substitution in high-risk areas
- Sprinkler system integration for active fire protection
Code compliance verification process:
- Submit panel specifications and fire test reports with building permit applications
- Schedule inspections during installation to verify proper installation techniques
- Maintain documentation of fire-rated materials and installation methods
- Coordinate with fire marshal for final approval of completed installation
Special considerations for specific occupancies:
- Healthcare facilities require additional smoke and toxicity testing
- Schools and assembly buildings have stricter flame spread requirements
- High-rise construction may prohibit EPS panels above certain heights
Always consult local building officials early in the design process to confirm specific requirements for EPS panel installations. Requirements vary significantly between jurisdictions and building types.
For detailed information about fire-rated options, see our fire rated sandwich panel guide.
EPS Sandwich Panels for Commercial vs Residential Buildings
EPS sandwich panel applications differ significantly between commercial and residential construction in terms of performance requirements, building codes, and installation complexity. Understanding these differences helps optimize panel selection and installation approaches.
Commercial building applications:
Commercial EPS installations typically involve larger panel sizes, higher performance requirements, and more complex building systems integration. Commercial projects often prioritize speed of construction and long-term energy performance over initial cost considerations.
Key commercial requirements:
- Higher structural loads requiring thicker panels or additional support
- Stricter fire safety codes requiring enhanced fire-resistant materials
- More complex HVAC integration requiring precise air sealing
- Professional installation requirements for warranty and insurance coverage
Typical commercial applications include:
- Warehouse and distribution facilities
- Manufacturing plants and industrial buildings
- Retail and office buildings
- Agricultural and storage facilities
Residential building applications:
Residential EPS installations focus on energy efficiency, cost-effectiveness, and integration with standard residential construction practices. Residential projects typically involve smaller panels and simpler building systems.
Residential installation considerations:
- Standard residential framing integration
- Coordination with electrical and plumbing systems
- Aesthetic considerations for visible panel installations
- DIY installation potential for experienced homeowners
Performance comparison factors:
| Application Factor | Commercial | Residential |
|---|---|---|
| Typical Panel Size | 8′ x 20′ to 8′ x 40′ | 4′ x 8′ to 8′ x 16′ |
| Installation Complexity | High – requires professionals | Moderate – DIY possible |
| Code Requirements | Strict fire and structural codes | Standard residential codes |
| Cost per Square Foot | $12-18 (economies of scale) | $15-25 (smaller quantities) |
Selection criteria by building type:
Choose commercial-grade EPS panels for projects requiring maximum structural performance, fire resistance, and long-term durability. Select residential-grade panels for cost-sensitive projects where standard performance meets building requirements.
For comprehensive cost analysis, review our sandwich panel installation cost guide.
Troubleshooting Gaps and Air Leaks in EPS Sandwich Panel Walls
Air leakage through EPS sandwich panel installations can significantly reduce energy performance and compromise building comfort. Systematic troubleshooting and repair techniques restore optimal thermal performance and prevent long-term building envelope problems.
Common air leakage locations:
- Panel-to-panel joints with inadequate or failed sealant
- Penetrations for electrical, plumbing, or HVAC systems
- Window and door rough opening connections
- Foundation and roof connection details
Diagnostic techniques for identifying air leaks:
Blower door testing: Professional testing quantifies total air leakage and helps locate specific problem areas. Testing should be conducted before and after repairs to verify improvement.
Thermal imaging: Infrared cameras reveal temperature differences indicating air infiltration paths. Thermal imaging works best during periods of significant indoor-outdoor temperature differential.
Visual inspection methods: Smoke pencils or incense sticks reveal air movement at suspected leak locations. This low-cost method effectively identifies major leakage paths.
Repair techniques by leak type:
Joint sealant failures:
- Remove failed sealant completely using appropriate solvents or mechanical methods
- Clean joint surfaces ensuring complete removal of old sealant and contaminants
- Apply primer if required by sealant manufacturer specifications
- Install new sealant ensuring proper depth-to-width ratios and complete adhesion
Penetration leaks:
- Remove existing sealing materials around penetrations
- Install appropriate sleeve or flashing system for penetration type
- Apply sealant in continuous beads ensuring complete coverage
- Install interior vapor barrier patches where required by climate conditions
Structural connection leaks:
- Identify source of air path through building assembly
- Install additional sealing materials or gasket systems
- Consider mechanical fastener modifications if structural connections are inadequate
- Verify repair effectiveness using diagnostic testing methods
Prevention strategies for future installations:
- Specify high-quality sealants appropriate for expected environmental conditions
- Include redundant sealing systems for critical building envelope connections
- Plan regular inspection and maintenance schedules for sealant systems
- Train installation crews on proper sealing techniques and quality control procedures
Most air leakage problems result from inadequate initial installation rather than material failures. Investing in proper installation techniques prevents expensive troubleshooting and repair work later.
For professional installation services, see our sandwich panel installation service guide.
Frequently Asked Questions
How thick should EPS sandwich panels be for wall applications?
Standard wall applications typically use 4-6 inch thick EPS sandwich panels providing R-15 to R-25 insulation values. Choose 4-inch panels for moderate climate zones and 6-inch panels for extreme climate conditions or high-performance building requirements.
Can EPS sandwich panels be installed in cold weather?
EPS panel installation can proceed in cold weather with proper precautions. Sealants require minimum temperatures typically above 40°F for proper curing. Use cold-weather sealants and allow extended curing time when installing in temperatures below 50°F.
What is the lifespan of EPS sandwich panels?
Properly installed EPS sandwich panels typically last 30-50 years with minimal maintenance. The EPS core maintains insulation properties indefinitely while metal faces may require recoating every 15-20 years depending on environmental exposure.
Do EPS sandwich panels require special electrical installation techniques?
Electrical installation through EPS panels requires careful planning to maintain insulation integrity. Use appropriate electrical boxes designed for foam insulation and seal all penetrations with compatible sealants to prevent air leakage.
Can EPS sandwich panels be painted or finished?
Metal-faced EPS panels can be painted using appropriate primers and paints designed for metal substrates. Factory-finished panels typically provide better long-term appearance and durability than field-applied finishes.
How do EPS sandwich panels perform in high wind conditions?
EPS sandwich panels provide excellent wind resistance when properly fastened to structural frameworks. Panel systems regularly withstand hurricane-force winds when installed according to manufacturer specifications and local building codes.
What happens if moisture gets inside EPS sandwich panels?
Moisture infiltration can reduce insulation performance and potentially cause structural problems. Small amounts of moisture typically dry out naturally, but significant infiltration requires panel replacement and source identification to prevent recurring problems.
Are EPS sandwich panels environmentally friendly?
EPS panels offer environmental benefits through reduced energy consumption over building lifetime. The EPS core is recyclable, and the overall building envelope performance typically offsets manufacturing environmental impacts within 2-3 years of operation.
Can EPS sandwich panels be used for load-bearing walls?
EPS sandwich panels can provide structural support for roof and floor loads when properly designed and installed. Structural calculations must verify panel capacity for specific load conditions and building configurations.
How do I maintain EPS sandwich panel walls?
Regular maintenance includes annual inspection of sealant systems, cleaning of panel surfaces, and prompt repair of any damage. Sealant replacement typically required every 7-10 years depending on environmental exposure conditions.
What building codes apply to EPS sandwich panel installation?
EPS panel installations must comply with local building codes covering structural, fire safety, and energy efficiency requirements. Most jurisdictions require professional installation and inspection for commercial applications and larger residential projects.
Can EPS sandwich panels be installed over existing walls?
EPS panels can be installed over existing wall systems with proper structural evaluation and moisture management. Retrofit installations require careful attention to vapor barrier placement and thermal bridging prevention through existing structural elements.
Conclusion
EPS sandwich panel wall installation offers significant advantages in construction speed, energy performance, and long-term building durability when executed properly. Professional installation ensures compliance with building codes, optimal thermal performance, and warranty protection for your investment.
The key to successful EPS panel installation lies in thorough planning, proper material selection, and meticulous attention to sealing and moisture management details. While DIY installation may be possible for simple applications, most projects benefit from professional expertise and specialized equipment.
Take these next steps to move forward with your EPS panel project:
- Evaluate your specific requirements – Consider building size, performance goals, and budget constraints to determine if EPS panels are appropriate for your application
- Obtain professional consultation – Work with experienced installers to develop proper specifications and installation plans
- Secure necessary permits – Verify building code requirements and obtain appropriate permits before beginning installation work
- Plan for long-term maintenance – Establish inspection and maintenance schedules to protect your investment and maintain optimal performance
For expert guidance on your EPS sandwich panel project, explore our comprehensive resources on EPS panel selection and professional installation services.
SEO Meta Title: EPS Sandwich Panel Wall Installation Guide 2026 | Complete How-To