Last updated: July 31, 2026

Quick Answer
Sandwich panel installation involves mounting pre-fabricated insulated panels consisting of two metal faces with an insulating core between them. Professional installation typically takes 1-3 days for standard buildings and costs $15-35 per square meter including materials and labor. The process requires specific tools, proper structural support, and attention to thermal bridging prevention for optimal performance.
Key Takeaways
- Sandwich panels combine structural strength with thermal insulation in a single building component
- Professional installation ensures proper sealing, structural integrity, and thermal performance
- Installation costs range from $15-35 per square meter depending on panel type and complexity
- Proper vapor barrier installation prevents moisture problems that cause 60% of panel failures
- Cold weather installation requires special techniques to prevent thermal bridging issues
- DIY installation is possible for small projects but professional installation recommended for buildings over 500 square meters
- Wall and roof installations have different requirements for load bearing and weatherproofing
- Common mistakes include inadequate structural support and improper joint sealing
- Installation timeline depends on building size, weather conditions, and panel complexity
What Are Sandwich Panels and How Do They Work
Sandwich panels are composite building materials consisting of two outer metal sheets bonded to an insulating core material such as polyurethane (PU), expanded polystyrene (EPS), or mineral wool. The panels function as both structural elements and insulation systems, providing thermal efficiency, weather protection, and load-bearing capacity in a single component.
The core material determines the panel's thermal performance and fire resistance properties. Polyurethane cores offer the highest insulation value with R-values of 6-8 per inch, while mineral wool cores provide superior fire resistance and acoustic properties. EPS cores balance cost-effectiveness with good thermal performance.
These panels work through the structural sandwich principle where the outer faces carry tensile and compressive loads while the core resists shear forces. This design creates a lightweight yet strong building envelope that can span significant distances without intermediate support.
For specialized applications, clean room sandwich panels offer additional benefits like smooth surfaces and antimicrobial properties.
Sandwich Panel Installation Steps and Best Practices
Professional sandwich panel installation follows a systematic approach starting with structural preparation and ending with weatherproofing. The installation begins with verifying that the supporting structure can handle the panel loads and wind forces according to local building codes.
Pre-Installation Phase:
- Inspect and prepare the structural framework
- Check measurements and panel delivery schedule
- Set up safety equipment and access platforms
- Verify panel orientation and installation sequence
Installation Sequence:
- Install bottom starter strips with proper drainage slopes
- Position first panel ensuring plumb and level alignment
- Apply structural sealant to panel joints before connecting
- Secure panels to structure using appropriate fasteners
- Install interlocking joints between adjacent panels
- Apply weatherproof sealant to all exterior joints
- Install flashing and trim pieces for weather protection
Quality Control Measures:
- Check panel alignment every 3-4 panels during installation
- Verify fastener spacing meets manufacturer specifications
- Test joint integrity with water spray before final acceptance
- Document any deviations from installation drawings
The complete installation guide for sandwich panel roofs provides detailed specifications for roofing applications.
Sandwich Panel Installation Cost Analysis
Sandwich panel installation costs vary significantly based on panel type, building complexity, and regional labor rates. In 2026, total installed costs typically range from $15-35 per square meter including materials, labor, and basic accessories.
Cost Breakdown by Component:
- Panel materials: $8-18 per square meter
- Installation labor: $5-12 per square meter
- Accessories and trim: $2-5 per square meter
- Structural modifications: $0-8 per square meter (if needed)
Factors Affecting Installation Costs:
- Panel thickness and core material selection
- Building height and accessibility requirements
- Weather conditions during installation period
- Local labor availability and skill levels
- Structural modifications needed for panel support
Regional Cost Variations:
Urban areas typically see 20-30% higher installation costs due to higher labor rates and logistics challenges. Remote locations may incur additional transportation costs for materials and specialized crews.
For detailed regional pricing, consult our sandwich panel installation cost guide for Bangladesh.
Sandwich Panel vs Traditional Insulation: Which Performs Better
Sandwich panels outperform traditional insulation systems in installation speed, thermal continuity, and long-term durability. Traditional insulation requires separate structural elements, vapor barriers, and cladding systems, creating multiple thermal bridges and installation steps.
Performance Comparison:
| Factor | Sandwich Panels | Traditional Systems |
|---|---|---|
| Installation Time | 1-3 days typical | 5-10 days typical |
| Thermal Bridging | Minimal with proper installation | Significant at structural connections |
| Air Leakage | Low when properly sealed | Higher due to multiple joints |
| Maintenance Requirements | Low – integrated system | Higher – multiple components |
When to Choose Sandwich Panels:
- Fast construction schedules are required
- Thermal performance is critical for energy efficiency
- Long-term maintenance costs need minimization
- Consistent quality control is important
When Traditional Systems May Be Better:
- Complex architectural details require custom solutions
- Local building codes restrict sandwich panel use
- Renovation projects with existing structural constraints
- Budget constraints favor phased construction approaches
Common Mistakes When Installing Sandwich Panels
Improper structural support causes 40% of sandwich panel installation failures, leading to panel deflection, joint opening, and water infiltration. The supporting structure must be designed specifically for sandwich panel loads and connection requirements.
Critical Installation Errors:
Inadequate Structural Support:
- Using standard steel framing without calculating sandwich panel loads
- Insufficient fastener spacing or wrong fastener types
- Ignoring thermal expansion requirements in connection design
Poor Joint Sealing:
- Skipping structural sealant application between panels
- Using incompatible sealant materials that fail over time
- Inadequate surface preparation before sealant application
Thermal Bridge Creation:
- Installing continuous metal elements through the insulation layer
- Inadequate insulation around panel connections
- Missing thermal breaks at structural attachment points
Moisture Management Failures:
- Incorrect vapor barrier placement or installation
- Inadequate drainage design around panel joints
- Missing or improperly installed flashing systems
Prevention Strategies:
Choose experienced installers familiar with sandwich panel systems. Verify that structural calculations account for panel-specific loads and thermal movements. Inspect joint sealing quality during installation rather than after completion.
Sandwich Panel Installation Tools and Equipment Requirements
Professional sandwich panel installation requires specialized tools for handling, cutting, and securing panels safely and accurately. Standard construction tools are insufficient for achieving proper installation quality and worker safety.
Essential Installation Equipment:
- Panel lifting equipment: Vacuum lifters or panel clamps rated for panel weight
- Cutting tools: Specialized panel saws with dust collection systems
- Fastening tools: Magnetic drill presses and impact drivers with torque control
- Measuring equipment: Laser levels and precision measuring tapes
- Safety equipment: Fall protection systems and edge protection barriers
Specialized Panel Tools:
- Seam rollers: For proper joint compression and sealant distribution
- Panel scribes: For marking cut lines without damaging panel faces
- Thermal imaging cameras: For verifying insulation continuity after installation
- Joint testing equipment: For pressure testing sealed joints before acceptance
Tool Selection Criteria:
Panel thickness and core material determine cutting tool requirements. Mineral wool cores require different cutting techniques than foam cores to prevent core damage. Panel weight determines lifting equipment capacity needs.
Safety Equipment Requirements:
Working with large panels creates unique safety hazards requiring specialized fall protection and lifting procedures. Wind conditions significantly affect panel handling safety and may require work suspension.
Professional sandwich panel installation services include all necessary specialized equipment and trained operators.
Installation Timeline: How Long Does Sandwich Panel Installation Take
Sandwich panel installation typically requires 1-3 days for standard commercial buildings under 2,000 square meters. Installation speed depends on panel size, building complexity, weather conditions, and crew experience levels.
Timeline Factors:
- Building size: 200-400 square meters per day with experienced crews
- Panel complexity: Simple rectangular panels install faster than custom shapes
- Weather conditions: Wind speeds above 25 mph halt installation for safety
- Access requirements: Ground-level installation proceeds faster than high-rise work
Typical Installation Schedules:
Small Buildings (under 500 sq meters):
- Day 1: Site preparation and first panel installation
- Day 2: Main panel installation and joint sealing
- Day 3: Trim installation and final inspections
Medium Buildings (500-2000 sq meters):
- Week 1: Structural preparation and material staging
- Week 2-3: Panel installation with quality control checks
- Week 4: Accessories, trim, and final weatherproofing
Factors That Extend Installation Time:
- Complex architectural details requiring custom fabrication
- Structural modifications discovered during installation
- Weather delays during critical sealing operations
- Coordination delays with other building trades
Acceleration Strategies:
Larger crews can reduce installation time but require more coordination and workspace. Pre-fabricated panel assemblies reduce field installation time but increase transportation complexity.
Sandwich Panels for Roofing vs Walls: Key Installation Differences
Roof and wall sandwich panel installations have fundamentally different structural and weatherproofing requirements. Roof panels must handle snow loads, thermal expansion, and water drainage while wall panels focus on wind loads and thermal performance.
Roof Panel Installation Requirements:
- Structural support: Minimum 1:40 slope for drainage with purlins spaced per load calculations
- Thermal movement: Expansion joints every 60-80 meters depending on climate
- Weatherproofing: Continuous membrane under panels with sealed penetrations
- Snow load considerations: Reinforced connections in high snow load regions
Wall Panel Installation Requirements:
- Wind load resistance: Connections designed for local wind speed requirements
- Thermal bridging prevention: Insulated connection details at structural attachments
- Moisture management: Proper vapor barrier placement based on climate zone
- Foundation interface: Weatherproof connection to building foundation systems
Joint Design Differences:
Roof panel joints require complete water shedding capability with positive drainage. Wall panel joints focus on air sealing and thermal continuity while managing wind-driven rain.
Installation Sequence Variations:
Roof installation typically proceeds from low to high points following water flow patterns. Wall installation can proceed in multiple directions but requires careful attention to panel plumb and level alignment.
For specific roof installation guidance, see our detailed sandwich panel roof installation guide.
DIY vs Professional Installation: Making the Right Choice
DIY sandwich panel installation is feasible for small, single-story buildings under 200 square meters with simple rectangular layouts. Professional installation becomes essential for larger buildings, complex designs, or applications requiring building code compliance verification.
DIY Installation Suitability:
- Building size: Under 200 square meters with simple geometry
- Height limitations: Single story or maximum 4 meters high
- Structural requirements: Pre-engineered buildings with manufacturer support
- Timeline flexibility: No critical completion deadlines
Professional Installation Requirements:
- Complex buildings: Multi-story, irregular shapes, or custom details
- Code compliance: Commercial buildings requiring permit inspections
- Warranty requirements: Manufacturer warranties often require certified installers
- Safety considerations: High-rise work or challenging site conditions
Skill Requirements for DIY:
- Basic construction experience with metal building systems
- Ability to read and interpret technical installation drawings
- Access to proper tools and safety equipment
- Understanding of local building code requirements
Risk Assessment:
Improper installation voids manufacturer warranties and may create safety hazards or building performance problems. Professional installation provides insurance coverage and warranty protection that often justifies the additional cost.
Cost Comparison:
DIY installation saves 30-50% on labor costs but requires tool purchase or rental and assumes installation risk. Professional installation includes insurance, warranty, and code compliance verification.
Cold Weather Installation: Problems and Solutions
Cold weather sandwich panel installation presents unique challenges including material brittleness, sealant curing problems, and thermal bridging risks. Installation quality suffers when temperatures drop below manufacturer-specified limits without proper cold weather procedures.
Temperature-Related Installation Issues:
- Panel brittleness: Metal faces become more prone to cracking below -10°C
- Sealant performance: Most sealants require temperatures above 5°C for proper curing
- Thermal shock: Rapid temperature changes cause panel expansion/contraction stress
- Worker safety: Cold conditions increase accident risk and reduce work efficiency
Cold Weather Installation Techniques:
- Material preconditioning: Store panels in heated areas before installation
- Sealant selection: Use cold-weather formulations that cure at lower temperatures
- Installation timing: Schedule critical sealing work during warmest daily periods
- Temporary heating: Use portable heaters to maintain minimum temperatures during installation
Thermal Bridging Prevention:
Cold weather installation increases thermal bridging risks as metal components conduct more heat. Insulated washers and thermal breaks become more critical in cold climates to prevent condensation and energy loss.
Quality Control Adjustments:
Cold weather requires modified inspection procedures including thermal imaging to verify insulation continuity and extended sealant curing verification periods.
Seasonal Planning:
Schedule sandwich panel installation during moderate weather when possible. If cold weather installation is unavoidable, allow additional time and budget for cold weather procedures.
Moisture and Vapor Barrier Installation Best Practices
Proper vapor barrier installation prevents 60% of sandwich panel moisture problems that lead to insulation degradation and structural damage. Vapor barrier placement depends on climate zone and building use but must always create a continuous moisture control layer.
Vapor Barrier Placement Rules:
- Cold climates: Install vapor barrier on warm (interior) side of insulation
- Hot humid climates: Install vapor barrier on exterior side or use permeable materials
- Mixed climates: Use smart vapor barriers that adjust permeability seasonally
Installation Sequence:
- Install structural vapor barrier before panel placement
- Seal all penetrations with compatible tape or sealant
- Overlap barrier joints minimum 150mm with sealed seams
- Test barrier continuity before panel installation
- Protect barrier during panel installation to prevent damage
Critical Sealing Points:
- Foundation to wall transitions require flexible sealing materials
- Roof to wall connections need continuous barrier transitions
- Penetrations for utilities must be sealed with compatible materials
- Panel joints require both structural and vapor sealing
Common Vapor Barrier Mistakes:
- Installing barrier on wrong side for climate conditions
- Using incompatible tape or sealant materials that fail over time
- Inadequate overlap at joints allowing moisture bypass
- Damage during installation that goes unrepaired
Testing and Verification:
Blower door testing verifies air barrier continuity while thermal imaging identifies thermal bridges that may cause condensation problems.
Sandwich Panels for Metal Buildings: Installation Considerations
Metal building sandwich panel installation requires coordination between the structural system and panel attachment methods. The building frame must be designed specifically for sandwich panel loads and connection requirements rather than adapted from conventional metal building designs.
Structural Interface Requirements:
- Purlin spacing: Designed for specific panel spans and load requirements
- Connection details: Insulated connections to prevent thermal bridging
- Thermal movement: Allowances for differential expansion between frame and panels
- Load paths: Clear load transfer from panels to primary structure
Installation Coordination:
Panel installation must coordinate with mechanical and electrical rough-in work. Plan penetrations before panel installation to minimize field modifications that compromise thermal performance.
Metal Building Advantages:
- Pre-engineered systems with coordinated panel specifications
- Factory-designed connection details reduce field problems
- Faster overall construction compared to conventional framing
- Integrated design approach optimizes thermal performance
Special Considerations:
- Building expansion joints must coordinate with panel joint locations
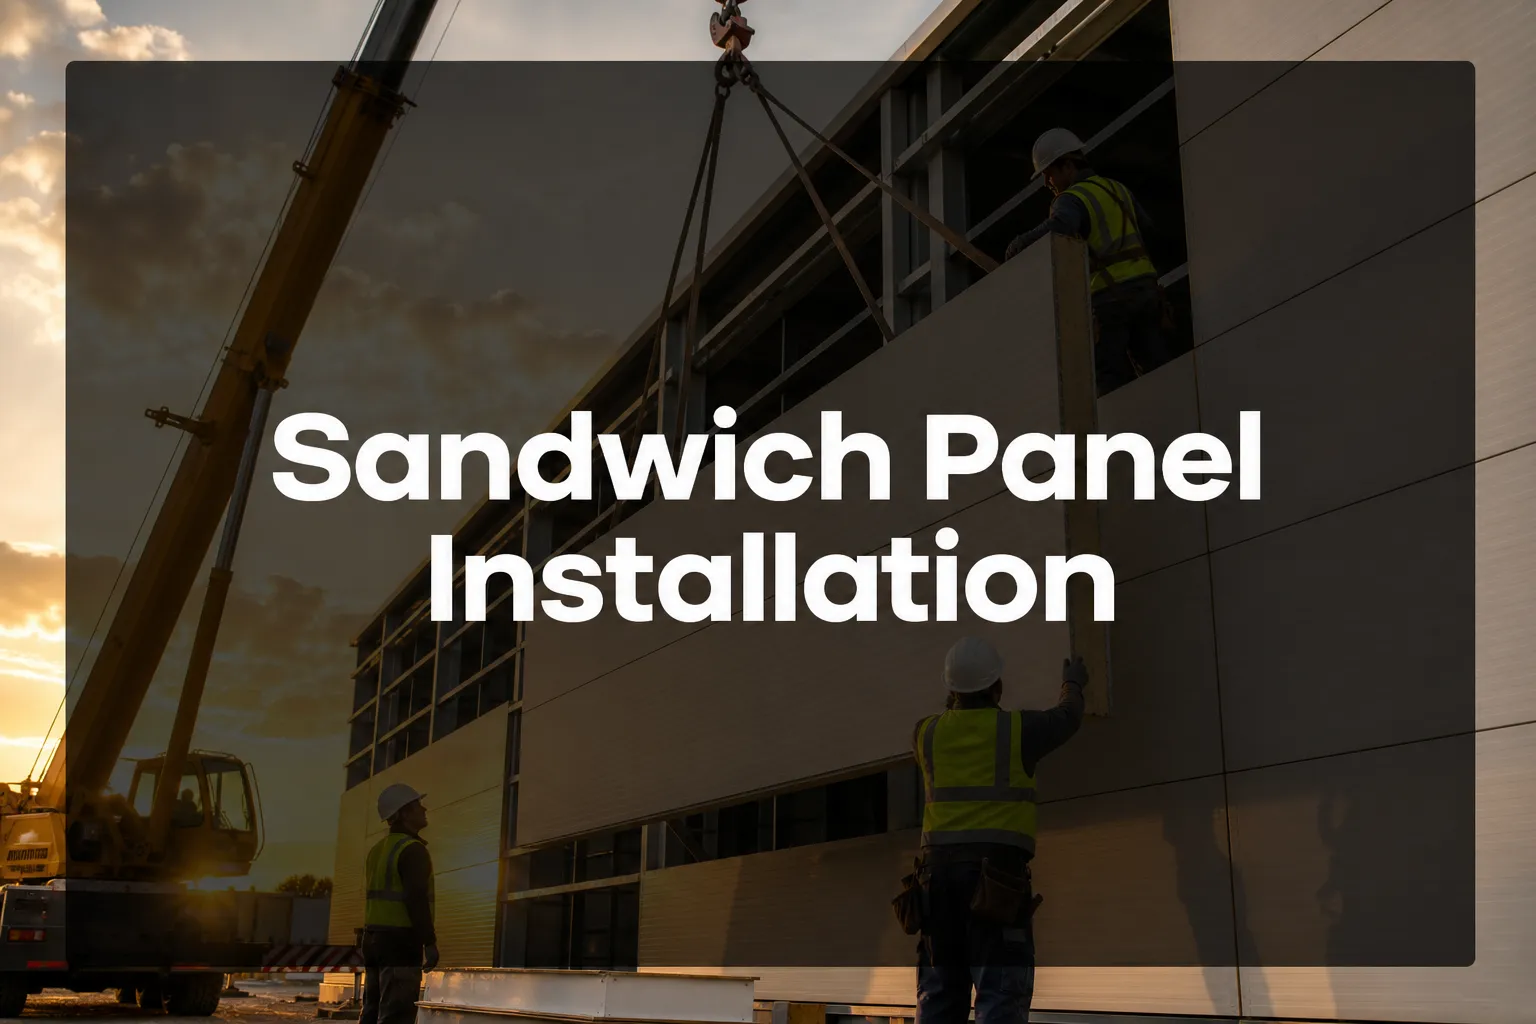
- Crane access requirements for panel installation affect site layout
- Panel delivery scheduling must match construction sequence
- Quality control procedures specific to metal building systems
For comprehensive guidance on metal building applications, see our sandwich panel for factory building guide.
Preventing Sandwich Panel Failure After Installation
Post-installation sandwich panel failures typically result from moisture infiltration, thermal movement stress, or inadequate structural support. Proper installation techniques prevent 80% of these failures, while regular maintenance addresses the remaining risk factors.
Primary Failure Modes:
- Joint failure: Sealant degradation allowing water and air infiltration
- Fastener loosening: Thermal cycling causes connection stress over time
- Core degradation: Moisture infiltration degrades insulation performance
- Face sheet damage: Impact or corrosion compromises panel integrity
Failure Prevention Strategies:
- Quality installation: Use certified installers following manufacturer specifications
- Proper materials: Select sealants and fasteners compatible with panel materials
- Maintenance planning: Schedule regular inspections and preventive maintenance
- Design considerations: Avoid details that concentrate stress or trap moisture
Early Warning Signs:
- Visible sealant cracking or separation at panel joints
- Water stains or discoloration on panel surfaces
- Increased energy costs indicating thermal performance degradation
- Unusual noise during wind events suggesting loose connections
Maintenance Requirements:
Annual inspection of sealant joints and fastener tightness prevents most failures. Replace degraded sealants promptly to prevent water infiltration that causes expensive core replacement.
Warranty Considerations:
Most panel failures within warranty periods result from installation defects rather than material problems. Proper installation documentation supports warranty claims when material defects occur.
Avoiding Thermal Bridging During Installation
Thermal bridging through sandwich panel connections can reduce overall building thermal performance by 20-40% if not properly addressed during installation. Effective thermal bridge prevention requires careful attention to connection details and material selection.
Common Thermal Bridge Locations:
- Structural attachments: Metal fasteners penetrating through insulation layers
- Panel joints: Continuous metal elements connecting interior and exterior faces
- Penetrations: Utilities passing through panels without thermal breaks
- Foundation connections: Direct metal contact between panels and structure
Thermal Bridge Prevention Techniques:
- Insulated fasteners: Use fasteners with thermal breaks or insulated washers
- Broken thermal paths: Avoid continuous metal elements through insulation
- Insulated sub-framing: Create thermal breaks in structural connections
- Sealed penetrations: Insulate around all utility penetrations
Installation Quality Control:
Thermal imaging during or immediately after installation identifies thermal bridges before they become permanent problems. Address thermal bridges during installation rather than attempting repairs later.
Performance Impact:
Uncontrolled thermal bridging can increase heating and cooling costs by 15-25% annually. The energy cost impact often exceeds the additional cost of proper thermal bridge prevention within 3-5 years.
Design Coordination:
Effective thermal bridge prevention requires coordination between structural design and panel installation. Review connection details before installation to identify and resolve potential thermal bridge problems.
Frequently Asked Questions
How much weight can sandwich panels support?
Sandwich panels can support 150-400 kg/m² depending on thickness, span, and core material. Structural calculations must verify specific load capacity for each application based on panel specifications and support conditions.
Can sandwich panels be installed in winter?
Yes, but temperatures must remain above manufacturer minimums (typically 5°C) during sealant application. Cold weather installation requires special procedures and may extend installation time by 20-30%.
Do sandwich panels need a vapor barrier?
Vapor barrier requirements depend on climate zone and building use. Cold climates typically require vapor barriers on the warm side, while hot humid climates may need them on the exterior side or use permeable materials.
How long do sandwich panels last?
Properly installed sandwich panels typically last 25-40 years with minimal maintenance. Panel life depends on material quality, installation quality, environmental exposure, and maintenance practices.
Can I cut sandwich panels on site?
Yes, but use proper cutting tools designed for sandwich panels to prevent core damage. Clean cuts immediately and seal cut edges to prevent moisture infiltration and core degradation.
What happens if panels get wet during installation?
Remove standing water immediately and allow panels to dry completely before sealing joints. Wet insulation cores may require replacement if moisture penetration is extensive.
Are building permits required for sandwich panel installation?
Most jurisdictions require permits for sandwich panel installation on permanent structures. Check local building codes and permit requirements before beginning installation work.
Can sandwich panels be installed over existing walls?
Sandwich panels can be installed over existing walls if the structure can support the additional load and proper attachment methods are used. Structural evaluation is typically required.
How do I find qualified sandwich panel installers?
Look for installers certified by panel manufacturers with specific sandwich panel experience. Verify insurance coverage, references from similar projects, and understanding of local building codes.
What warranty coverage applies to sandwich panel installation?
Material warranties typically cover 10-25 years while installation warranties vary by contractor. Manufacturer warranties often require certified installer compliance with specified installation procedures.
Can sandwich panels be recycled after removal?
Metal faces are recyclable while core materials have limited recycling options. Some manufacturers offer take-back programs for end-of-life panels to maximize material recovery.
Do sandwich panels require special fire safety considerations?
Fire safety requirements depend on building use and local codes. Some applications require fire-rated panels or additional fire protection systems regardless of panel fire performance.
Conclusion
Sandwich panel installation success depends on proper planning, quality materials, and experienced installation crews. The integrated approach of combining structure, insulation, and weather protection in a single component offers significant advantages over traditional building methods when installed correctly.
Key factors for successful installation include adequate structural support, proper joint sealing, thermal bridge prevention, and moisture management. Professional installation typically provides better long-term performance and warranty protection, especially for commercial applications or complex building designs.
Next Steps for Your Project:
- Evaluate your building requirements and determine appropriate panel specifications
- Obtain structural calculations and building permits as required
- Select qualified installers with relevant experience and proper insurance
- Plan installation timing to avoid adverse weather conditions
- Establish quality control procedures and inspection schedules
For specific guidance on your sandwich panel project, consult with experienced installation professionals who can provide detailed specifications and installation planning tailored to your building requirements.
SEO Meta Title: Sandwich Panel Installation Guide: Complete 2026 Professional Tips