Last updated: July 31, 2026

Quick Answer
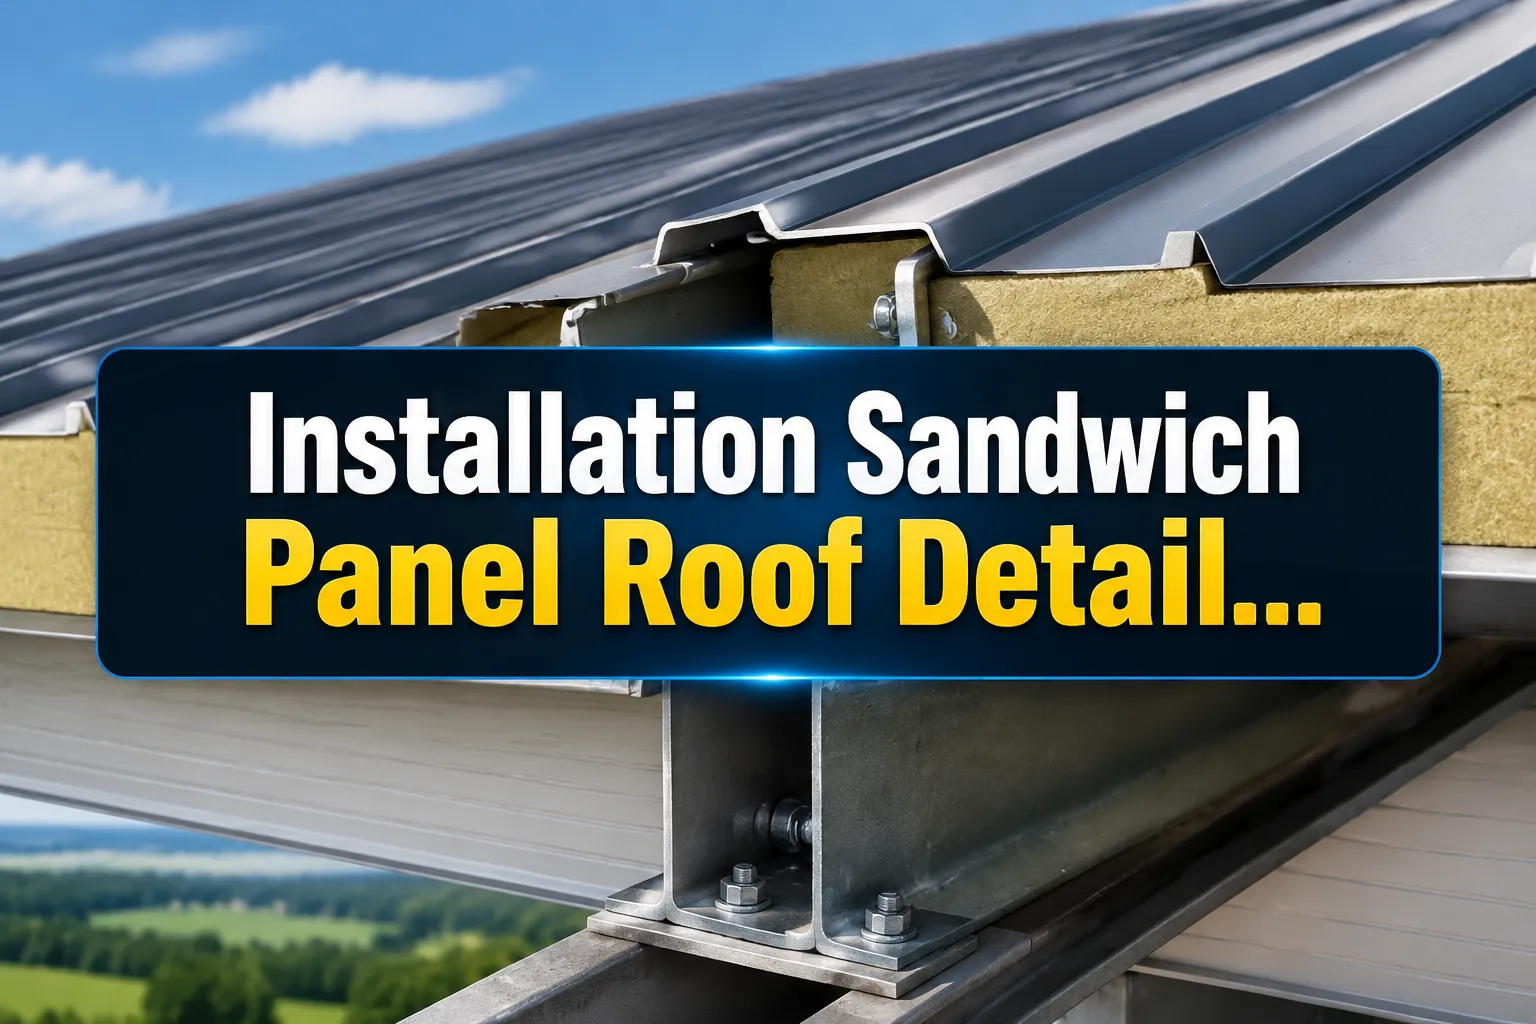
Installation sandwich panel roof detail involves mounting pre-fabricated insulated panels with specific fastening patterns, proper sealing techniques, and weatherproofing systems. The process requires precise alignment, adequate structural support, and professional-grade sealants to ensure watertight performance and thermal efficiency.
Key Takeaways
- Sandwich panel roofs combine structural strength with built-in insulation in a single system
- Professional installation typically costs 15-25% of total project budget but ensures warranty compliance
- Proper fastening patterns and sealing details prevent 90% of common leak issues
- Installation time ranges from 2-5 days for standard commercial buildings depending on size
- Cold weather installation requires modified sealants and extended curing times
- Panel thickness selection affects both thermal performance and installation complexity
- Professional installation is recommended for buildings over 5,000 square feet
- Regular maintenance extends roof life from 20 to 40+ years
What is a Sandwich Panel Roof and How Does It Work
A sandwich panel roof consists of two metal sheets bonded to an insulating core material, creating a single structural element that provides both weather protection and thermal insulation. The outer metal sheets (typically steel or aluminum) handle structural loads and weather resistance, while the core material (polyurethane, rockwool, or EPS) provides insulation and additional structural rigidity.
The system works through composite action – the three layers work together as one structural unit, making the panel much stronger than the sum of its parts. This design eliminates the need for separate insulation installation and reduces thermal bridging compared to traditional roofing systems.
Core material options include:
- Polyurethane (PU): Best thermal performance, moderate fire resistance
- Rockwool: Superior fire resistance, good thermal performance
- Expanded Polystyrene (EPS): Most economical, adequate for many applications
The panels interlock through male-female edge profiles that create continuous seals when properly installed. This interlocking system is critical for both structural performance and weather resistance.
Sandwich Panel Roof Installation Steps and Process
The installation process follows a systematic approach that ensures structural integrity and weather protection. Proper preparation accounts for 40% of installation success, making the preliminary steps as important as the panel mounting itself.
Pre-installation preparation:
- Verify structural adequacy – roof structure must support panel weight plus live loads
- Install vapor barriers if required by climate conditions
- Mark panel layout lines ensuring proper drainage slopes
- Stage panels in installation sequence to minimize handling
Installation sequence:
- Start at the lowest point – install first panel at eave with proper overhang
- Apply structural sealant to panel edges before positioning
- Secure panels with approved fasteners at specified spacing
- Install each subsequent panel, maintaining consistent overlap
- Apply weather sealant to all joints after mechanical fastening
- Install ridge caps, gutters, and penetration flashings
Critical installation details:
- Maintain minimum 1:40 slope for proper drainage
- Use only manufacturer-approved fasteners and sealants
- Ensure continuous support at panel edges
- Allow for thermal expansion with appropriate joint spacing
For detailed installation procedures, refer to our complete installation guide for sandwich panel roofs.
How Much Does Sandwich Panel Roof Installation Cost
Installation costs vary significantly based on building size, panel type, and local labor rates. Professional installation typically ranges from $8-15 per square foot including materials and labor, with total project costs depending on complexity factors.
Cost breakdown components:
- Materials (60-70%): Panels, fasteners, sealants, accessories
- Labor (25-35%): Installation crew, equipment rental
- Engineering (3-5%): Structural calculations, drawings
- Permits (1-2%): Building permits, inspections
Factors affecting installation costs:
- Building height: Higher buildings require specialized equipment and safety measures
- Roof complexity: Multiple levels, penetrations, and angles increase labor time
- Panel thickness: Thicker panels cost more but may reduce labor time
- Weather conditions: Cold weather installation adds 10-20% to labor costs
- Access limitations: Restricted site access increases material handling costs
Regional cost variations:
- Urban areas: 15-25% higher due to labor costs and logistics
- Rural areas: Potentially lower labor costs but higher material transport
- Coastal regions: May require upgraded corrosion-resistant materials
For specific pricing in Bangladesh, see our sandwich panel installation cost guide.
Sandwich Panel Roof Installation Tools and Equipment Needed
Professional installation requires specialized tools and equipment to ensure proper fastening, sealing, and safety. Using incorrect tools is the leading cause of installation defects and warranty voids.
Essential hand tools:
- Cordless drill with magnetic bit holders
- Reciprocating saw with metal cutting blades
- Chalk line and measuring tape
- Caulk guns for sealant application
- Socket wrenches for structural connections
Power equipment:
- Mobile crane or telehandler for panel lifting and positioning
- Scissor lifts or scaffolding for worker access
- Pneumatic fastening tools for high-volume installation
- Panel cutting equipment (circular saw with appropriate blade)
Safety equipment (mandatory):
- Fall protection harnesses and anchor points
- Safety nets or guardrails at roof edges
- Non-slip footwear rated for metal surfaces
- Weather monitoring equipment for wind speed
Specialized installation tools:
- Panel lifting devices to prevent damage during handling
- Alignment bars for precise panel positioning
- Torque wrenches to ensure proper fastener tension
- Sealant smoothing tools for professional joint finish
Common tool-related mistakes:
- Using standard wood screws instead of self-drilling metal fasteners
- Over-torquing fasteners, which compresses insulation and creates leaks
- Cutting panels with inappropriate blades, causing edge damage
Common Mistakes When Installing Sandwich Panel Roofs
Installation errors can compromise both performance and warranty coverage. Proper training prevents 80% of common installation problems, making contractor selection critical for project success.
Critical fastening errors:
- Insufficient fastener penetration: Must penetrate structural deck by minimum 3/4 inch
- Incorrect fastener spacing: Too wide allows panel lifting, too close creates stress concentrations
- Missing edge fasteners: Panel edges carry highest wind loads and require specific fastening patterns
- Wrong fastener type: Using standard screws instead of self-sealing fasteners
Sealing and weatherproofing mistakes:
- Applying sealant in wet conditions, preventing proper adhesion
- Using incompatible sealants that don't bond to panel materials
- Insufficient sealant quantity at panel overlaps
- Failing to tool sealant joints for proper weather seal
Structural installation errors:
- Installing panels without proper structural support at edges
- Ignoring thermal expansion requirements
- Incorrect panel orientation relative to prevailing winds
- Inadequate slope for water drainage
Quality control failures:
- Skipping manufacturer's installation training requirements
- Not following approved installation drawings
- Failing to document installation for warranty compliance
- Installing damaged panels without repair or replacement
Prevention strategies:
- Use only manufacturer-certified installers
- Require installation quality checklists
- Schedule inspections at critical installation milestones
- Maintain detailed photo documentation of installation process
Sandwich Panel Roof vs Traditional Roofing: Which is Better
The choice between sandwich panels and traditional roofing systems depends on project priorities including cost, performance, and construction timeline. Sandwich panels offer superior thermal performance and faster installation, while traditional systems may have lower initial costs.
Performance comparison:
| Factor | Sandwich Panels | Traditional Roofing |
|---|---|---|
| Installation Speed | 3-5 days typical | 7-14 days typical |
| Thermal Performance | R-20 to R-40 continuous | R-15 to R-30 with bridges |
| Initial Cost | Higher ($12-18/sq ft) | Lower ($8-12/sq ft) |
| Energy Performance | 20-30% better | Baseline |
| Maintenance | Low (inspect annually) | Moderate (membrane replacement) |
Advantages of sandwich panels:
- Single-source responsibility: One manufacturer warrants entire system
- Faster installation: Reduces construction financing costs
- Superior insulation: Eliminates thermal bridging common in traditional systems
- Structural efficiency: Panels contribute to building's structural capacity
Traditional roofing advantages:
- Lower initial cost: Especially for simple rectangular buildings
- Familiar installation: More contractors available
- Repair flexibility: Individual components can be replaced
- Proven track record: Decades of performance data available
Choose sandwich panels when:
- Energy efficiency is a priority
- Fast construction schedule is required
- Building has complex geometry
- Single-source warranty is desired
Choose traditional roofing when:
- Initial cost is the primary concern
- Local expertise with sandwich panels is limited
- Building requires frequent roof penetrations
- Phased construction is planned
For thickness selection guidance, see our guide on choosing sandwich panel thickness.
Sandwich Panel Roof Leaking Problems and Solutions
Leak prevention requires understanding common failure modes and implementing proper installation details. Most sandwich panel roof leaks occur at joints and penetrations, not through the panels themselves.
Primary leak sources:
- Panel side laps: Inadequate sealant or improper overlap
- End laps: Insufficient overlap length or missing sealant
- Ridge and eave details: Improper flashing installation
- Penetrations: Inadequate sealing around roof-mounted equipment
Leak detection methods:
- Visual inspection during rain events
- Electronic leak detection for concealed areas
- Thermal imaging to identify wet insulation
- Smoke testing for air infiltration paths
Repair procedures by leak type:
Side lap leaks:
- Clean existing joint of debris and failed sealant
- Apply primer if required by sealant manufacturer
- Install new structural sealant with proper tooling
- Allow full cure time before weather exposure
Penetration leaks:
- Remove equipment if necessary for access
- Install proper base flashing extending under panels
- Apply compatible sealant around penetration
- Install storm collar or cover flashing as appropriate
Prevention strategies:
- Use only manufacturer-approved sealants
- Follow proper surface preparation procedures
- Maintain sealant manufacturer's recommended replacement schedule
- Perform annual inspections focusing on joint areas
When to call professionals:
- Leaks affecting building contents or operations
- Multiple leak locations indicating systematic problems
- Warranty work requiring manufacturer involvement
- Structural damage from water infiltration
How to Seal Sandwich Panel Roof Joints Properly
Proper joint sealing is critical for long-term weather resistance and requires specific materials and techniques. Joint failure accounts for 75% of sandwich panel roof problems, making proper sealing technique essential for system performance.
Sealant selection criteria:
- Structural sealants: For load-bearing joints, typically polyurethane-based
- Weather sealants: For exposed joints, must resist UV and temperature cycling
- Compatibility: Must bond to both panel materials without primer when possible
- Movement capability: Must accommodate thermal expansion without failure
Joint preparation steps:
- Clean surfaces – remove all dirt, oil, and loose material
- Dry thoroughly – moisture prevents proper sealant adhesion
- Apply primer if required by sealant manufacturer
- Install backer rod for deep joints to control sealant depth
Application technique:
- Cut sealant tube tip to match joint width
- Apply continuous bead without gaps or air bubbles
- Tool immediately to ensure proper surface contact
- Remove excess sealant before skinning begins
- Protect from moisture during cure period
Quality control measures:
- Maintain consistent bead size throughout joint length
- Ensure complete adhesion to both joint surfaces
- Verify proper cure before weather exposure
- Document sealant batch numbers for warranty tracking
Common sealing errors:
- Applying sealant over dirty or wet surfaces
- Using expired sealant with reduced adhesion properties
- Insufficient sealant quantity leaving gaps in coverage
- Disturbing sealant during initial cure period
Maintenance requirements:
- Annual inspection of all sealed joints
- Re-sealing every 10-15 years depending on sealant type
- Immediate repair of any cracked or separated sealant
- Documentation of all maintenance for warranty compliance
Sandwich Panel Roof Installation in Cold Weather
Cold weather installation requires modified procedures and materials to ensure proper performance. Temperatures below 40°F significantly affect sealant performance and require special considerations for successful installation.
Temperature-related challenges:
- Sealant performance: Most sealants require minimum 40°F for proper cure
- Material handling: Cold panels become more brittle and prone to damage
- Worker safety: Icy surfaces increase fall risks
- Equipment operation: Hydraulic systems may require cold weather fluids
Cold weather modifications:
- Use cold-weather sealants formulated for low-temperature application
- Pre-condition materials by storing in heated areas before installation
- Extend cure times – allow 50% longer cure periods in cold conditions
- Monitor weather forecasts – avoid installation before precipitation events
Installation procedure changes:
- Warm panels before installation when possible to reduce brittleness
- Use heated storage for sealants and maintain minimum application temperature
- Install temporary weather protection to shield work areas from wind and precipitation
- Schedule critical sealing work during warmest part of day
Safety considerations:
- Increase fall protection measures due to slippery conditions
- Provide heated break areas for workers
- Monitor workers for cold stress symptoms
- Use equipment rated for cold weather operation
Quality assurance in cold weather:
- Perform additional sealant adhesion testing
- Extend inspection schedules to verify proper cure
- Document temperature conditions during installation
- Plan for potential spring repairs if cold weather compromises installation
Minimum temperature guidelines:
- Structural sealants: Typically 35°F minimum application temperature
- Weather sealants: May be applied to 20°F with appropriate products
- Panel handling: Exercise extra care below 32°F due to increased brittleness
For professional cold weather installation services, see our sandwich panel installation service guide.
Who Should Install Sandwich Panel Roofs: Professionals or DIY
Professional installation is strongly recommended for most sandwich panel roof projects due to safety requirements, warranty considerations, and technical complexity. DIY installation voids most manufacturer warranties and may not meet building code requirements.
Professional installation advantages:
- Warranty protection: Maintains full manufacturer warranty coverage
- Code compliance: Ensures installation meets all building code requirements
- Safety expertise: Professional crews have proper equipment and training
- Quality assurance: Experienced installers avoid common mistakes
- Insurance coverage: Professional liability protection for installation defects
When professional installation is required:
- Buildings over 5,000 square feet
- Roof heights exceeding 20 feet
- Complex roof geometries with multiple levels
- Commercial or industrial applications
- Projects requiring building permits
Limited DIY scenarios:
- Small agricultural buildings under 2,000 square feet
- Single-story residential applications with simple geometry
- Experienced contractors with metal roofing background
- Non-critical applications where warranty is not essential
DIY risk factors:
- Safety hazards: Fall risks and equipment operation dangers
- Installation errors: Improper fastening and sealing techniques
- Warranty voids: Most manufacturers require certified installer programs
- Code violations: May not meet structural or energy code requirements
- Insurance issues: Homeowner policies may not cover DIY installation problems
Contractor selection criteria:
- Manufacturer certification and training completion
- Minimum 5 years experience with sandwich panel systems
- Proper licensing and insurance coverage
- Local references from similar projects
- Warranty support and service capabilities
Cost considerations:
- Professional installation adds 25-40% to material costs
- DIY savings may be offset by warranty loss and potential repairs
- Insurance discounts may be available for professional installation
- Financing options often require professional installation
Sandwich Panel Roof Warranty and Maintenance Requirements
Warranty coverage and maintenance requirements vary by manufacturer but typically require professional installation and regular maintenance documentation. Proper maintenance can extend roof life from 20 to 40+ years while maintaining warranty coverage.
Typical warranty coverage:
- Material defects: 15-20 years for panel materials and coatings
- Thermal performance: 10-15 years for insulation R-value retention
- Weather resistance: 10-20 years against leaks from material failure
- Structural performance: Varies by application and loading conditions
Warranty requirements:
- Certified installer: Must use manufacturer-approved installation contractor
- Approved materials: Only specified fasteners, sealants, and accessories
- Installation documentation: Photo documentation and inspection reports
- Regular maintenance: Annual inspections and documented maintenance
Annual maintenance checklist:
- Inspect all joints for sealant cracking or separation
- Check fasteners for looseness or corrosion
- Clear drainage systems of debris and obstructions
- Document findings with photos and written reports
- Perform minor repairs immediately to prevent damage progression
Maintenance intervals:
- Annual inspections: Required for warranty compliance
- Sealant replacement: Every 10-15 years depending on exposure
- Fastener inspection: Every 5 years in corrosive environments
- Panel cleaning: As needed to maintain appearance and performance
Common maintenance issues:
- Sealant degradation: UV exposure and thermal cycling cause gradual failure
- Fastener corrosion: Coastal and industrial environments accelerate corrosion
- Debris accumulation: Leaves and debris can block drainage and cause ponding
- Impact damage: Hail, falling branches, or equipment damage requires prompt repair
Maintenance cost planning:
- Budget 1-2% of roof cost annually for routine maintenance
- Major sealant replacement every 10-15 years at 15-25% of original cost
- Emergency repairs average $500-2,000 per incident
- Preventive maintenance reduces total lifecycle costs by 30-50%
For warranty details and maintenance services, consult our sandwich panel warranty guide.
Best Sandwich Panel Roof Brands and Manufacturers
Manufacturer selection affects both initial quality and long-term support availability. Choose manufacturers with local technical support and proven track records in your specific building type and climate conditions.
Top international manufacturers:
- Kingspan: Premium systems with superior thermal performance
- Metecno: Wide range of core materials and applications
- Tata Steel: Strong presence in Asian markets with local support
- ArcelorMittal: Global reach with consistent quality standards
Evaluation criteria for manufacturers:
- Technical support: Local engineering and installation support
- Warranty terms: Length and coverage of material and performance warranties
- Testing certifications: Fire resistance, structural performance, and thermal testing
- Installation network: Availability of certified installers in your region
Product specification factors:
- Core material options: PU, rockwool, or EPS based on application requirements
- Panel profiles: Structural depth and connection system design
- Coating systems: Durability and color retention in local climate
- Thickness range: Available options for thermal and structural requirements
Local manufacturer advantages:
- Reduced shipping costs: Lower transportation costs and faster delivery
- Technical support: Local engineering support and site visits
- Warranty service: Easier warranty claims and repair coordination
- Custom capabilities: Ability to modify standard products for specific needs
Quality verification methods:
- Request third-party test reports for thermal and structural performance
- Verify manufacturing certifications (ISO 9001, quality management systems)
- Check local project references and performance history
- Confirm availability of replacement parts and repair materials
For manufacturer options in Bangladesh, see our guide to sandwich panel suppliers.
Sandwich Panel Roof Installation on Metal Buildings
Metal building applications require specific installation details to accommodate structural movement and connection requirements. Pre-engineered metal buildings often require custom panel profiles to match building geometry and connection systems.
Metal building considerations:
- Structural movement: Buildings expand and contract with temperature changes
- Connection details: Panels must connect to structural purlins or girts
- Building codes: May require specific fire ratings or structural performance
- Thermal bridging: Metal structure can conduct heat around panel insulation
Installation modifications for metal buildings:
- Thermal breaks: Install thermal barrier strips between panels and structure
- Expansion joints: Provide movement accommodation at building expansion joints
- Fastener selection: Use appropriate fasteners for structural steel connections
- Vapor barriers: May be required based on building use and climate
Common metal building applications:
- Warehouses: Large clear spans with minimal roof penetrations
- Manufacturing facilities: May require enhanced fire resistance or acoustic performance
- Agricultural buildings: Cost-effective solutions with basic performance requirements
- Aircraft hangars: Large spans requiring structural contribution from panels
Design coordination requirements:
- Verify structural adequacy for panel loads and attachment forces
- Coordinate panel layout with structural framing and building geometry
- Plan penetrations for mechanical equipment and utilities
- Consider maintenance access requirements for building systems
Performance benefits in metal buildings:
- Structural contribution: Panels can reduce structural steel requirements
- Thermal performance: Eliminates thermal bridging through structural members
- Speed of construction: Faster enclosure compared to separate roofing and insulation
- Single-source responsibility: Simplified coordination and warranty coverage
For metal building applications, see our factory building panel guide.
How Long Does Sandwich Panel Roof Installation Take
Installation duration depends on building size, complexity, weather conditions, and crew experience. Typical installation rates range from 2,000-4,000 square feet per day for experienced crews working on straightforward projects.
Timeline factors:
- Building size: Larger buildings benefit from economies of scale
- Roof complexity: Multiple levels and penetrations slow installation
- Weather conditions: Wind and precipitation stop installation work
- Crew size and experience: Experienced crews work 30-50% faster
- Material delivery: Staged delivery prevents installation delays
Typical project timelines:
Small buildings (under 5,000 sq ft):
- Simple geometry: 2-3 days
- Complex geometry: 3-5 days
- Weather delays: Add 1-2 days
Medium buildings (5,000-20,000 sq ft):
- Simple geometry: 5-8 days
- Complex geometry: 8-12 days
- Weather delays: Add 2-4 days
Large buildings (over 20,000 sq ft):
- Simple geometry: 10-15 days
- Complex geometry: 15-25 days
- Weather delays: Add 5-10 days
Installation sequence timing:
- Setup and safety (Day 1): Equipment positioning and fall protection
- Panel installation (Days 2-X): Systematic panel installation from low to high
- Detail work (Final 1-2 days): Ridge caps, gutters, and penetration flashings
- Cleanup and inspection (Final day): Site cleanup and quality verification
Factors that slow installation:
- High winds: Installation stops at 25-30 mph sustained winds
- Precipitation: Wet conditions prevent sealant application
- Temperature extremes: Cold weather slows sealant cure and material handling
- Site access: Restricted crane access increases material handling time
Acceleration strategies:
- Larger crews: Additional crews can work simultaneously on large buildings
- Pre-fabricated details: Shop-fabricated penetrations and trim pieces
- Material staging: Proper sequencing reduces handling time
- Weather planning: Flexible scheduling around weather forecasts
Frequently Asked Questions
What is the minimum slope required for sandwich panel roofs?
The minimum slope is 1:40 (1.4 degrees) for proper water drainage. Steeper slopes improve drainage performance and reduce ponding risks, with 1:20 slope recommended for areas with heavy rainfall.
Can sandwich panels be installed over existing roofing?
Yes, panels can be installed over existing roofs if the structure can support the additional load and proper ventilation is provided to prevent condensation. A structural engineer should verify adequacy.
How do you cut sandwich panels without damaging the insulation?
Use a circular saw with a fine-tooth metal cutting blade at slow speed. Support both sides of the cut to prevent panel sagging. Seal cut edges immediately to prevent moisture infiltration into the core.
What happens if panels get wet during installation?
Stop installation immediately and allow panels to dry completely before continuing. Wet insulation cores can lead to reduced thermal performance and potential mold growth. Document any water exposure for warranty purposes.
Are special fasteners required for sandwich panel installation?
Yes, use only manufacturer-approved self-drilling fasteners with integral sealing washers. Standard wood or metal screws lack proper sealing and may not provide adequate holding power.
How do you handle thermal expansion in large roofs?
Install expansion joints every 150-200 feet and use sliding connections at one end of each panel run. Allow 1/4 inch movement per 100 feet of panel length for temperature variations.
Can sandwich panels be repaired if damaged?
Minor damage can be repaired with patch panels and appropriate sealants. Major damage typically requires panel replacement. Keep spare panels from original installation for future repairs to ensure color matching.
What fire rating do sandwich panel roofs provide?
Fire ratings vary by core material and thickness. Rockwool cores typically provide Class A fire ratings, while PU and EPS cores may have lower ratings. Verify requirements with local building codes.
How do you prevent condensation in sandwich panel roofs?
Install proper vapor barriers on the warm side of the insulation and ensure adequate ventilation. Control interior humidity levels and avoid thermal bridging through the building envelope.
What warranty coverage is typical for sandwich panel roofs?
Material warranties typically range from 15-20 years for panels and coatings. Installation warranties are usually 2-5 years. Weather resistance warranties may be 10-20 years depending on the manufacturer and application.
Can sandwich panels support rooftop equipment?
Panels can support light equipment when properly designed and installed. Heavy equipment requires additional structural support independent of the panels. Consult a structural engineer for equipment loads over 20 pounds per square foot.
What maintenance is required for sandwich panel roofs?
Annual inspections of joints and fasteners, cleaning of drainage systems, and prompt repair of any damage. Sealant replacement every 10-15 years maintains weather resistance and warranty coverage.
Conclusion
Installation sandwich panel roof detail requires careful attention to fastening patterns, sealing techniques, and structural requirements to achieve optimal performance. Success depends on proper material selection, professional installation, and regular maintenance throughout the roof's service life.
The key factors for successful installation include using manufacturer-certified installers, following approved installation procedures, and maintaining detailed documentation for warranty compliance. While initial costs may be higher than traditional roofing systems, the combination of superior thermal performance, faster installation, and reduced maintenance requirements provides excellent long-term value.
Next steps for your project:
- Evaluate your specific building requirements and climate conditions
- Obtain quotes from certified installers with relevant experience
- Review manufacturer warranties and maintenance requirements
- Plan installation timing around weather conditions and project schedules
For professional installation services and detailed project planning, consult with certified sandwich panel contractors who can ensure proper installation and warranty compliance for your specific application.
SEO Meta Title: Installation Sandwich Panel Roof Detail Guide 2026
Meta Description: Complete guide to sandwich panel roof installation details. Learn proper techniques, costs, tools needed, and common mistakes to avoid for successful roofing projects.