Last updated: July 31, 2026

Quick Answer
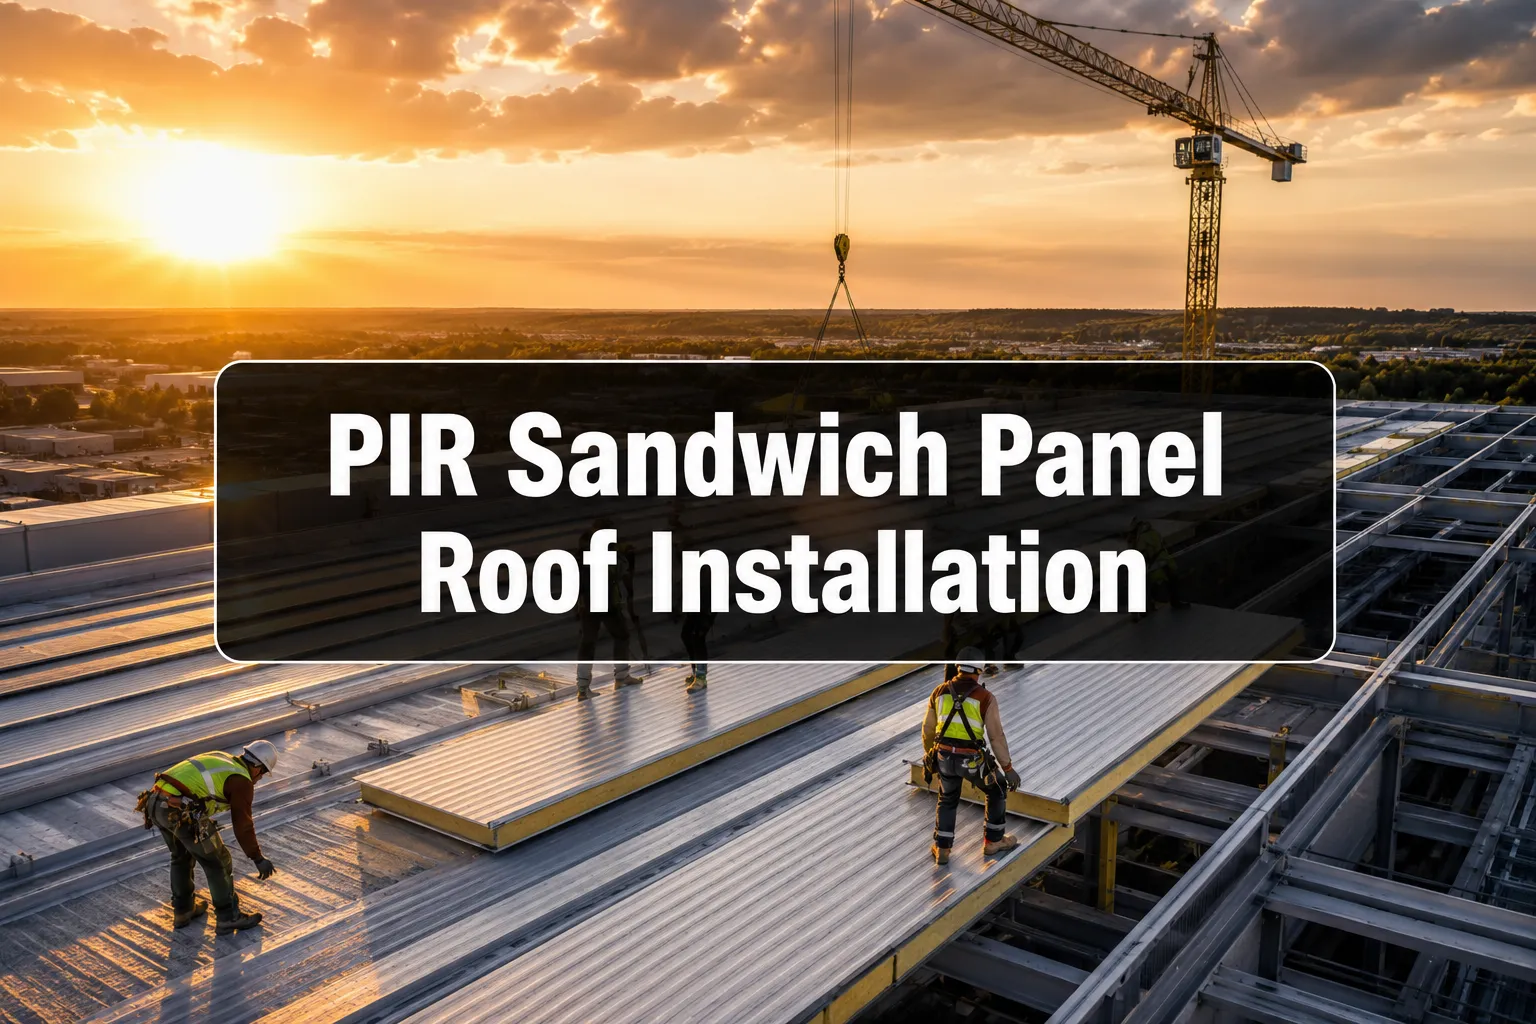
PIR sandwich panel roof installation involves mounting polyisocyanurate foam-core panels with metal facings onto a structural frame using specialized fasteners and sealants. The process typically takes 2-5 days for standard buildings and requires proper planning, weatherproofing, and professional-grade tools to achieve optimal thermal performance and weathertight seals.
Key Takeaways
- PIR panels offer superior thermal insulation with R-values of 6-8 per inch, outperforming traditional roofing materials
- Professional installation costs range from $8-15 per square foot including materials and labor
- Installation requires specialized fasteners, sealants, and proper overlap techniques for weatherproofing
- Cold weather installation below 40°F requires modified adhesives and extended curing times
- DIY installation is possible for small structures but professional installation ensures warranty compliance
- Proper joint sealing and flashing details are critical for preventing water infiltration
- PIR panels typically last 25-30 years with minimal maintenance when properly installed
- Fire-rated PIR panels meet building codes for most commercial and industrial applications
What Is a PIR Sandwich Panel and How Does It Work
PIR sandwich panels consist of a polyisocyanurate foam core sandwiched between two metal facings, typically steel or aluminum. The polyisocyanurate foam provides exceptional thermal insulation while the metal skins offer structural strength and weather protection.
The panels work by creating a continuous insulation barrier that minimizes thermal bridging. The closed-cell foam structure traps air, providing R-values between 6-8 per inch of thickness. The metal facings distribute loads across the panel width and provide attachment points for fasteners.
Key components include:
- Polyisocyanurate foam core (density 2-4 pounds per cubic foot)
- Galvanized steel or aluminum facings (0.5-1.0mm thick)
- Tongue-and-groove or overlap joint systems
- Integrated vapor barriers in some configurations
PIR panels excel in applications requiring high thermal performance, such as cold storage facilities, warehouses, and energy-efficient buildings. The material maintains its insulation properties across a wide temperature range from -40°F to 200°F.
PIR Sandwich Panel Roof Installation Step by Step Guide
Phase 1: Pre-Installation Preparation
- Verify structural adequacy for panel loads (typically 2-4 PSF)
- Install roof deck or purlins at specified spacing (4-8 feet on center)
- Apply air/vapor barrier if required by design
- Mark panel layout and cutting requirements
Phase 2: Panel Installation
- Start installation at the low end of the roof slope
- Position first panel with proper overhang (typically 1-2 inches)
- Secure panels with self-drilling fasteners at 12-18 inch centers
- Install subsequent panels with proper overlap (minimum 6 inches)
- Apply structural adhesive or sealant at all joints
Phase 3: Sealing and Finishing
- Install ridge caps and edge trim pieces
- Apply weatherproof sealant at all penetrations
- Install gutters and downspouts as required
- Conduct final inspection for proper fastening and sealing
Critical installation requirements include maintaining consistent fastener patterns, ensuring proper panel alignment, and achieving weathertight seals at all joints. Panel cutting should be done with fine-tooth blades to prevent foam damage.
For comprehensive installation techniques, refer to our complete installation guide for sandwich panel roofs.
How Much Does PIR Sandwich Panel Roof Installation Cost
PIR sandwich panel roof installation costs vary significantly based on project size, panel thickness, and regional labor rates. Material costs typically account for 60-70% of total project expense.
Cost breakdown per square foot:
- Materials: $5-9 (panels, fasteners, sealants, trim)
- Labor: $3-6 (installation, cutting, sealing)
- Total installed cost: $8-15 per square foot
Factors affecting cost:
- Panel thickness (2-6 inches) – thicker panels cost 20-40% more
- Building complexity – multiple penetrations add $2-5 per square foot
- Accessibility – difficult access increases labor costs by 15-25%
- Regional variations – urban areas typically 10-20% higher than rural
Project size impacts:
- Small projects (under 5,000 SF): $12-18 per square foot
- Medium projects (5,000-20,000 SF): $9-13 per square foot
- Large projects (over 20,000 SF): $7-11 per square foot
Additional costs include permits ($500-2,000), structural modifications if required ($2-8 per square foot), and crane rental for large panels ($800-1,500 per day).
For detailed cost analysis in your region, see our sandwich panel installation cost guide.
Best Tools and Equipment Needed for PIR Panel Roof Installation
Essential hand tools:
- Cordless drill with hex bits and Phillips heads
- Circular saw with fine-tooth metal cutting blade (80+ teeth)
- Measuring tape (minimum 25 feet)
- Chalk line for layout marking
- Utility knife with replaceable blades
- Level (4-foot minimum for panel alignment)
Power tools and equipment:
- Self-drilling screw gun with depth control
- Reciprocating saw for trimming and modifications
- Caulk gun for sealant application
- Rivet gun for trim attachment
- Portable band saw for precise cuts
Safety equipment:
- Fall protection harnesses and anchor points
- Non-slip safety boots with good tread
- Hard hats and safety glasses
- Cut-resistant gloves for handling metal edges
Lifting and positioning:
- Crane or telehandler for panels over 20 feet
- Panel lifters or suction cups for manual handling
- Scaffolding or mobile platforms for access
Specialized fasteners and materials:
- Self-drilling screws with EPDM washers (12-14 gauge)
- Structural adhesive compatible with PIR foam
- Butyl tape for temporary sealing
- Polyurethane or silicone sealants for final weatherproofing
Choose tools rated for the specific panel gauge and ensure all cutting equipment produces clean edges without damaging the foam core. Proper tool selection reduces installation time by 20-30% compared to using inadequate equipment.
PIR vs Polyurethane Sandwich Panels: Which Is Better
PIR and polyurethane (PU) panels both offer excellent insulation but differ in performance characteristics and cost. PIR panels generally provide superior fire resistance and thermal stability, while PU panels offer slightly better adhesion properties.
PIR panel advantages:
- Higher fire resistance (Class A rating possible)
- Better dimensional stability at temperature extremes
- Lower smoke generation in fire conditions
- Superior long-term thermal performance retention
Polyurethane panel advantages:
- Better adhesion between core and facings
- Slightly lower material cost (5-10% less)
- Better performance in very low temperature applications
- More flexible in handling and installation
Performance comparison:
- Thermal conductivity: PIR 0.022-0.025 W/mK vs PU 0.023-0.028 W/mK
- Temperature range: PIR -40°F to 200°F vs PU -60°F to 180°F
- Fire rating: PIR typically Class A vs PU typically Class B or C
- Lifespan: Both 25-30 years with proper installation
Choose PIR panels if:
- Fire resistance is critical for building codes
- High-temperature applications are expected
- Long-term thermal performance is prioritized
- Budget allows for 5-10% premium cost
Choose PU panels if:
- Extreme cold weather conditions exist
- Lower initial cost is important
- Flexibility during installation is needed
- Fire ratings are less stringent
For most commercial roofing applications, PIR panels provide better overall value despite higher initial cost due to superior fire performance and thermal stability.
How Long Does PIR Sandwich Panel Roof Installation Take
PIR sandwich panel roof installation typically takes 2-5 days for standard commercial buildings, depending on size, complexity, and weather conditions. Installation speed averages 1,000-2,000 square feet per day with a skilled crew.
Timeline factors:
- Building size: 500-1,000 SF per installer per day
- Panel complexity: Simple rectangles install 40% faster than cut panels
- Weather conditions: Rain delays installation, wind over 25 mph stops work
- Crew experience: Experienced teams work 25-35% faster than novice crews
Typical project timelines:
- Small building (2,000-5,000 SF): 2-3 days
- Medium building (5,000-15,000 SF): 4-7 days
- Large building (15,000+ SF): 1-3 weeks
- Complex buildings with multiple levels: Add 30-50% to base timeline
Daily installation phases:
- Day 1: Layout, first panel row, establish alignment
- Day 2-3: Main field panels, maintain consistent progress
- Final day: Ridge caps, trim, sealant application, cleanup
Common delays:
- Weather (rain, high winds): 1-3 days typical
- Material delivery issues: 1-2 days
- Structural modifications needed: 2-5 days additional
- Permit or inspection delays: 1-3 days
Plan for 20% contingency time in project schedules to account for weather and unforeseen complications. Winter installations may take 25-40% longer due to shorter daylight hours and weather delays.
Common Mistakes to Avoid When Installing PIR Roof Panels
Fastener placement errors represent the most frequent installation mistake. Fasteners placed too close to panel edges (within 2 inches) can cause cracking, while insufficient fastener density leads to wind uplift failures.
Critical mistakes to avoid:
Improper panel cutting:
- Using coarse-tooth blades that damage foam core
- Cutting panels in cold weather without allowing thermal expansion
- Failing to seal cut edges immediately after cutting
Inadequate weatherproofing:
- Skipping sealant at panel overlaps
- Using incompatible sealants that don't adhere to panel coatings
- Insufficient overlap distances (minimum 6 inches required)
Structural issues:
- Installing panels on inadequate structural support
- Ignoring thermal expansion requirements (1/4 inch per 100 feet)
- Overdriving fasteners that compress insulation
Safety violations:
- Working in high winds without proper fall protection
- Lifting oversized panels without mechanical assistance
- Ignoring manufacturer's weight limits for manual handling
Quality control failures:
- Skipping pre-installation moisture checks on existing structures
- Failing to verify panel dimensions before installation
- Installing damaged panels without proper repairs
Prevention strategies:
- Follow manufacturer specifications exactly
- Conduct daily quality inspections during installation
- Use only approved fasteners and sealants
- Maintain proper tool calibration for consistent results
The most expensive mistake is inadequate joint sealing, which can require complete panel removal and reinstallation if water infiltration occurs.
PIR Sandwich Panel Roof Installation Problems and Solutions
Water infiltration represents the most serious installation problem, typically occurring at panel joints, penetrations, or damaged areas. Early detection and proper repair prevent structural damage and insulation degradation.
Common problems and solutions:
Panel alignment issues:
- Problem: Panels don't align properly causing gaps
- Solution: Use string lines and laser levels for consistent alignment
- Prevention: Verify structural frame dimensions before panel delivery
Fastener problems:
- Problem: Fasteners backing out or failing over time
- Solution: Use proper fastener length and torque specifications
- Prevention: Choose fasteners rated for specific panel gauge and wind loads
Thermal bridging:
- Problem: Heat loss through structural connections
- Solution: Install thermal breaks at structural connections
- Prevention: Design continuous insulation details in original plans
Condensation issues:
- Problem: Moisture accumulation inside building
- Solution: Install proper vapor barriers and ventilation
- Prevention: Calculate dew point and design appropriate vapor control
Panel damage during installation:
- Problem: Dented or punctured panels from handling
- Solution: Repair small damage with compatible patches and sealants
- Prevention: Use proper lifting equipment and protect panels during storage
Wind uplift concerns:
- Problem: Panels lifting in high winds
- Solution: Increase fastener density and use structural adhesives
- Prevention: Calculate wind loads and specify appropriate fastening patterns
Emergency repairs:
- Temporary fixes: Use butyl tape and plastic sheeting for immediate water protection
- Permanent solutions: Replace damaged sections with properly sealed connections
- Documentation: Photograph all repairs for warranty and maintenance records
Address problems immediately to prevent secondary damage. Most installation issues result from inadequate preparation or deviation from manufacturer specifications.
Do I Need a Professional or Can I Install PIR Panels Myself
DIY PIR panel installation is feasible for small, simple structures under 2,000 square feet, but professional installation is recommended for most commercial applications due to safety requirements and warranty considerations.
DIY installation suitable for:
- Single-story buildings with simple rectangular shapes
- Structures under 15 feet in height
- Projects where building codes allow owner installation
- Experienced builders with proper safety equipment
Professional installation required for:
- Buildings over 2,000 square feet or 15 feet high
- Structures requiring crane access for panel placement
- Projects with complex roof shapes or multiple penetrations
- Applications where manufacturer warranty requires certified installation
DIY skill requirements:
- Experience with metal roofing or siding installation
- Ability to read and follow technical specifications
- Access to proper tools and safety equipment
- Understanding of local building codes and permit requirements
Professional advantages:
- Warranty coverage typically 2-10 years vs. no warranty for DIY
- Insurance coverage for installation defects
- Proper equipment for safe installation at height
- Experience with weatherproofing details and code compliance
Cost comparison:
- DIY material cost: $5-9 per square foot
- Professional installation: $8-15 per square foot
- Potential DIY mistakes: $3-8 per square foot in repairs
When to hire professionals:
- Complex building shapes or multiple roof levels
- Local codes require licensed contractor installation
- Project timeline is critical for business operations
- Long-term warranty coverage is important
For guidance on professional services, see our sandwich panel installation service guide.
PIR Sandwich Panel Roof Warranty and Lifespan
PIR sandwich panels typically carry 15-25 year material warranties and achieve 25-30 year service life when properly installed and maintained. Warranty coverage varies significantly between manufacturers and installation methods.
Standard warranty coverage:
- Material defects: 15-25 years (manufacturing flaws, delamination)
- Thermal performance: 10-15 years (R-value retention guarantee)
- Weather resistance: 10-20 years (coating and sealant performance)
- Structural integrity: 5-10 years (panel strength and fastener pullout)
Warranty requirements:
- Professional installation by certified contractors
- Use of manufacturer-approved fasteners and sealants
- Compliance with installation specifications
- Regular maintenance and inspection records
Factors affecting lifespan:
- Climate conditions: Coastal environments reduce lifespan 15-25%
- Building use: High-moisture applications may reduce life 10-20%
- Maintenance quality: Proper maintenance extends life 5-10 years
- Installation quality: Poor installation reduces lifespan by 30-50%
Expected performance timeline:
- Years 1-10: Minimal maintenance, full performance
- Years 10-20: Periodic sealant renewal, minor repairs
- Years 20-30: Increased maintenance, potential panel replacement
Warranty exclusions:
- Damage from extreme weather events
- Normal wear and weathering of coatings
- Damage from building settlement or structural movement
- Modifications or repairs not performed by qualified contractors
Maintenance requirements for warranty:
- Annual inspections of sealants and fasteners
- Immediate repair of any punctures or damage
- Cleaning of panels per manufacturer specifications
- Documentation of all maintenance activities
For specific warranty terms, review manufacturer documentation and ensure compliance with all installation and maintenance requirements.
PIR Roof Panels Installation in Cold Weather Issues
Cold weather installation below 40°F requires modified procedures and materials to ensure proper panel performance and weatherproofing. Low temperatures affect sealant curing, panel flexibility, and worker safety.
Temperature-related challenges:
- Sealants cure slowly or incompletely below 40°F
- Panel materials become more brittle and prone to cracking
- Condensation risk increases during temperature transitions
- Worker productivity decreases due to safety and comfort issues
Cold weather modifications:
- Use low-temperature sealants rated for installation below 32°F
- Allow panels to acclimate to ambient temperature before installation
- Extend curing times for adhesives and sealants by 50-100%
- Heat enclosed spaces to accelerate sealant curing when possible
Material considerations:
- Store sealants and adhesives in heated areas before use
- Warm application tools to improve sealant flow
- Use winter-grade fasteners with enhanced corrosion protection
- Select panels with flexible coatings that resist cold-weather cracking
Installation procedures:
- Plan shorter work days due to limited daylight and weather windows
- Install temporary weather protection for critical sealing operations
- Monitor weather forecasts and avoid installation during storms
- Focus on weatherproofing completion before temperature drops
Safety requirements:
- Provide heated break areas for workers
- Use anti-slip footwear appropriate for cold and potentially icy conditions
- Implement additional fall protection due to reduced dexterity
- Monitor workers for cold stress symptoms
Quality control:
- Inspect all sealant joints more frequently during cold installation
- Plan for spring inspection and touch-up of winter installations
- Document temperature conditions during critical sealing operations
- Consider warranty implications of cold-weather installation
Avoid installation when temperatures drop below 20°F or during precipitation. Plan cold-weather projects with 25-40% additional time for weather delays and modified procedures.
What Buildings Are PIR Sandwich Panels Best For
PIR sandwich panels excel in buildings requiring superior thermal performance, fire resistance, and long-term durability. The panels are particularly well-suited for temperature-controlled environments and energy-efficient construction.
Ideal applications:
- Cold storage and freezer facilities requiring continuous insulation
- Food processing plants needing washable, sanitary surfaces
- Warehouses and distribution centers prioritizing energy efficiency
- Manufacturing facilities with temperature-sensitive processes
Commercial building types:
- Retail stores and shopping centers
- Office buildings pursuing LEED certification
- Data centers requiring precise climate control
- Healthcare facilities needing infection control surfaces
Industrial applications:
- Chemical processing plants requiring fire-resistant construction
- Pharmaceutical manufacturing with cleanroom requirements
- Agricultural buildings housing livestock or crops
- Aircraft hangars and large-span structures
Specialized uses:
- Clean rooms and laboratory facilities
- Gymnasiums and recreational facilities
- Schools and institutional buildings
- Modular and prefabricated construction
Building characteristics favoring PIR panels:
- Large roof areas (over 5,000 square feet) for cost efficiency
- Single-story construction with minimal penetrations
- Buildings requiring high R-values (R-20 to R-40)
- Structures needing rapid construction timelines
Less suitable applications:
- Residential construction (cost and code limitations)
- Buildings with complex roof shapes requiring extensive cutting
- Structures subject to high impact loads or abuse
- Applications where natural materials are preferred for aesthetic reasons
For specific building applications, consider our guides on warehouse panels and factory building solutions.
How to Seal and Weatherproof PIR Panel Roof Joints
Proper joint sealing is critical for PIR panel roof performance, preventing water infiltration and maintaining thermal integrity. Use a multi-step sealing process with compatible materials for long-term weatherproofing.
Primary sealing system:
- Apply butyl tape at panel overlap before installation
- Install panels with minimum 6-inch overlap at ends
- Apply structural adhesive or sealant at all longitudinal joints
- Install mechanical fasteners through sealed areas
Sealant selection criteria:
- Structural glazing grade for high-stress applications
- UV resistance for 20+ year exterior exposure
- Adhesion compatibility with panel coatings
- Movement capability of ±25% for thermal expansion
Step-by-step sealing process:
Joint preparation:
- Clean all surfaces with isopropyl alcohol
- Remove any oil, dirt, or loose coating material
- Mask adjacent surfaces to ensure clean sealant lines
- Verify surface temperature is within sealant application range
Sealant application:
- Apply primer if required by sealant manufacturer
- Install backer rod for deep joints (over 1/4 inch)
- Apply sealant in continuous beads without voids
- Tool sealant surface for proper profile and adhesion
Critical sealing locations:
- Panel end laps (6-inch minimum overlap)
- Longitudinal side joints between panels
- Roof penetrations for equipment and utilities
- Ridge and eave terminations
- Expansion joints in long roof runs
Quality control:
- Inspect all sealant joints within 24 hours of application
- Test adhesion with small pull tests after initial cure
- Document sealant lot numbers and application dates
- Plan inspection schedule for ongoing maintenance
Common sealing failures:
- Three-sided adhesion causing sealant failure
- Inadequate surface preparation reducing adhesion
- Wrong sealant type for specific panel coating
- Insufficient sealant thickness for expected movement
Use only manufacturer-approved sealants to maintain warranty coverage. Plan for sealant renewal every 10-15 years as part of routine maintenance.
PIR Sandwich Panel Roof Maintenance and Care Tips
Regular maintenance extends PIR panel roof life to 25-30 years and prevents costly repairs from minor issues. Establish a systematic inspection and maintenance program within the first year of installation.
Annual inspection checklist:
- Examine all sealant joints for cracking or separation
- Check fasteners for backing out or corrosion
- Inspect panel surfaces for dents, scratches, or coating damage
- Verify proper drainage at gutters and roof drains
- Document any changes from previous inspections
Routine maintenance tasks:
Cleaning (semi-annually):
- Remove debris from roof surface and gutters
- Wash panels with mild detergent and low-pressure water
- Avoid abrasive cleaners that damage protective coatings
- Clean and inspect roof drains and overflow systems
Sealant maintenance (every 2-3 years):
- Touch up minor sealant cracks with compatible materials
- Replace deteriorated sealant sections completely
- Maintain expansion joints and movement areas
- Update maintenance log with all sealant work
Panel repairs:
- Address minor scratches with touch-up paint within 30 days
- Repair small punctures with manufacturer-approved patches
- Replace severely damaged panels rather than attempting major repairs
- Maintain proper overlap and sealing when replacing panels
Preventive measures:
- Trim tree branches away from roof surface
- Install walkway pads for regular maintenance access
- Protect panels during other building maintenance work
- Monitor building settlement that could stress panel connections
Professional maintenance services:
- Annual comprehensive inspection by qualified contractor
- Major sealant renewal every 10-15 years
- Coating renewal every 15-20 years in harsh environments
- Structural assessment if building modifications are planned
Maintenance cost planning:
- Annual routine maintenance: $0.10-0.25 per square foot
- Major sealant renewal: $1.00-2.00 per square foot
- Panel replacement: $8-12 per square foot including installation
Early intervention on minor issues prevents major problems. Maintain detailed records for warranty claims and future maintenance planning.
Frequently Asked Questions
How thick should PIR sandwich panels be for roof applications?
PIR roof panels typically range from 2-6 inches thick, with 4-inch panels being most common for commercial buildings. Thickness depends on required R-value, structural loads, and local energy codes. Choose thicker panels for better insulation but consider increased cost and structural requirements.
Can PIR panels be installed over existing roofing?
PIR panels can be installed over existing roofing if the structure can support additional loads and proper ventilation is maintained. Verify structural capacity and remove damaged roofing materials. Install new panels with appropriate fastener lengths to reach structural members.
What is the minimum roof slope for PIR sandwich panels?
PIR sandwich panels require minimum 1/4 inch per foot (2%) slope for proper drainage. Steeper slopes of 1/2 inch per foot or more provide better long-term performance. Flat installations are not recommended due to water pooling risks.
How do you cut PIR sandwich panels on site?
Cut PIR panels with fine-tooth circular saw blades (80+ teeth) or reciprocating saws with metal cutting blades. Support panels during cutting to prevent vibration. Seal all cut edges immediately with compatible sealant to prevent moisture infiltration into foam core.
Are PIR sandwich panels fire resistant?
PIR panels offer good fire resistance with Class A ratings possible depending on facing materials and core formulation. The polyisocyanurate foam is inherently fire-resistant and produces less smoke than other foam types. Verify specific fire ratings with manufacturer data.
What fasteners work best for PIR panel installation?
Use self-drilling screws with EPDM washers designed for specific panel gauge and structural material. Typical sizes are #12 or #14 screws with 3/4 inch washers. Fastener length should penetrate structural members by minimum 3/4 inch for steel, 1.5 inches for wood.
How do you prevent condensation with PIR roof panels?
Prevent condensation by installing proper vapor barriers on the warm side of insulation and ensuring adequate ventilation. Calculate dew point conditions and design vapor control systems accordingly. Continuous insulation reduces thermal bridging that causes condensation points.
Can PIR panels be painted or coated after installation?
PIR panels can be painted with compatible coatings that adhere to the existing finish. Clean surfaces thoroughly and use primer if recommended. Avoid coatings that trap moisture or are incompatible with panel materials. Consult manufacturer before applying aftermarket coatings.
What is the expected lifespan of PIR sandwich panel roofs?
PIR sandwich panel roofs typically last 25-30 years with proper installation and maintenance. Coastal environments may reduce lifespan to 20-25 years due to salt exposure. Regular maintenance and prompt repairs can extend service life beyond 30 years.
How do you handle thermal expansion in PIR panel roofs?
Allow 1/4 inch expansion per 100 feet of panel length by using expansion joints or flexible connections. Install panels at moderate temperatures when possible. Use sealants with high movement capability (±25%) at expansion locations.
Are there building code restrictions for PIR sandwich panels?
PIR sandwich panels must meet local building codes for fire resistance, structural loads, and energy efficiency. Most commercial applications accept PIR panels with proper engineering. Verify specific code requirements and obtain necessary permits before installation.
What maintenance is required for PIR sandwich panel roofs?
Annual inspections of sealants and fasteners are essential, along with semi-annual cleaning and debris removal. Touch up minor damage immediately and plan for major sealant renewal every 10-15 years. Maintain detailed maintenance records for warranty compliance.
Conclusion
PIR sandwich panel roof installation offers superior thermal performance and long-term durability when executed with proper planning and technique. The key to successful installation lies in understanding material properties, following manufacturer specifications, and maintaining rigorous quality control throughout the process.
Professional installation ensures warranty compliance and optimal performance, though experienced builders can tackle smaller projects with appropriate preparation. The investment in quality materials and proper installation techniques pays dividends through reduced energy costs, minimal maintenance requirements, and extended service life.
Next steps for your PIR panel roof project:
- Calculate thermal requirements and select appropriate panel thickness
- Obtain multiple quotes from certified installers for comparison
- Verify local building code requirements and permit needs
- Plan installation timing to avoid extreme weather conditions
- Establish maintenance schedule and budget for long-term care
For comprehensive project planning, explore our sandwich panel thickness guide and pricing resources to make informed decisions about your roofing investment.
SEO Meta Title: PIR Sandwich Panel Roof Installation Guide: Complete 2026 Manual