Last updated: July 31, 2026

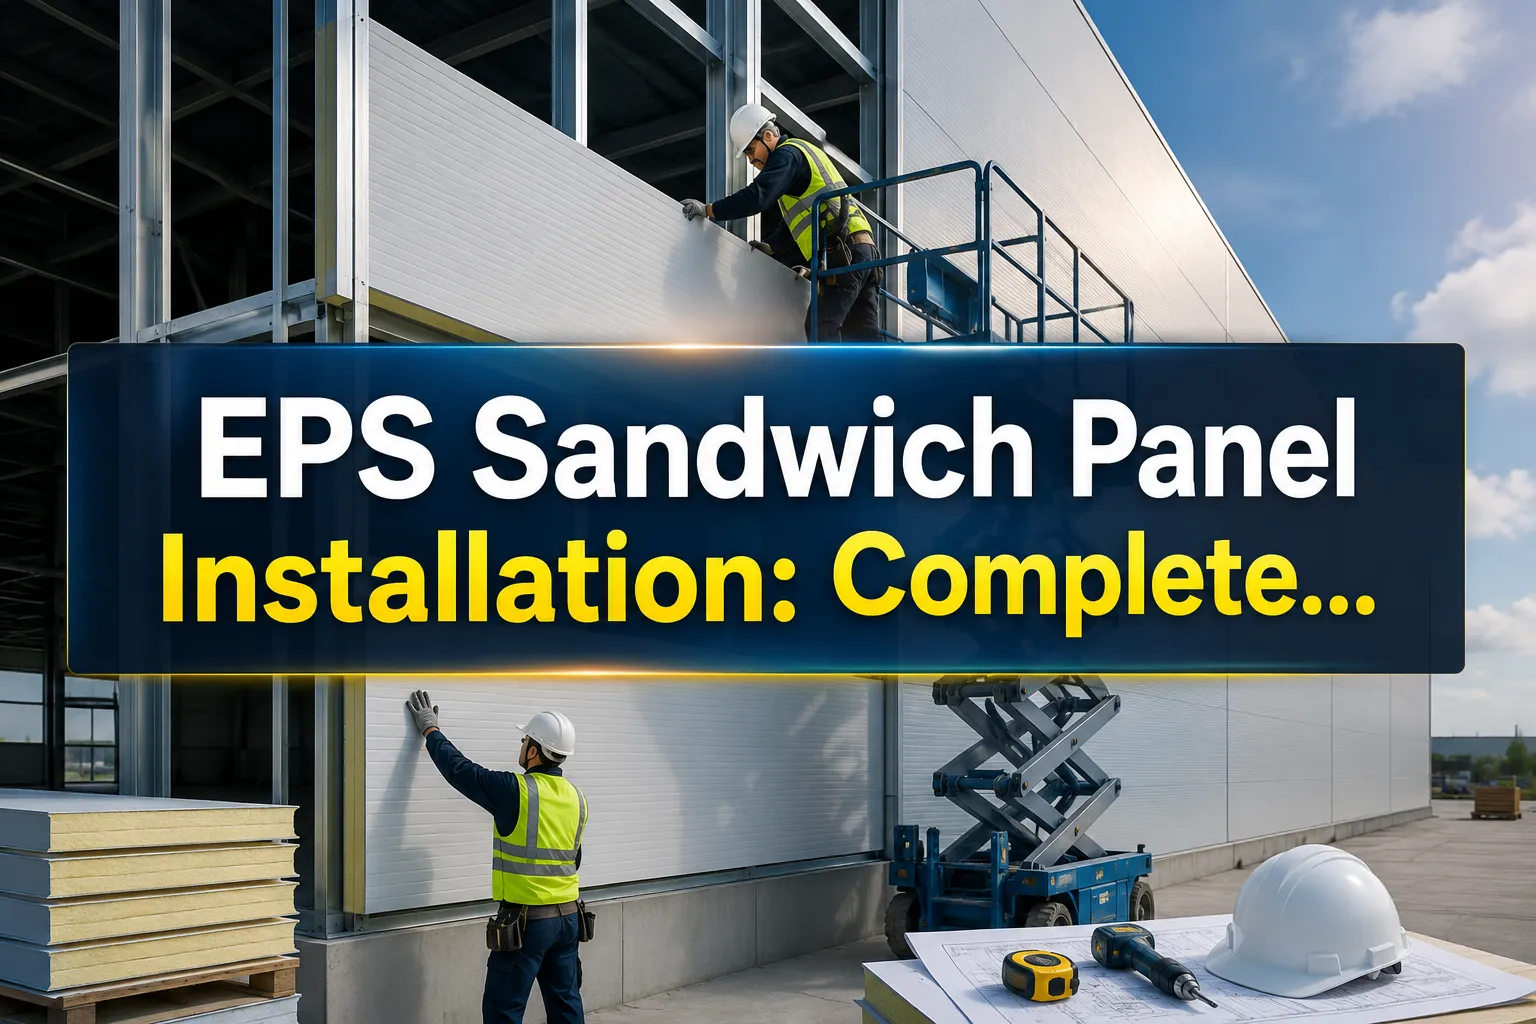
EPS sandwich panel installation involves mounting lightweight, insulated panels consisting of expanded polystyrene foam core between two metal facings onto building structures using mechanical fasteners and proper sealing techniques. Professional installation typically takes 2-4 hours per 100 square meters and requires specific tools, weather considerations, and adherence to fire safety codes.
Key Takeaways
- EPS sandwich panels combine 50-200mm expanded polystyrene core with steel facings for thermal insulation
- Installation costs range from $15-25 per square meter including labor and materials
- Essential tools include drill drivers, sealants, fasteners, and measuring equipment
- Proper panel overlap of 150-200mm and weatherproofing prevents thermal bridging
- Professional installation recommended for buildings over 1000 square meters or complex designs
- Installation should avoid temperatures below 5°C or during high winds above 25 mph
- Fire-rated EPS panels meet Class B building codes in most commercial applications
- Common mistakes include inadequate sealing, wrong fastener spacing, and poor alignment
What Are EPS Sandwich Panels and How Do They Work
EPS sandwich panels are composite building materials featuring an expanded polystyrene foam core bonded between two metal sheets, typically galvanized steel or aluminum. The panels provide structural strength, thermal insulation, and weather protection in a single lightweight component weighing 10-15 kg per square meter.
The expanded polystyrene core offers excellent thermal performance with R-values ranging from R-14 to R-28 depending on thickness. The metal facings provide structural integrity and weather resistance while allowing for various architectural finishes including painted, textured, or wood-grain appearances.
Key specifications for EPS sandwich panels:
- Core thickness: 50mm to 200mm
- Panel width: 1000mm standard (custom widths available)
- Length: Up to 12 meters continuous
- Thermal conductivity: 0.035-0.040 W/mK
- Compressive strength: 150-200 kPa
These panels work by creating a continuous insulation barrier that eliminates thermal bridging common in traditional framed construction. The foam core maintains its insulating properties while the metal facings handle structural loads and environmental exposure.
For comprehensive guidance on different panel types, review our complete guide to insulated sandwich panels in Bangladesh.
EPS Sandwich Panel Installation Step by Step Guide
EPS sandwich panel installation follows a systematic process that ensures proper thermal performance and structural integrity. The installation typically progresses from bottom to top, with careful attention to panel alignment and sealing at each step.
Pre-installation preparation:
- Verify structural frame is level and square within 6mm tolerance
- Install vapor barrier if required by building codes
- Mark panel layout on structural frame
- Check weather conditions (no rain, wind under 25 mph)
Panel installation sequence:
- Start with corner panels – Install first panel at building corner, ensuring vertical alignment with level
- Apply sealant – Run continuous bead of structural sealant along panel edges
- Position and fasten – Align panel with layout marks, secure with fasteners every 600mm
- Install subsequent panels – Overlap joints by 150-200mm, maintain consistent reveal
- Seal all joints – Apply weatherproof sealant to horizontal and vertical joints
- Install trim pieces – Attach corner trim, base flashing, and top caps
Critical installation points:
- Maintain 6mm minimum gap at panel ends for thermal expansion
- Use only manufacturer-approved fasteners with proper penetration depth
- Install panels during dry conditions with ambient temperature above 5°C
Choose professional installation if your project exceeds 1000 square meters or involves complex geometries with multiple corners and penetrations. For detailed roof-specific techniques, see our sandwich panel roof installation guide.
EPS Sandwich Panel Installation Cost Analysis
EPS sandwich panel installation costs in 2026 range from $15-25 per square meter for complete installation including materials, labor, and basic accessories. Material costs account for 60-70% of total project expense, with labor representing 25-30% and accessories making up the remainder.
Detailed cost breakdown:
- Panel materials: $8-12 per square meter
- Fasteners and sealants: $1-2 per square meter
- Labor installation: $4-8 per square meter
- Accessories (trim, flashing): $2-3 per square meter
Factors affecting installation costs:
- Panel thickness: 200mm panels cost 40% more than 100mm panels
- Building height: Second story installation adds $3-5 per square meter
- Project size: Projects under 500 square meters have 20-30% higher per-unit costs
- Complexity: Multiple penetrations or irregular shapes increase labor by 25-50%
Regional variations impact pricing significantly. Urban areas typically see 15-20% higher labor costs, while remote locations may add transportation surcharges of $2-4 per square meter.
For current market pricing in your region, consult our detailed sandwich panel installation cost guide.
Essential Tools and Equipment for EPS Panel Installation
Professional EPS sandwich panel installation requires specific tools and equipment to ensure proper fastening, sealing, and alignment. Using incorrect tools can result in panel damage, poor weatherproofing, or structural failure.
Primary installation tools:
- Drill driver with torque control – 18V minimum, variable speed for different fastener types
- Circular saw with fine-tooth blade – For cutting panels to length
- Measuring tape and chalk line – 25-foot minimum for layout marking
- Level (4-foot minimum) – Ensures proper panel alignment
- Caulk gun and sealant – Structural-grade polyurethane or silicone sealant
Specialized equipment:
- Panel lifters or suction cups – For handling large panels safely
- Magnetic drill – For fastening to steel structures
- Rivet gun – For mechanical connections where required
- Safety harness and fall protection – Required for installations above 6 feet
Fastener specifications:
- Self-drilling screws with EPDM washers for steel frames
- Expansion anchors for concrete or masonry substrates
- Stainless steel fasteners in coastal or corrosive environments
- Fastener length should penetrate substrate by minimum 25mm
Common tool mistakes to avoid:
- Using impact drivers without torque control (causes over-driving)
- Standard wood-cutting blades (creates rough panel edges)
- Inadequate fall protection equipment for elevated work
Quality tools reduce installation time by 20-30% and ensure professional results that meet manufacturer warranties.
Common EPS Sandwich Panel Installation Mistakes
Installation errors compromise thermal performance, structural integrity, and weather resistance of EPS sandwich panel systems. Understanding these common mistakes helps ensure successful project completion and long-term building performance.
Critical installation errors:
Inadequate joint sealing represents the most frequent mistake, occurring in 40% of problematic installations. Gaps larger than 6mm or missing sealant at panel joints create thermal bridges and water infiltration paths. Always apply continuous sealant beads and tool joints smooth within 10 minutes of application.
Incorrect fastener spacing compromises structural performance and panel attachment. Fasteners spaced beyond 600mm centers or inadequate edge distance (less than 50mm) can cause panel flutter or detachment. Follow manufacturer specifications exactly, especially in high-wind zones.
Poor panel alignment creates visible irregularities and potential water collection points. Panels out of plane by more than 6mm appear unprofessional and may violate building codes. Use string lines and frequent level checks during installation.
Additional mistakes to avoid:
- Installing panels during rain or high humidity (affects sealant adhesion)
- Over-tightening fasteners (compresses panel core and reduces thermal performance)
- Inadequate structural support spacing (causes panel sagging)
- Missing thermal expansion gaps (leads to panel buckling)
Quality control checkpoints:
- Verify panel alignment every third course
- Check fastener penetration depth with gauge
- Test sealant adhesion before proceeding to next section
Professional installers report 85% fewer callbacks when following systematic quality control procedures throughout the installation process.
EPS vs Fiberglass vs Polyurethane Panel Comparison
EPS sandwich panels compete with fiberglass and polyurethane alternatives, each offering distinct advantages for specific applications. Understanding performance differences helps specify the optimal panel type for your project requirements and budget constraints.
Thermal performance comparison:
- EPS panels: R-4 to R-7 per inch, stable performance over time
- Polyurethane panels: R-6 to R-8 per inch, highest initial R-value
- Fiberglass panels: R-3 to R-4 per inch, lowest thermal resistance
Cost and durability factors:
EPS panels provide the best value for most commercial applications, costing 20-30% less than polyurethane while offering superior moisture resistance. Polyurethane panels excel in space-constrained applications where maximum insulation in minimum thickness is required.
Fiberglass panels cost least initially but require thicker sections to achieve comparable thermal performance, often negating cost savings in larger projects.
Application-specific recommendations:
- Choose EPS panels if: Budget-conscious, standard thermal requirements, high moisture exposure
- Choose polyurethane panels if: Maximum insulation in minimum space, cold storage applications
- Choose fiberglass panels if: Fire resistance is primary concern, minimal thermal requirements
Fire safety considerations:
EPS panels meet Class B fire ratings with flame-retardant additives. Polyurethane panels require special formulations for commercial applications. Fiberglass panels offer inherent fire resistance but lower structural performance.
For detailed comparisons of panel types available in your region, review our comprehensive sandwich panel buying guide.
EPS Sandwich Panel Installation Timeline and Duration
EPS sandwich panel installation timelines depend on project size, complexity, weather conditions, and crew experience. Professional crews typically install 200-400 square meters per day under optimal conditions with proper equipment and site preparation.
Installation rate factors:
- Simple wall applications: 300-400 square meters per day with 3-person crew
- Roof installations: 200-300 square meters per day due to safety requirements
- Complex geometries: 150-250 square meters per day with multiple penetrations
Project phase breakdown:
- Site preparation: 0.5-1 day per 1000 square meters
- Panel installation: 3-5 days per 1000 square meters
- Trim and finishing: 1-2 days per 1000 square meters
- Final inspection: 0.5 day regardless of project size
Weather impact on scheduling:
Rain delays installation completely as panels cannot be installed on wet surfaces. Wind speeds above 25 mph create safety hazards and handling difficulties. Temperature below 5°C affects sealant performance and should be avoided.
Crew size optimization:
Three-person crews provide optimal productivity for most projects. Larger crews (4-5 people) benefit projects over 2000 square meters but require experienced foremen to coordinate effectively.
Scheduling best practices:
- Plan installation during dry season when possible
- Schedule delivery to minimize on-site storage time
- Coordinate with other trades to avoid conflicts
- Build in 10-15% schedule contingency for weather delays
For professional installation services and scheduling, contact our sandwich panel installation specialists.
Troubleshooting EPS Panel Installation Problems
Installation problems with EPS sandwich panels typically involve alignment issues, fastener problems, or sealing failures. Quick identification and correction prevent costly rework and ensure long-term system performance.
Panel alignment problems occur when panels appear wavy or out of plane. This usually results from inadequate structural support or improper fastener placement. Check structural frame for straightness within 6mm tolerance and verify fastener spacing matches manufacturer specifications.
Fastener-related issues include loose panels, over-driven screws, or fastener backing out. Use torque-controlled drivers set to manufacturer specifications (typically 15-20 ft-lbs for self-drilling screws). Replace any fasteners that strip or fail to achieve proper compression.
Sealant adhesion failures appear as gaps or loose sealant beads at panel joints. Clean panel surfaces with isopropyl alcohol before sealant application. Ensure ambient temperature exceeds 5°C and relative humidity stays below 85% during installation.
Emergency repair procedures:
- Loose panels: Add intermediate fasteners at 300mm spacing
- Water infiltration: Apply temporary patch with butyl tape, schedule permanent repair
- Panel damage: Cut out damaged section, install patch panel with sealed joints
Prevention strategies:
- Inspect structural frame before panel installation begins
- Verify all tools are calibrated and functioning properly
- Monitor weather conditions throughout installation process
- Conduct quality control checks every 100 square meters
When to call professionals:
Contact experienced installers if problems affect more than 10% of installed area or involve structural attachment failures. Attempting complex repairs without proper experience can void manufacturer warranties.
EPS Panels for Roofing vs Wall Applications
EPS sandwich panels perform differently in roofing versus wall applications due to varying structural loads, thermal requirements, and moisture exposure patterns. Understanding these differences ensures proper specification and installation techniques for each application.
Roofing applications subject panels to greater thermal cycling, snow loads, and direct weather exposure. Roof panels typically require thicker cores (150-200mm) and enhanced vapor barriers to prevent condensation issues. Slope requirements of minimum 1:40 ensure proper drainage.
Wall applications prioritize thermal performance and architectural appearance while handling wind loads and thermal expansion. Wall panels can use thinner cores (75-150mm) and focus on joint sealing to prevent air infiltration.
Performance comparison:
- Thermal requirements: Roofs need higher R-values due to heat loss patterns
- Structural loads: Roofs handle snow, equipment loads; walls resist wind pressure
- Moisture management: Roofs require superior drainage; walls focus on vapor control
- Installation complexity: Roofs need fall protection; walls allow easier access
Application-specific considerations:
For roofing, specify panels with factory-applied vapor barriers and enhanced edge sealing. Install with positive slope toward drainage points and avoid foot traffic on completed sections.
For walls, prioritize joint alignment and architectural appearance. Use color-matched sealants and ensure consistent reveal lines for professional appearance.
Code requirements vary by application:
- Roof installations typically require fire-rated assemblies
- Wall applications may need specific thermal bridging calculations
- Both applications require compliance with wind load requirements
Choose roof-specific panels for applications with slopes less than 3:12 or where superior weather resistance is required. For detailed roofing specifications, see our sandwich panel roofing guide.
Professional vs DIY EPS Panel Installation
EPS sandwich panel installation complexity varies significantly based on project size, building height, and structural requirements. While smaller projects may suit experienced DIY installers, most commercial applications benefit from professional installation to ensure code compliance and warranty coverage.
DIY installation is suitable for:
- Single-story buildings under 500 square meters
- Simple rectangular structures without complex penetrations
- Projects with adequate ground-level access
- Installers with construction experience and proper tools
Professional installation recommended for:
- Multi-story buildings or installations above 6 meters height
- Projects requiring engineered structural connections
- Buildings in high-wind or seismic zones
- Commercial applications requiring code compliance documentation
Skill requirements for DIY installation:
- Ability to read construction drawings and follow specifications
- Experience with power tools and fastener installation
- Understanding of building codes and permit requirements
- Physical capability to handle panels weighing 10-15 kg per square meter
Cost comparison:
DIY installation saves $4-8 per square meter in labor costs but requires tool investment of $500-1000 for quality equipment. Factor in learning curve time and potential rework costs when comparing options.
Risk factors:
Improper installation voids manufacturer warranties and may create liability issues. Professional installers carry insurance and provide workmanship guarantees typically lasting 2-5 years.
Decision criteria:
Choose professional installation if project value exceeds $10,000, involves structural modifications, or requires building permits. The cost difference often justifies professional expertise for complex projects.
For professional installation services and quotes, visit our installation service page.
Cold Weather EPS Panel Installation Considerations
Cold weather significantly impacts EPS sandwich panel installation procedures, sealant performance, and worker safety. Installations in temperatures below 5°C require modified techniques and materials to ensure proper system performance.
Temperature limitations for installation:
- Sealant application: Most sealants require minimum 5°C ambient temperature
- Panel handling: EPS becomes more brittle below 0°C, increasing breakage risk
- Worker efficiency: Cold conditions reduce productivity by 15-25%
- Fastener performance: Metal contraction affects connection integrity
Cold weather installation modifications:
Use low-temperature sealants formulated for application down to -10°C. These specialized products cost 20-30% more but maintain adhesion and flexibility in cold conditions. Warm panels and substrates with portable heaters when possible before sealant application.
Equipment considerations:
- Battery tools lose 30-50% capacity in cold weather – have backup batteries
- Hydraulic tools may require winter-grade fluids
- Extension cords need cold-weather ratings to prevent cracking
- Personal protective equipment must accommodate layered clothing
Installation sequence adjustments:
Complete structural connections first, then focus on weatherproofing during warmest part of day (typically 10 AM to 2 PM). Schedule sealant work for consecutive warm days to allow proper curing.
Quality control in cold weather:
- Inspect sealant adhesion more frequently
- Allow extended curing time before exposing joints to weather
- Monitor panel expansion/contraction gaps more closely
- Document temperature conditions for warranty purposes
When to postpone installation:
Avoid installation during precipitation, when wind chill creates unsafe conditions, or when forecast shows temperatures remaining below 0°C for extended periods.
Sealing and Weatherproofing EPS Panel Systems
Proper sealing and weatherproofing represent critical aspects of EPS sandwich panel installation that determine long-term building performance and energy efficiency. Effective weatherproofing prevents air infiltration, moisture intrusion, and thermal bridging at panel joints and penetrations.
Primary sealing locations:
- Horizontal joints: Between panel courses, most critical for water resistance
- Vertical joints: Between adjacent panels in same course
- Perimeter sealing: Where panels meet other building components
- Penetrations: Around pipes, conduits, and equipment attachments
Sealant selection criteria:
Structural glazing sealants provide superior adhesion and weather resistance for primary joints. Silicone sealants offer excellent UV resistance and flexibility for exposed applications. Polyurethane sealants excel in high-movement joints but require primer on some surfaces.
Application techniques:
Apply sealant in continuous beads without gaps or air pockets. Tool joints within 10 minutes of application to ensure proper adhesion and appearance. Maintain consistent bead width of 6-12mm depending on joint size and expected movement.
Weatherproofing system components:
- Primary seal: Structural sealant at panel interface
- Secondary seal: Weather seal at exterior face
- Vapor barrier: Interior seal preventing moisture migration
- Drainage system: Weep holes and gutters for water management
Quality assurance testing:
Perform adhesion tests on sample joints before full installation. Test sealant cure by checking surface tack after specified time periods. Inspect completed joints for voids, gaps, or contamination.
Maintenance requirements:
Inspect sealant joints annually for cracking, adhesion loss, or UV degradation. Plan for sealant replacement every 15-20 years depending on exposure conditions and sealant type selected.
For comprehensive weatherproofing specifications, consult our energy-efficient sandwich panel guide.
Fire Safety and Building Code Requirements
EPS sandwich panels must comply with specific fire safety regulations and building codes that vary by jurisdiction and building occupancy type. Understanding these requirements ensures proper product selection and installation compliance for commercial and industrial applications.
Fire rating classifications:
EPS sandwich panels typically achieve Class B fire ratings when manufactured with flame-retardant additives. Class A ratings require special core formulations or additional fire-resistant barriers. Verify local code requirements before specifying panels for your application.
Building code considerations:
- Occupancy type: Assembly buildings may require higher fire ratings than warehouse applications
- Building height: Multi-story construction often mandates enhanced fire resistance
- Proximity to property lines: Setback requirements affect allowable fire ratings
- Sprinkler systems: Automatic suppression may allow reduced fire rating requirements
Installation requirements for fire safety:
Maintain proper fire stops at floor lines and compartment boundaries. Install panels according to tested assembly configurations to maintain fire ratings. Use only approved fasteners and sealants that won't compromise fire performance.
Testing and certification:
Panels must meet ASTM E84 (Steiner Tunnel Test) or equivalent standards for flame spread and smoke development. Factory Mutual (FM) approval may be required for commercial insurance coverage. Verify all certifications before installation begins.
Special applications:
Clean rooms, hospitals, and food processing facilities may require enhanced fire resistance or special core materials. Some jurisdictions prohibit EPS cores in certain occupancies – verify local requirements early in design process.
For fire-rated panel options and specifications, review our fire-rated sandwich panel guide.
Where to Source EPS Sandwich Panels and Installation Services
Sourcing quality EPS sandwich panels and professional installation services requires evaluation of manufacturer capabilities, local availability, and service support. Choosing the right supplier impacts project cost, schedule, and long-term performance.
Manufacturer selection criteria:
- Production capacity: Ability to meet project timeline and volume requirements
- Quality certifications: ISO 9001, fire ratings, and thermal performance testing
- Technical support: Engineering assistance and installation guidance
- Warranty coverage: Comprehensive material and performance guarantees
Local vs regional suppliers:
Local suppliers offer advantages in transportation costs, delivery flexibility, and service response. Regional manufacturers may provide better pricing for large projects and specialized products not available locally.
Distribution network considerations:
Established distributors maintain inventory for quick delivery and provide technical support. Direct manufacturer purchases may offer cost savings but require longer lead times and minimum order quantities.
Installation service evaluation:
- Experience level: Years in business and project portfolio
- Insurance coverage: General liability and workers compensation
- Safety record: OSHA compliance and accident history
- References: Recent projects of similar size and complexity
Procurement best practices:
Request quotes from multiple suppliers including material specifications, delivery terms, and technical support. Verify installer licensing, insurance, and bonding before contract execution. Coordinate delivery schedules to minimize on-site storage requirements.
Quality assurance:
Inspect panels upon delivery for damage, dimensional accuracy, and finish quality. Verify certifications and test reports accompany shipments. Document any defects before installation begins.
For qualified suppliers and installation services in your area, visit our supplier directory.
Frequently Asked Questions
How long do EPS sandwich panels last?
EPS sandwich panels typically last 25-30 years with proper installation and maintenance. The metal facings provide weather protection while the EPS core maintains thermal properties throughout the service life. Regular inspection and sealant maintenance every 15-20 years ensures optimal performance.
Can EPS panels be installed in high-wind areas?
Yes, EPS panels can be installed in high-wind zones when properly engineered and fastened. Use enhanced fastener schedules with spacing reduced to 300-400mm centers and specify thicker gauge metal facings. Consult structural engineers for buildings in hurricane or tornado-prone regions.
What thickness EPS panel do I need for my climate?
Panel thickness depends on local climate and energy codes. Cold climates typically require 150-200mm thickness for adequate thermal performance. Moderate climates may use 100-150mm panels. Consult local energy codes or building professionals for specific recommendations.
Are EPS panels suitable for food processing facilities?
EPS panels work well for food processing when specified with appropriate facings and sealants. Choose panels with smooth, cleanable surfaces and FDA-approved sealants. Some facilities may require special core materials or enhanced fire ratings depending on processes involved.
How do I cut EPS panels on-site?
Cut EPS panels with fine-tooth circular saw blades or hot knives to prevent core damage. Make straight cuts and seal cut edges with appropriate sealant to maintain thermal performance. Avoid cutting in windy conditions that scatter foam particles.
What fasteners should I use with EPS panels?
Use self-drilling screws with EPDM washers for steel substrates or expansion anchors for concrete. Fastener length should penetrate substrate minimum 25mm beyond panel thickness. Stainless steel fasteners required in corrosive environments or coastal locations.
Can I install EPS panels over existing walls?
EPS panels can be installed over existing walls if the structure can support additional loads and proper attachment is achieved. Verify structural capacity and install furring strips if needed to create flat mounting surface. Address any moisture issues before panel installation.
Do EPS panels require vapor barriers?
Vapor barrier requirements depend on climate zone and building use. Cold climates typically require vapor barriers on warm side of insulation. Consult local building codes and consider building moisture loads when specifying vapor barrier systems.
How do I handle panel penetrations for utilities?
Cut penetrations slightly smaller than pipe diameter and seal with appropriate sealant or flashing. Use pipe boots or manufactured penetration assemblies for critical applications. Maintain thermal continuity around penetrations to prevent condensation issues.
What maintenance do EPS panels require?
EPS panels require minimal maintenance beyond annual inspection of sealant joints and fasteners. Clean panels with mild detergent and water as needed. Replace damaged panels promptly to maintain building envelope integrity and energy performance.
Are EPS panels environmentally friendly?
Modern EPS panels use recyclable materials and provide energy savings that offset manufacturing impacts over building lifetime. Many manufacturers offer recycling programs for end-of-life panels. Choose panels with recycled content when environmental impact is a priority.
Can I paint EPS sandwich panels?
Factory-finished panels typically don't require painting, but field painting is possible with appropriate primers and paints. Use paints compatible with panel facings and avoid dark colors that create excessive thermal stress. Consult manufacturer recommendations for approved coating systems.
Conclusion
EPS sandwich panel installation offers an efficient solution for achieving superior thermal performance and weather protection in commercial and industrial construction. Success depends on proper planning, quality materials, appropriate tools, and adherence to manufacturer specifications throughout the installation process.
The key factors for successful installation include selecting the right panel thickness for your climate, using proper fastening techniques with correct spacing, and implementing comprehensive sealing strategies at all joints and penetrations. Weather conditions significantly impact installation quality, making timing and preparation crucial for optimal results.
Professional installation provides the best outcomes for complex projects, while experienced DIY installers can handle smaller, simpler applications with proper preparation and tools. Regardless of approach, following systematic quality control procedures and building code requirements ensures long-term performance and warranty compliance.
Next steps for your EPS panel project:
- Evaluate your specific thermal and structural requirements
- Obtain quotes from qualified suppliers and installers
- Verify local building code requirements and permit needs
- Schedule installation during favorable weather conditions
- Plan for regular maintenance and inspection programs
For additional guidance on panel selection, installation services, or technical specifications, explore our comprehensive resources on sandwich panel solutions and connect with qualified professionals in your area.
SEO Meta Title: EPS Sandwich Panel Installation Guide: Complete 2026 Professional Tips