Last updated: July 31, 2026

Quick Answer: Sandwich panel joint detail refers to the specific methods and materials used to connect, seal, and weatherproof the edges where two sandwich panels meet. Proper joint detailing involves selecting appropriate sealants, gaskets, or tapes, ensuring thermal movement accommodation, and following manufacturer specifications to prevent air leakage, water infiltration, and thermal bridging.
Key Takeaways
- Sandwich panel joints require specific sealing methods to prevent water infiltration and maintain thermal performance
- Structural sealants, weatherstripping tapes, and gasket systems are the three primary sealing approaches
- Joint design must accommodate thermal expansion and contraction of panels
- Metal-faced panels require different joint details than foam-core panels due to thermal movement
- Proper installation sequence prevents common failures like sealant adhesion loss and water penetration
- Climate conditions significantly influence sealant selection and joint width requirements
- Professional installation reduces joint failure rates by up to 80% compared to DIY approaches
- Regular maintenance inspections should occur every 12-24 months depending on environmental exposure
What Is a Sandwich Panel Joint Detail
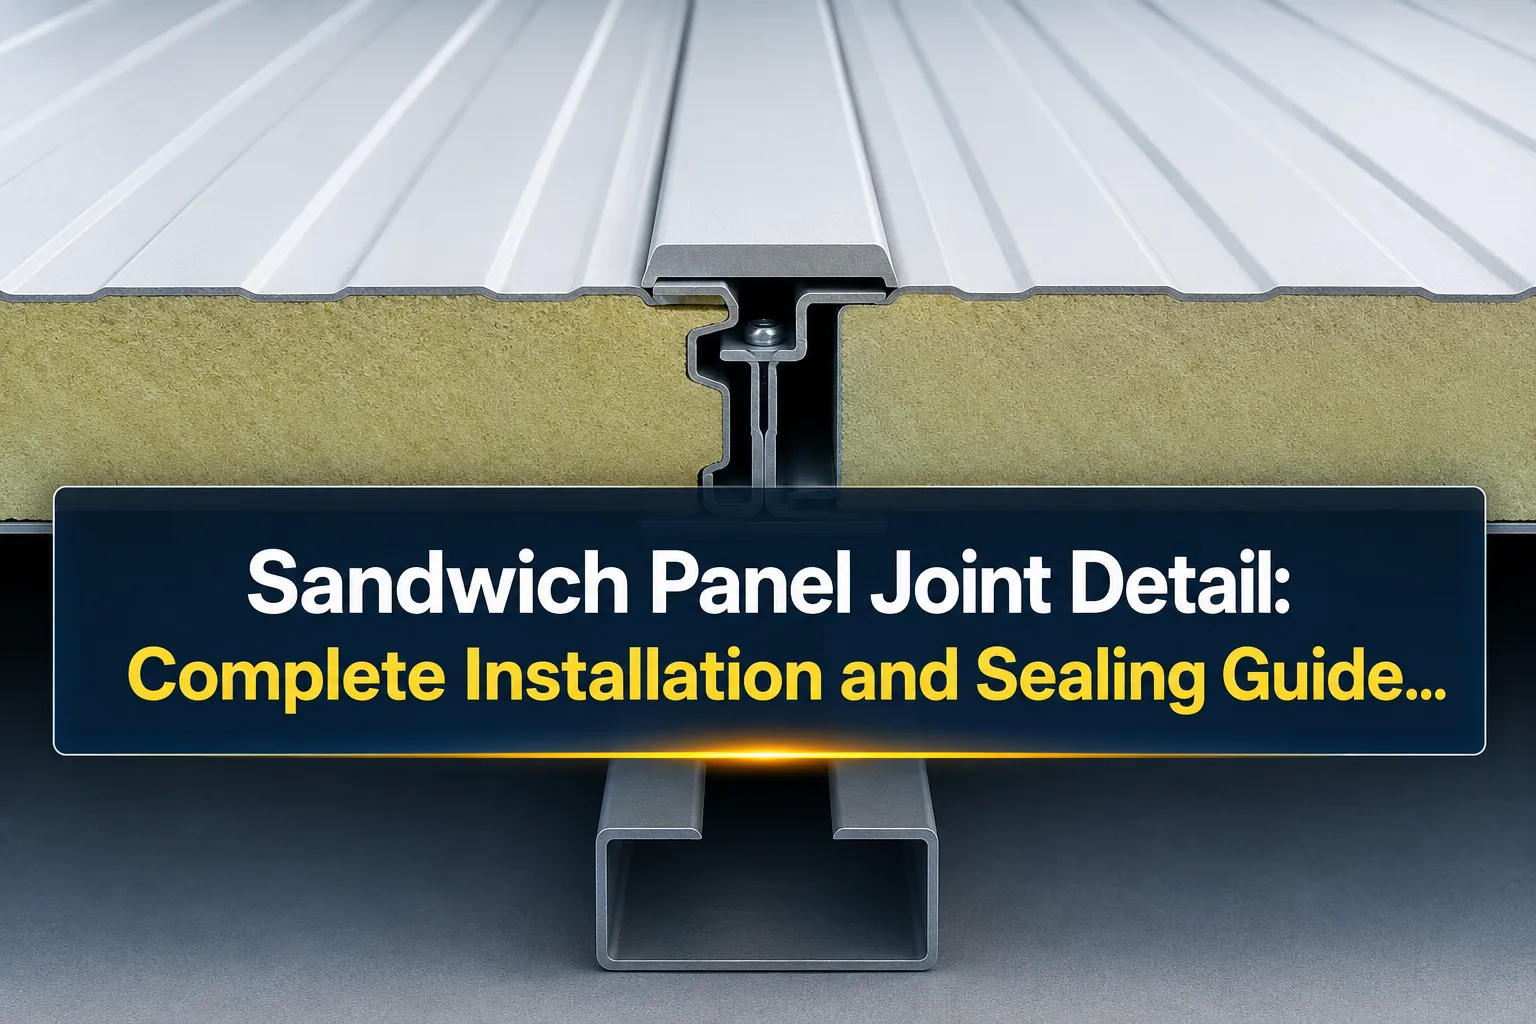
A sandwich panel joint detail is the engineered connection system that joins adjacent panels while maintaining structural integrity, thermal performance, and weather resistance. These details specify the exact materials, dimensions, and installation methods required where panel edges meet.
The joint detail encompasses several critical components: the structural connection between panels, the primary weather seal, any secondary sealing systems, and provisions for thermal movement. Effective joint design prevents the three main failure modes: water infiltration, air leakage, and thermal bridging.
Joint details vary significantly based on panel orientation (horizontal vs. vertical), core material (EPS, polyurethane, or mineral wool), and environmental exposure. For example, thermal insulation sandwich panels require more robust thermal break details than standard panels.
Choose compression-style joints for high wind loads, expansion joints for panels longer than 12 meters, and lap joints for standard applications with moderate environmental exposure.
How Do You Seal Sandwich Panel Joints
Sealing sandwich panel joints involves applying weatherproof materials at the panel interface to create a continuous barrier against moisture and air infiltration. The most effective approach combines structural sealants with mechanical fastening systems.
Primary sealing methods include:
- Structural glazing sealants – Two-part silicone or polyurethane compounds that cure to form flexible, weatherproof bonds
- Pre-compressed sealing tapes – Expanding foam tapes that conform to joint irregularities
- EPDM gasket systems – Molded rubber seals that compress between panel faces
- Hybrid systems – Combinations of tape and wet sealant for redundant protection
The installation process begins with cleaning all panel surfaces with isopropyl alcohol to remove oils and debris. Apply primer to metal surfaces if specified by the sealant manufacturer. Install backing rod or bond breaker tape to control sealant depth and prevent three-sided adhesion.
For PU sandwich panels used in cold rooms, use low-temperature rated sealants that remain flexible at -20°C or below. Standard construction sealants become brittle and fail in cold storage applications.
Common mistake: Applying sealant in temperatures below 5°C or above 35°C reduces adhesion and cure quality by up to 50%.
Sandwich Panel Joint Detail Best Practices
Best practices for sandwich panel joint details focus on preventing the most common failure modes while accommodating normal building movement. The key principle is redundancy – multiple sealing layers that provide backup protection if the primary seal fails.
Critical best practices include:
- Design joint width for maximum expected thermal movement – typically 6-12mm for standard applications
- Use compatible materials – ensure all sealants, tapes, and gaskets are chemically compatible
- Provide drainage paths – include weep holes or drainage channels for any water that penetrates the primary seal
- Install continuous air barriers – avoid gaps or interruptions in the sealing system
- Follow manufacturer cure times – allow full sealant cure before exposing joints to weather
Joint sequencing matters significantly. Install horizontal joints first, then vertical joints to create proper water shedding. For sandwich panel roof installations, work from low to high elevation to maintain proper overlap relationships.
Quality control checkpoint: Test joint integrity with low-pressure air testing (50 Pa) before final acceptance. This reveals installation defects while they're still easily correctable.
Professional installations typically achieve air leakage rates below 0.1 cfm per linear foot of joint, while poor installations may exceed 1.0 cfm per foot.
Sandwich Panel Joint Sealant Options
Sealant selection for sandwich panel joints depends on expected movement, temperature exposure, and compatibility with panel materials. Structural silicones offer the best long-term performance for most applications, while polyurethanes provide superior adhesion to difficult substrates.
Primary sealant categories:
- Structural silicone sealants – 25+ year life expectancy, excellent UV resistance, movement capability up to ±25%
- Polyurethane sealants – Superior adhesion, paintable, moderate cost, 15-20 year life expectancy
- Polysulfide sealants – Chemical resistance, fuel resistance, primarily for industrial applications
- Hybrid polymer sealants – Fast cure, low odor, good for occupied buildings during construction
Temperature performance varies significantly. Standard construction sealants operate from -30°C to +80°C, while specialized formulations extend this range to -50°C to +150°C for extreme applications.
For fire-rated sandwich panel applications, use intumescent sealants that expand when heated to maintain fire barrier integrity. These specialized products cost 3-5 times more than standard sealants but are required for code compliance.
Sealant compatibility testing is essential – some sealants react with foam cores or metal coatings, causing adhesion failure or material degradation.
Sandwich Panel Joint Detail Cost
Sandwich panel joint detail costs typically represent 8-15% of total panel installation expense, varying significantly based on joint complexity and sealant specifications. Basic compression joints with tape sealing cost $3-6 per linear meter, while engineered structural glazing systems range from $15-35 per linear meter.
Cost factors include:
- Sealant type and quality – Premium structural sealants cost 4-6 times more than basic construction caulks
- Joint complexity – Multi-stage sealing systems require more labor and materials
- Access difficulty – High elevation or confined space installations increase labor costs by 25-50%
- Climate requirements – Specialized low-temperature or high-movement sealants carry premium pricing
Labor typically represents 60-70% of joint sealing costs. Experienced installers complete 40-60 linear meters per day for standard joints, while complex details may reduce productivity to 15-25 meters per day.
Material costs for quality structural sealants range from $8-15 per linear meter for standard applications. Custom sandwich panel projects often require specialized details that increase costs by 20-40%.
Budget planning tip: Include 10-15% contingency for joint details, as field conditions often require modifications to standard details.
Sandwich Panel Joint Failure Causes
Joint failures in sandwich panel systems typically result from inadequate movement accommodation, material incompatibility, or installation errors. The most common failure mode is adhesive failure where sealants separate from panel surfaces due to improper surface preparation or incompatible materials.
Primary failure causes:
- Inadequate surface preparation – Oil, dust, or moisture prevents proper sealant adhesion
- Thermal movement exceeding design limits – Insufficient joint width causes sealant overstress
- Material incompatibility – Chemical reactions between different sealant systems
- Installation in poor weather – Rain, extreme temperatures, or high humidity during installation
- Insufficient cure time – Premature loading before sealant reaches full strength
Cohesive failures occur when sealants tear internally, usually indicating sealant selection errors or excessive movement. These failures typically appear 2-5 years after installation as materials age and lose flexibility.
For rockwool sandwich panels, mineral wool dust contamination causes frequent adhesion failures if panels aren't properly cleaned before sealing.
Prevention strategy: Implement quality control inspections at 24 hours, 7 days, and 30 days after installation to catch early failure indicators.
Failure rates vary dramatically – professional installations see less than 2% joint failures over 10 years, while poor installations may experience 15-25% failure rates within 5 years.
Sandwich Panel Joint Detail for Metal vs Foam
Metal-faced and foam core sandwich panels require different joint approaches due to their distinct thermal expansion characteristics and structural properties. Metal panels expand and contract significantly more than foam cores, creating stress concentrations at joints that must be accommodated through design.
Metal panel joint considerations:
- Higher thermal movement – Steel faces expand 12mm per 100 meters per 10°C temperature change
- Galvanic corrosion potential – Dissimilar metals in contact with moisture create corrosion cells
- Structural load transfer – Metal faces carry structural loads requiring mechanical connections
- Surface preparation critical – Oil films and mill scale prevent sealant adhesion
Foam core joint considerations:
- Lower thermal movement – Foam cores expand 2-4mm per 100 meters per 10°C
- Compression sensitivity – Over-compressed foam cores lose insulation value
- Chemical compatibility – Some solvents in sealants attack foam cores
- Vapor barrier continuity – Joints must maintain continuous vapor barriers
EPS sandwich panels require special attention to chemical compatibility, as many solvents dissolve polystyrene foam. Use water-based or 100% solids sealants for EPS applications.
Design rule: Size joints for the material with higher thermal movement, then accommodate the differential movement through flexible connections.
How to Install Sandwich Panel Joints
Installing sandwich panel joints requires careful attention to sequence, cleanliness, and environmental conditions to achieve long-term performance. The installation process follows a specific sequence that ensures proper overlap relationships and weather shedding.
Step-by-step installation process:
- Surface preparation – Clean all surfaces with isopropyl alcohol, remove protective films
- Joint sizing – Verify joint width matches design requirements for thermal movement
- Backing rod installation – Install closed-cell foam backing rod to control sealant depth
- Primer application – Apply primer to metal surfaces if required by sealant manufacturer
- Sealant application – Apply in continuous beads without air bubbles or voids
- Tooling and finishing – Tool sealant to proper profile within 10-15 minutes
- Cure protection – Protect from rain and contamination during cure period
Critical timing considerations: Complete sealant tooling before skin formation begins (typically 10-15 minutes for silicones). Late tooling breaks the surface skin and creates weak points.
For warehouse applications, install temporary weather protection over joints during multi-day installation sequences to prevent water infiltration into partially sealed areas.
Quality checkpoint: Verify continuous sealant contact with both substrates – gaps or voids create immediate failure points.
Environmental limits: Install only when air temperature is 5-35°C, relative humidity below 85%, and no precipitation expected for 4-6 hours after installation.
Sandwich Panel Joint Detail Thermal Movement
Thermal movement in sandwich panel joints results from temperature-induced expansion and contraction of panel materials, with metal faces showing significantly higher movement than insulation cores. Proper joint design must accommodate maximum expected movement while maintaining weather seal integrity.
Thermal movement calculations:
- Steel panels: 12mm per 100m per 10°C temperature change
- Aluminum panels: 23mm per 100m per 10°C temperature change
- Foam cores: 2-4mm per 100m per 10°C temperature change
- Composite movement: Combination of face and core expansion rates
Design temperature ranges typically span from minimum winter temperature to maximum summer surface temperature. For example, a dark-colored roof panel may reach 70°C in summer sun while experiencing -20°C in winter, creating a 90°C design range.
Movement accommodation strategies:
- Flexible sealants – Use sealants with ±25% movement capability minimum
- Proper joint sizing – Size joints for maximum expected movement plus 25% safety factor
- Expansion joints – Install dedicated expansion joints every 30-40 meters
- Sliding connections – Allow panels to slide relative to structure
For cold room applications, consider the extreme temperature differential between interior (-20°C) and exterior (35°C) conditions that create maximum thermal stress.
Common error: Undersized joints that cannot accommodate full thermal movement cause sealant failure within 1-2 years of installation.
Sandwich Panel Joint Waterproofing Methods
Waterproofing sandwich panel joints requires a multi-barrier approach that provides primary weather sealing plus backup protection against water that penetrates the outer seal. Effective waterproofing systems include drainage and pressure equalization to manage water that enters the joint cavity.
Primary waterproofing strategies:
- Pressure equalization – Connect joint cavities to exterior to eliminate wind-driven pressure differentials
- Drainage systems – Provide weep holes and internal gutters to remove water
- Redundant sealing – Multiple seal lines with air space between
- Vapor barriers – Continuous vapor barriers on warm side of insulation
Rainscreen principles apply to sandwich panel joints – the outer seal reduces water entry while the inner seal provides the air barrier. The cavity between seals must drain and ventilate to prevent pressure buildup.
Critical details include:
- Sill flashing – Continuous flashing under horizontal joints
- Head flashing – Drip edges above horizontal joints
- Corner treatments – Special details at panel intersections
- Penetration sealing – Proper sealing around fasteners and attachments
For poultry farm applications where wash-down cleaning occurs, use food-grade sealants and design joints to prevent bacterial growth in cavities.
Testing verification: Perform water spray testing at 3.4 L/min per square meter for 15 minutes to verify waterproofing effectiveness before final acceptance.
Sandwich Panel Joint Detail Common Mistakes
Common mistakes in sandwich panel joint details often result from inadequate planning, poor material selection, or installation shortcuts that compromise long-term performance. The most frequent error is undersizing joints for thermal movement, leading to sealant overstress and premature failure.
Frequent installation mistakes:
- Inadequate surface cleaning – Skipping solvent cleaning or primer application
- Wrong sealant selection – Using non-structural sealants for structural applications
- Improper joint sizing – Joints too narrow for expected thermal movement
- Poor weather timing – Installing during rain, extreme temperatures, or high humidity
- Incomplete cure protection – Exposing fresh sealant to contamination
Design mistakes include:
- No provision for drainage – Trapped water causes seal degradation
- Incompatible materials – Chemical reactions between different sealant systems
- Inadequate movement calculation – Underestimating thermal expansion requirements
- Missing vapor barriers – Allowing moisture infiltration into insulation
Three-sided adhesion represents a critical mistake where sealant bonds to three surfaces instead of two, preventing proper stress distribution and causing premature failure.
For factory building applications, rushing installation schedules often leads to inadequate cure time between sealing operations, resulting in poor inter-coat adhesion.
Prevention approach: Implement mandatory quality control hold points at surface preparation, sealant application, and final inspection stages.
Sandwich Panel Joint Detail CAD Details
CAD details for sandwich panel joints provide precise dimensional and material specifications that ensure consistent installation and performance. Professional CAD details include section views, material callouts, and installation sequences that eliminate field interpretation errors.
Essential CAD detail components:
- Dimensional accuracy – Joint widths, sealant depths, and backing rod sizes
- Material specifications – Exact sealant types, primer requirements, and compatibility notes
- Installation sequence – Step-by-step assembly procedures
- Quality control points – Inspection requirements and acceptance criteria
- Environmental limitations – Temperature and humidity restrictions
Standard detail library typically includes:
- Vertical panel joints (compression and lap types)
- Horizontal panel joints with drainage provisions
- Corner intersections (internal and external)
- Roof-to-wall transitions
- Penetration details for utilities and attachments
CAD details must accommodate local building codes and manufacturer requirements. Sandwich panel manufacturers typically provide standard details that can be modified for specific project requirements.
Detail coordination between architectural, structural, and envelope consultants prevents conflicts that lead to field modifications and potential performance issues.
Digital delivery: Provide CAD details in multiple formats (DWG, PDF, 3D models) to support different contractor workflows and reduce interpretation errors.
When Should You Use Tape vs Sealant on Sandwich Panels
The choice between tape and sealant for sandwich panel joints depends on joint movement requirements, installation conditions, and performance expectations. Tape systems excel in controlled factory conditions while sealants perform better for field-applied joints with significant movement.
Use pre-compressed sealing tape when:
- Joint movement is limited (less than ±5mm)
- Installation occurs in poor weather conditions
- Fast installation speed is critical
- Consistent compression can be maintained
- Initial cost is the primary concern
Use structural sealants when:
- Joint movement exceeds ±5mm
- Long-term durability is critical (20+ years)
- Structural load transfer is required
- Complex joint geometries are involved
- Premium performance justifies higher cost
Hybrid systems combine tape for immediate weather sealing with sealant for long-term performance. Install tape first for instant protection, then apply sealant over the tape after panel installation is complete.
For thermal performance critical applications, sealants typically provide superior air sealing compared to tape systems, reducing thermal bridging and improving energy efficiency.
Performance comparison: Quality structural sealants last 25+ years while tape systems typically require replacement every 10-15 years, making sealants more cost-effective long-term despite higher initial cost.
Installation productivity: Tape systems install 3-4 times faster than sealants but require precise panel alignment and consistent compression to perform properly.
Sandwich Panel Joint Detail for Different Climates
Climate conditions significantly influence sandwich panel joint design requirements, with extreme temperatures, humidity variations, and weather exposure affecting material selection and joint sizing. Hot, humid climates require different approaches than cold, dry environments due to varying thermal stress and moisture management needs.
Hot climate considerations:
- High thermal expansion – Surface temperatures may reach 70-80°C requiring larger joints
- UV exposure – Sealants must resist UV degradation over 20+ year service life
- Thermal cycling – Daily temperature swings create fatigue stress in sealants
- Moisture management – High humidity requires vapor barrier continuity
Cold climate requirements:
- Low temperature flexibility – Sealants must remain flexible at -30°C or below
- Freeze-thaw cycling – Water infiltration and freezing causes joint damage
- Reduced cure rates – Cold temperatures slow sealant cure requiring protection
- Condensation control – Vapor barriers prevent condensation in joint cavities
Coastal environments add salt spray exposure requiring corrosion-resistant materials and enhanced drainage systems. Energy-efficient sandwich panels in coastal areas need special attention to air barrier continuity.
Desert climates combine extreme temperature ranges with low humidity, requiring sealants that resist both thermal stress and desiccation cracking.
Climate-specific testing: Verify sealant performance through accelerated weathering tests that simulate local environmental conditions over 20+ year service life.
Frequently Asked Questions
What is the typical lifespan of sandwich panel joint sealants?
Quality structural sealants last 25-30 years when properly installed, while standard construction sealants typically last 10-15 years. Lifespan depends on sealant quality, installation conditions, and environmental exposure.
How wide should sandwich panel joints be?
Joint width should accommodate maximum thermal movement plus 25% safety factor. Typical widths range from 6-12mm for standard applications, with larger joints (15-25mm) for extreme temperature exposure or long panel runs.
Can you seal sandwich panel joints in cold weather?
Most sealants require installation temperatures above 5°C for proper cure. Cold-weather formulations allow installation down to -10°C but cure slowly and may require heated storage and application equipment.
What happens if sandwich panel joints fail?
Joint failures allow water infiltration, air leakage, and potential structural damage. Early intervention through resealing prevents major problems, while delayed repairs may require panel replacement.
Do sandwich panel joints need maintenance?
Joints should be inspected annually and resealed every 15-20 years depending on sealant type and environmental exposure. High-stress areas may require more frequent attention.
How do you repair failed sandwich panel joints?
Remove old sealant completely, clean surfaces with solvent, apply primer if required, and install new sealant. Partial repairs typically fail within 2-3 years due to poor adhesion to old sealant.
What tools are needed for sandwich panel joint installation?
Basic tools include caulk guns, backing rod installation tools, surface cleaning supplies, and sealant tooling equipment. Professional installations may require heated application equipment and air testing devices.
Can different sealant brands be mixed in the same project?
Mixing sealant brands is not recommended due to potential compatibility issues. Use the same manufacturer's products throughout the project for consistent performance and warranty coverage.
How do you calculate thermal movement for sandwich panel joints?
Multiply panel length × coefficient of thermal expansion × temperature range. Add 25% safety factor and size joints accordingly. Consider both face sheet and core materials in calculations.
What causes sandwich panel joint sealant to bubble or foam?
Bubbling typically results from moisture contamination, three-sided adhesion, or chemical reactions between incompatible materials. Proper surface preparation and material selection prevent these issues.
Are there fire-rated sealants for sandwich panel joints?
Yes, intumescent sealants expand when heated to maintain fire barriers. These specialized products cost more but are required for fire-rated wall assemblies and must be tested for specific fire ratings.
How long does sandwich panel joint sealant take to cure?
Skin formation occurs in 10-30 minutes, while full cure takes 1-7 days depending on sealant type, temperature, and humidity. Protect from rain and contamination during the cure period.
SEO Meta Title: Sandwich Panel Joint Detail: Installation & Sealing Guide 2026